I have demonstrated in previous blog posts how to deploy VMware vCenter 6.7 and 7.0 both manually and with automation using Ansible.
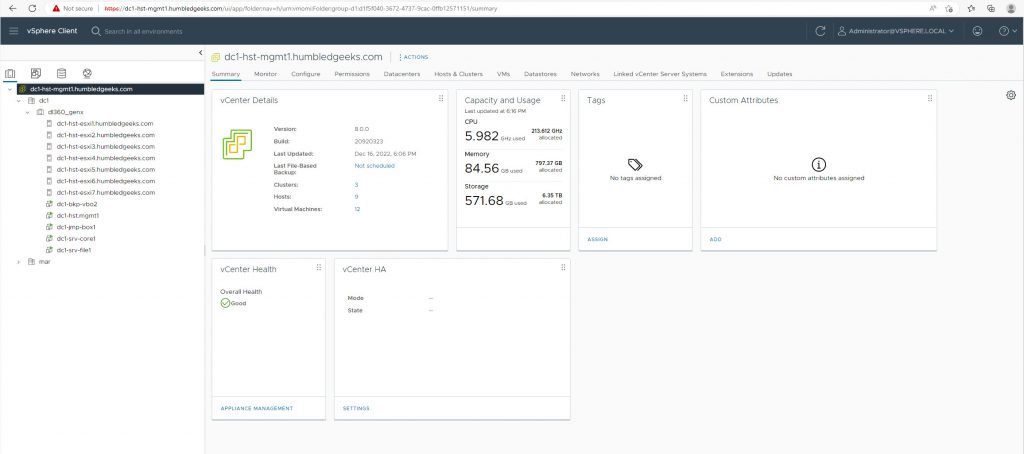
Now that vSphere 8 is GA, I have upgraded my lab to see new features in action and familiarize myself with the new look! I took screenshots along the way to share how it was done.
This post will detail all the steps needed to upgrade vCenter Server Appliance 7.0U3 to 8.0, non-disruptively.
DISCLAIMER:
I am documenting the procedure of upgrading my lab for educational purposes. If you attempt to follow these procedures, ensure that you have backups of your existing appliance and proceed with caution.
Getting Started
Before beginning, it’s recommended you check the VMware Product Interoperability Matrix before performing any upgrade to check compatibility of other VMware products.
To upgrade vCenter Server Appliance (VCSA) from version 6.5 or older, you must first upgrade to version 6.7 or 7.0, and then upgrade to version 8.0. This may also be found on the Upgrade Path tab of the VMware Product Interoperability Matrix.
After I validated my VMware products will support the upgrade, I was ready to get started!
Download VMware vCenter Binary
Procedure
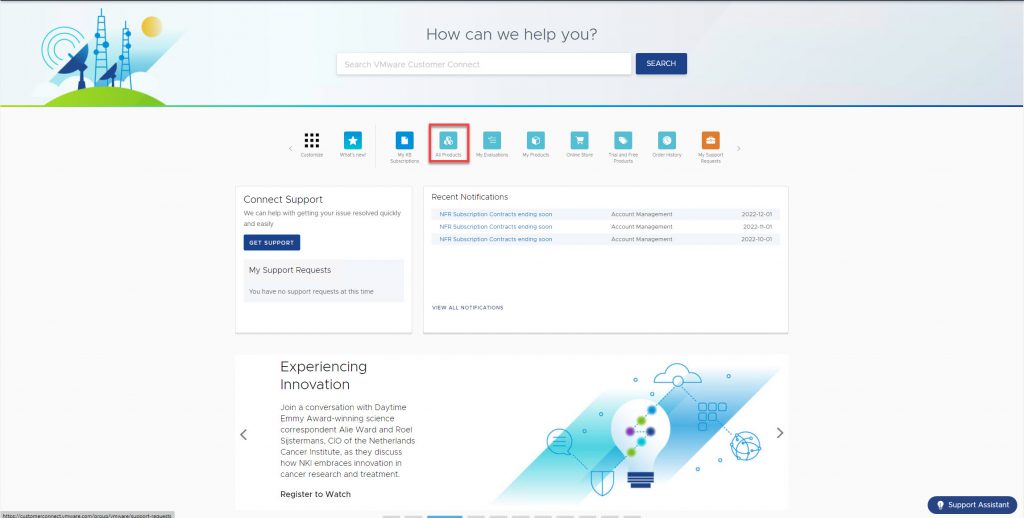
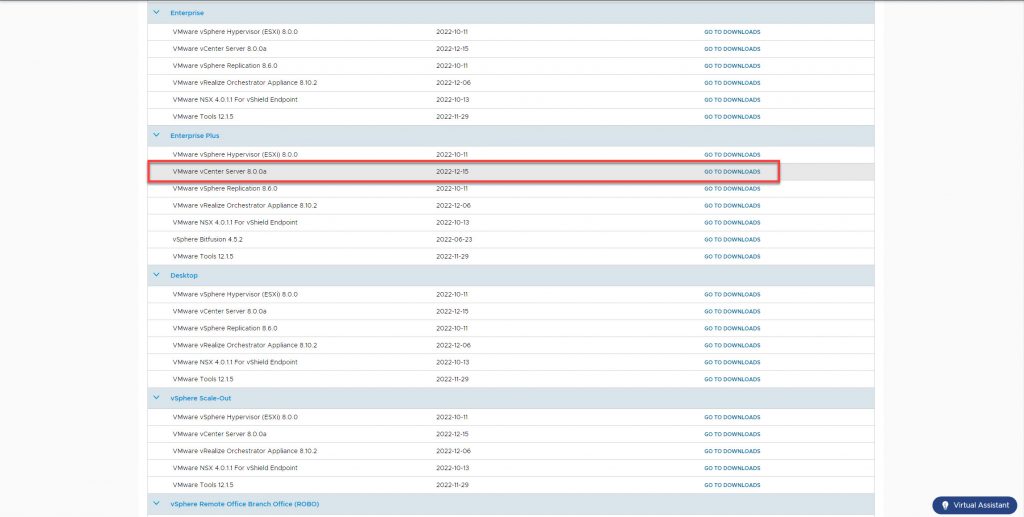
- Log in to VMware Customer Connect. Download VMware vSphere – VMware Customer Connect
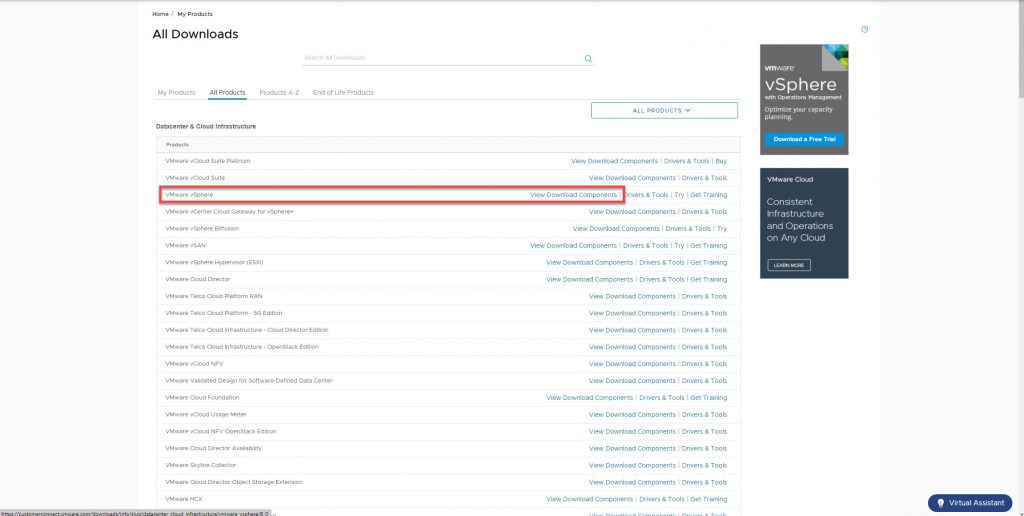
- Navigate to Products and Accounts > All Products.
- Find VMware vSphere and click View Download Components.
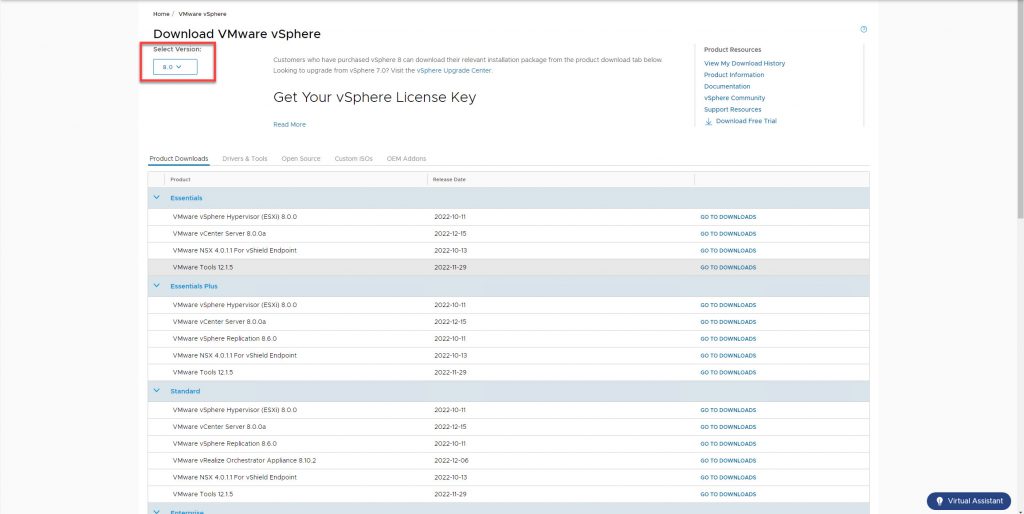
- Select a VMware vSphere version from the Select Version drop-down.
- Select a version of VMware vCenter Server and click GO TO DOWNLOADS.
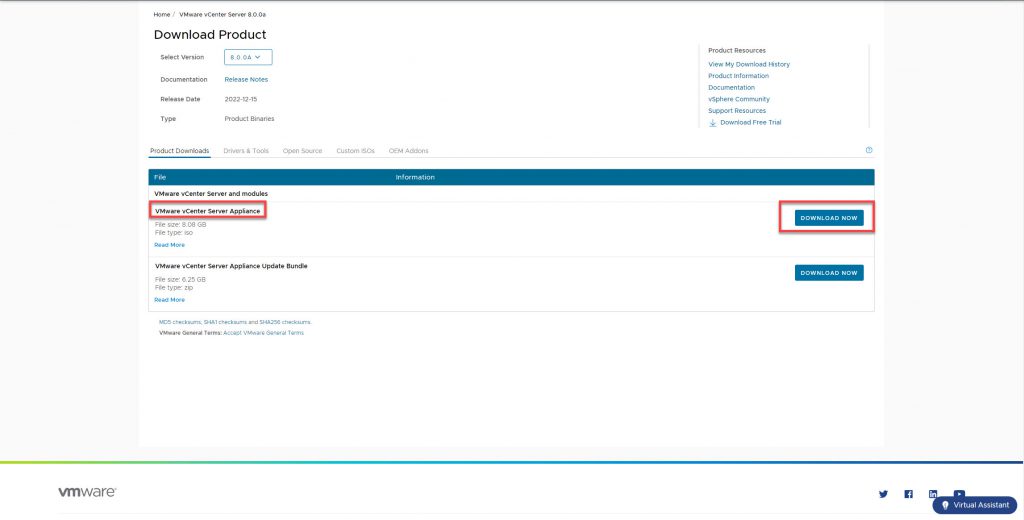
- Download the vCenter Server appliance ISO image.
- Confirm that the md5sum is correct by using an MD5 checksum tool.
- Mount the ISO image to the client machine from which you want to deploy, upgrade, migrate, or restore the appliance.
How to Update VMware vCenter Server Appliance (VCSA) 7.0 to VCSA 8.0
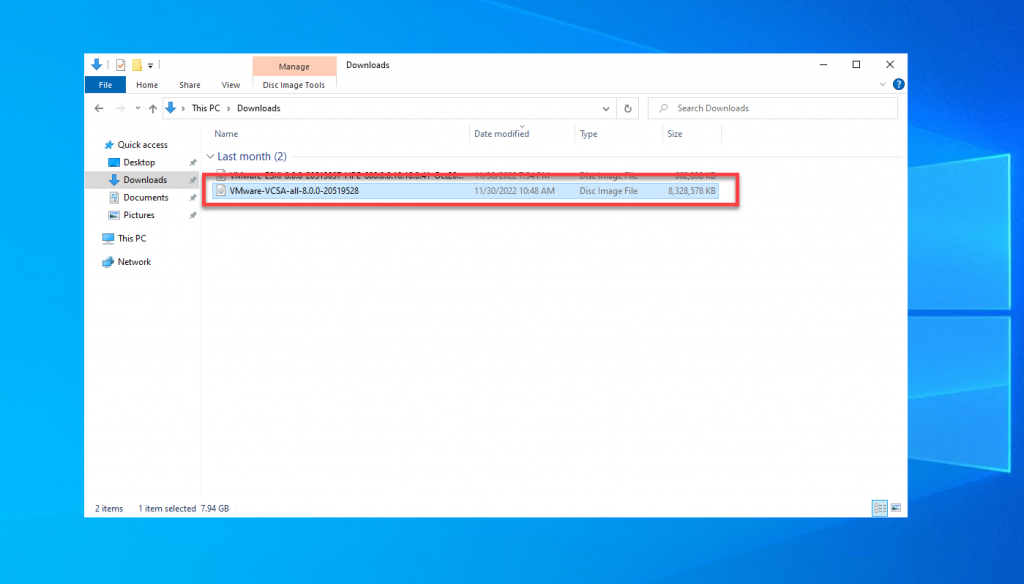
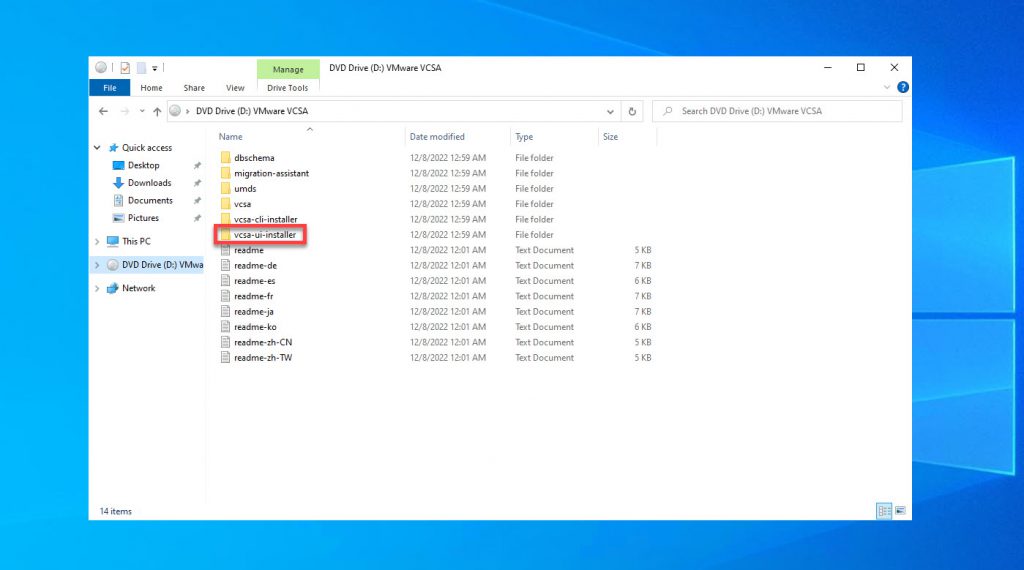
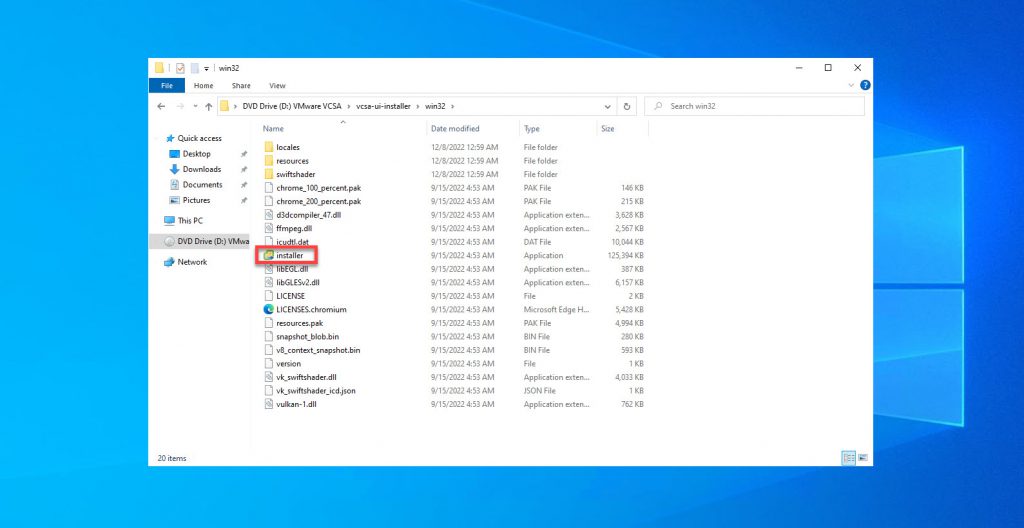
Mount the vCenter 8.0 ISO to your computer and start the vCenter Server 8.0 installer located at /vcsa-ui-installer/win32/installer.exe.

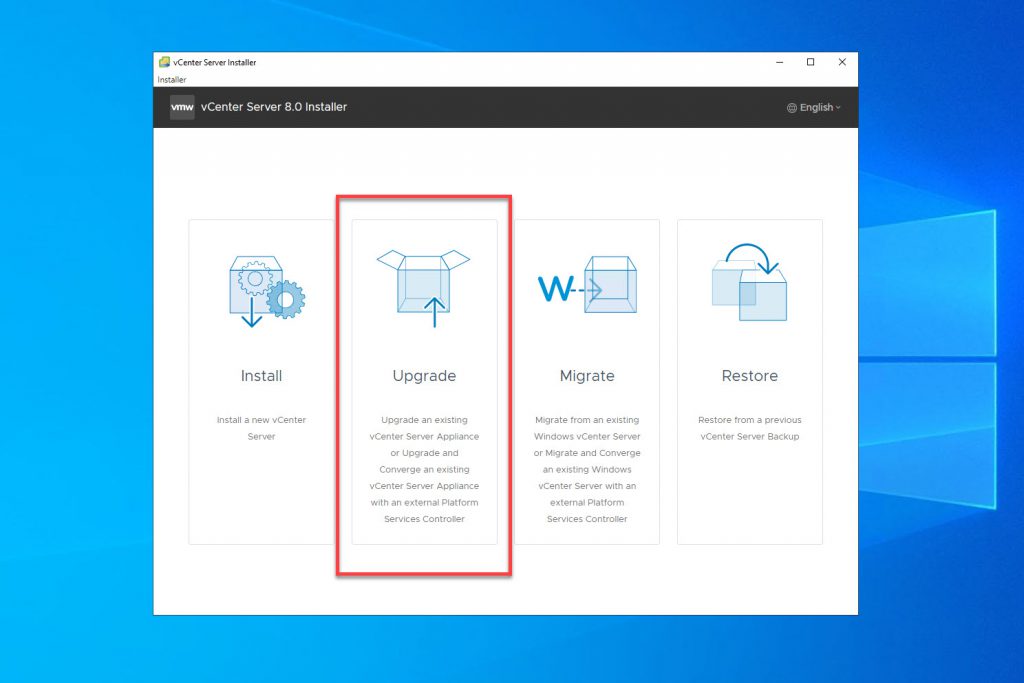
When the vCenter Server 8.0 installer starts, click on Upgrade.
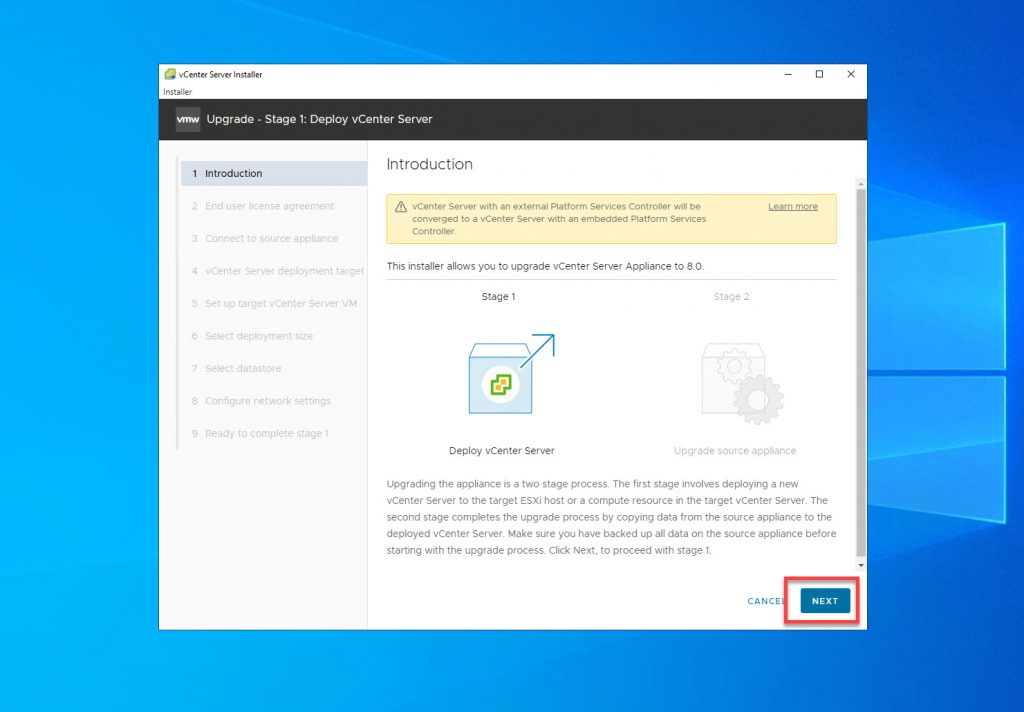
Click Next through the Introduction.
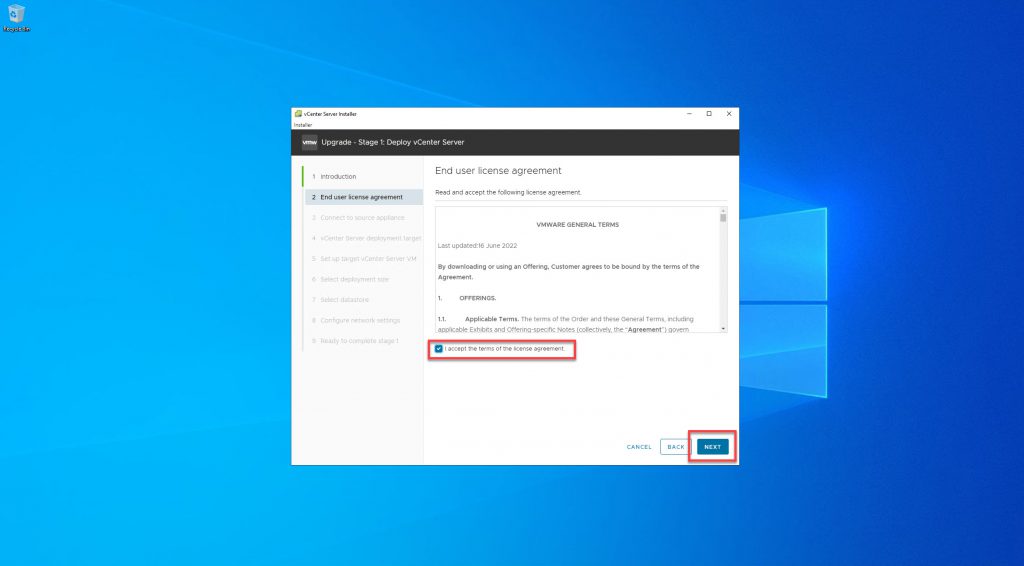
Agree to the End User License Agreement and click Next.
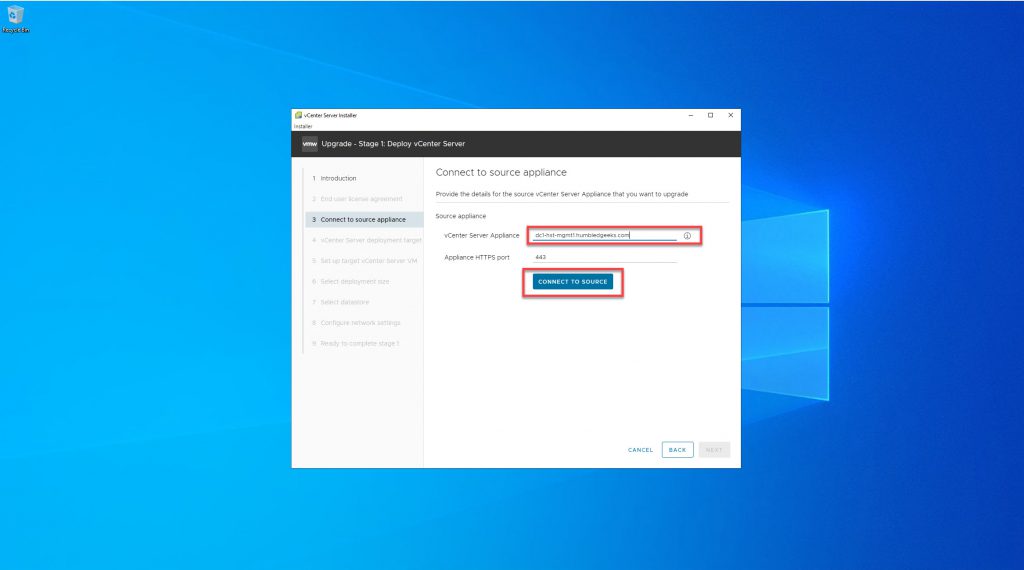
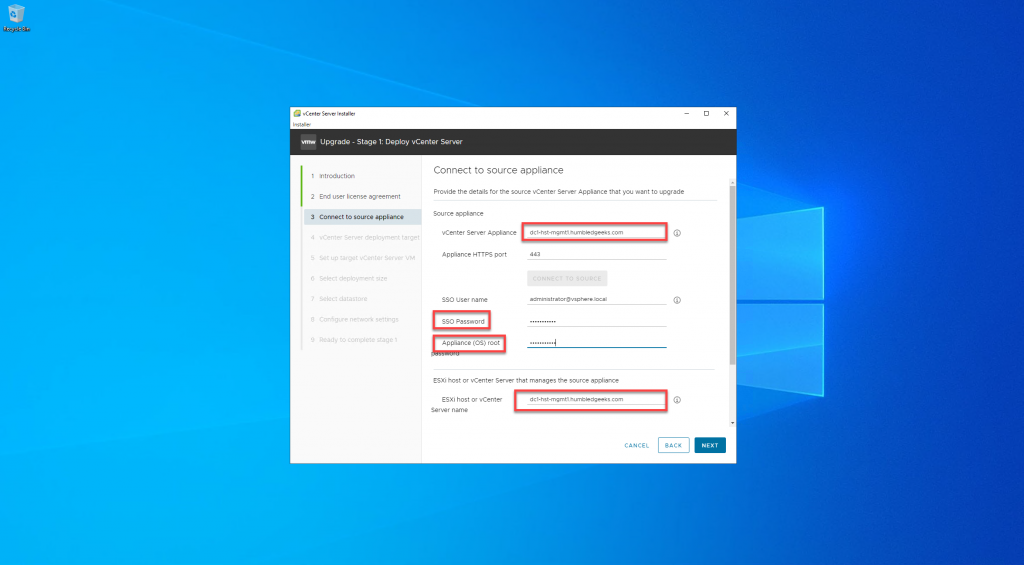
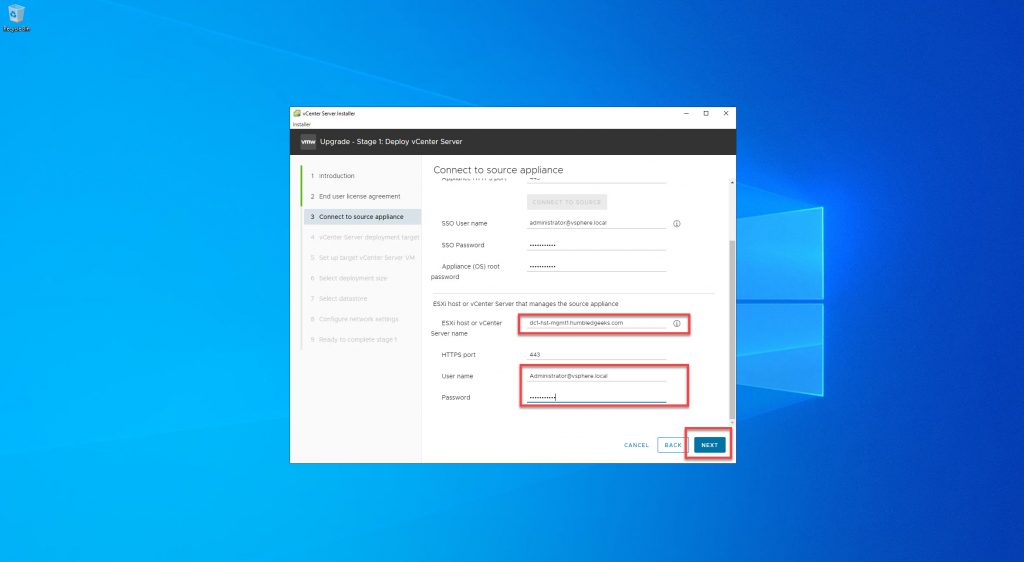
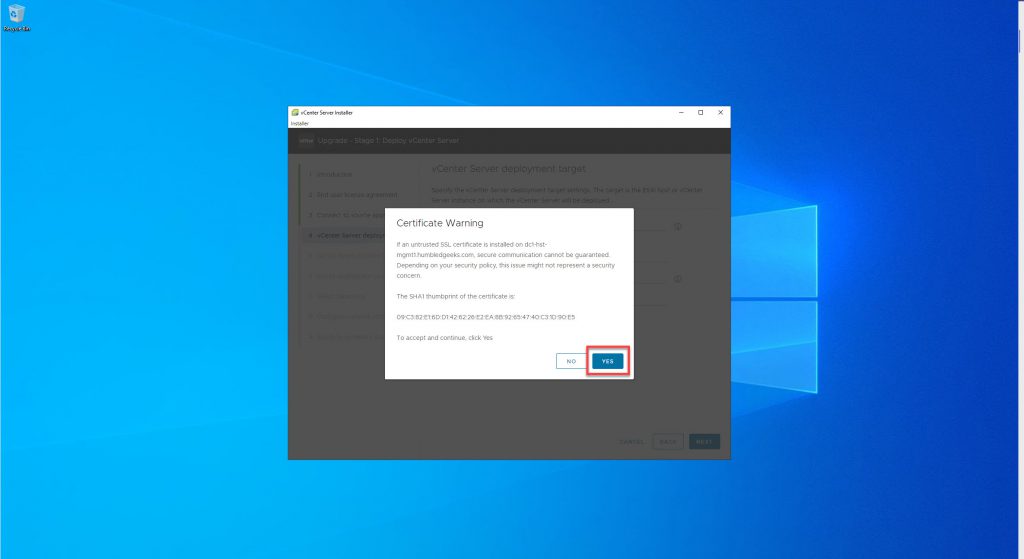
Enter the EXISTING VCSA FQDN or IP address, as well as the FQDN for the ESXi hosting the existing VCSA, and all of the credentials for the existing VCSA and ESXi host.
In this blog post, I will be using the FQDN of the existing VCSA and its credentials for all fields. This will allow more advanced features that I will demonstrate later in the post.
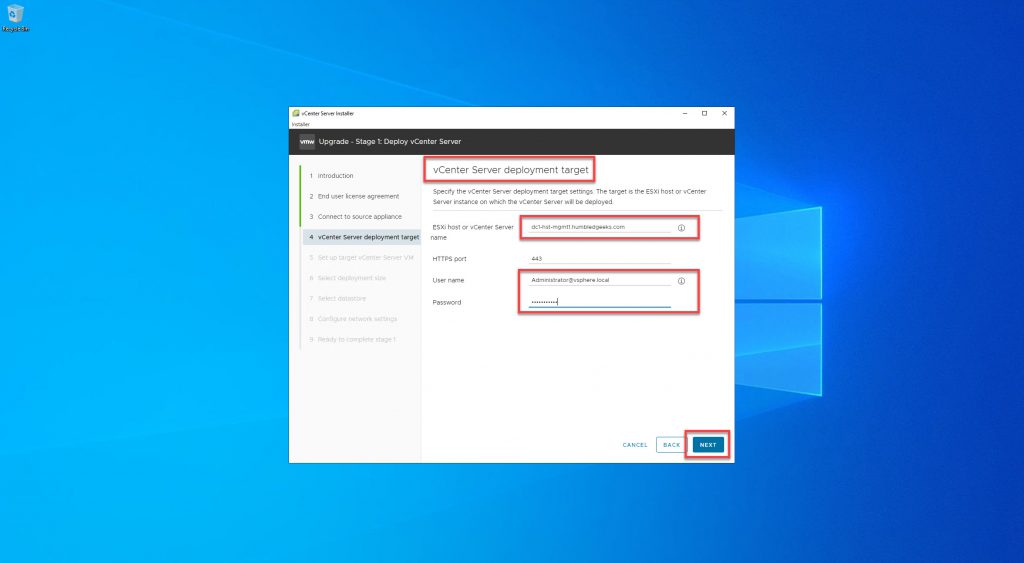
Enter the ESXi host or vCenter server where you would like the new VMware vCenter Server 8.0 appliance to be deployed.
Here I will be using the FQDN of existing VCSA and credentials. This will allow more advanced features.
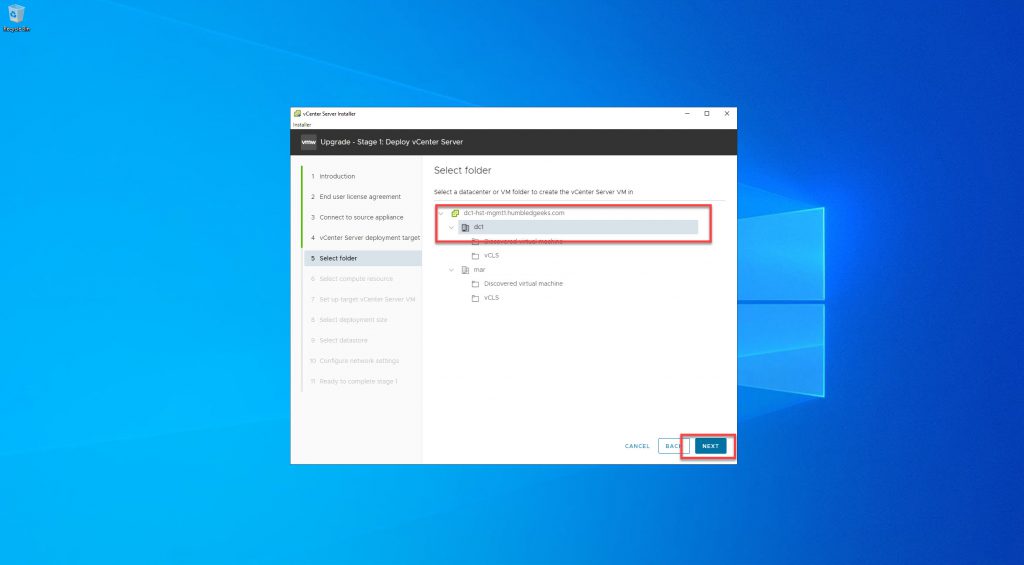
As you can see, here is one of the Advanced features. I can select what folder that I want to place the NEW VCSA in.
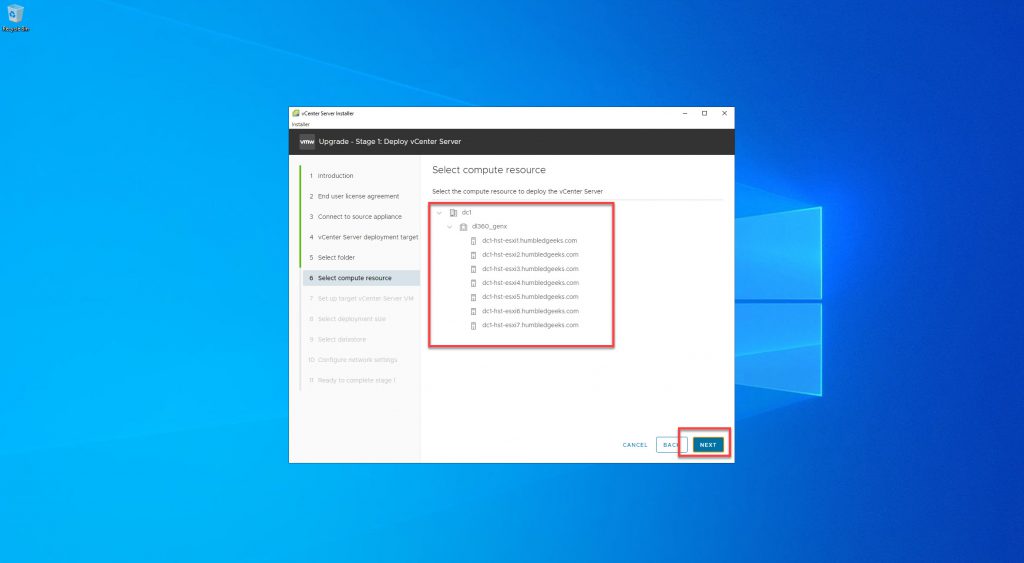
I can select what host that I want to place the VM on.
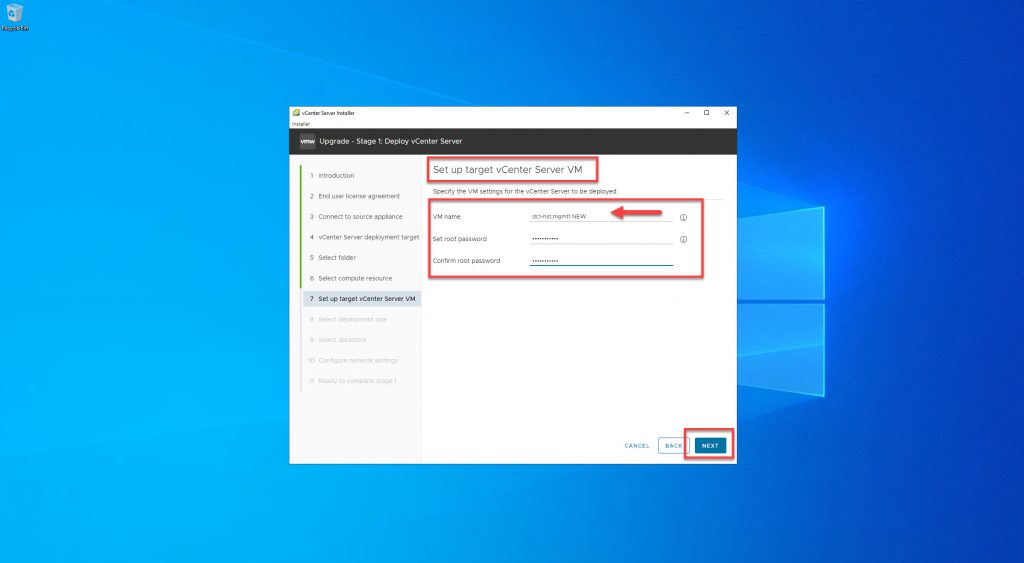
Next specify a VM name and root password for the new 8.0 VCSA – I temporarily used the same name as the existing VCSA and appended “.NEW” for easy identification later.
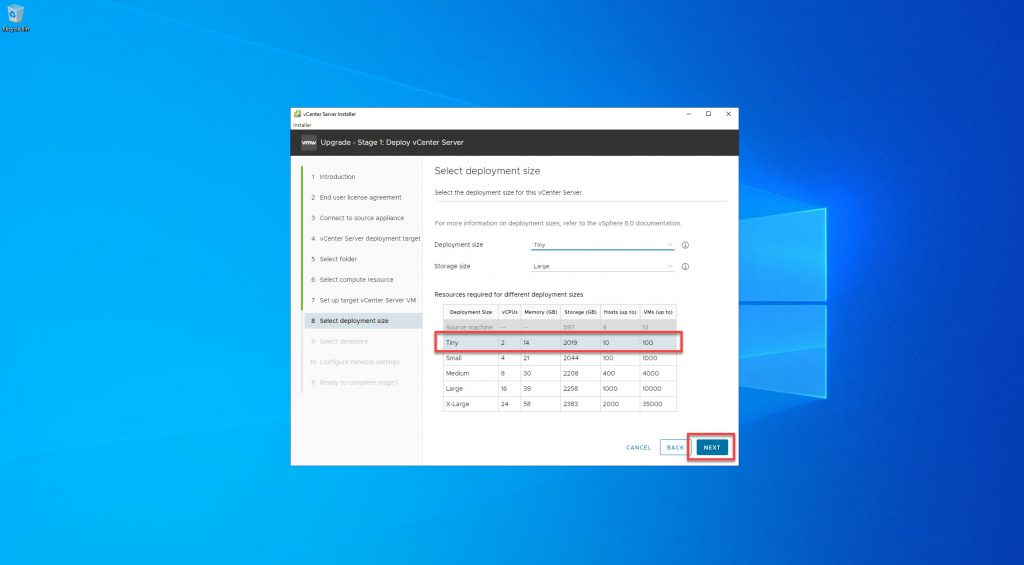
Select the appropriate deployment size for your environment.
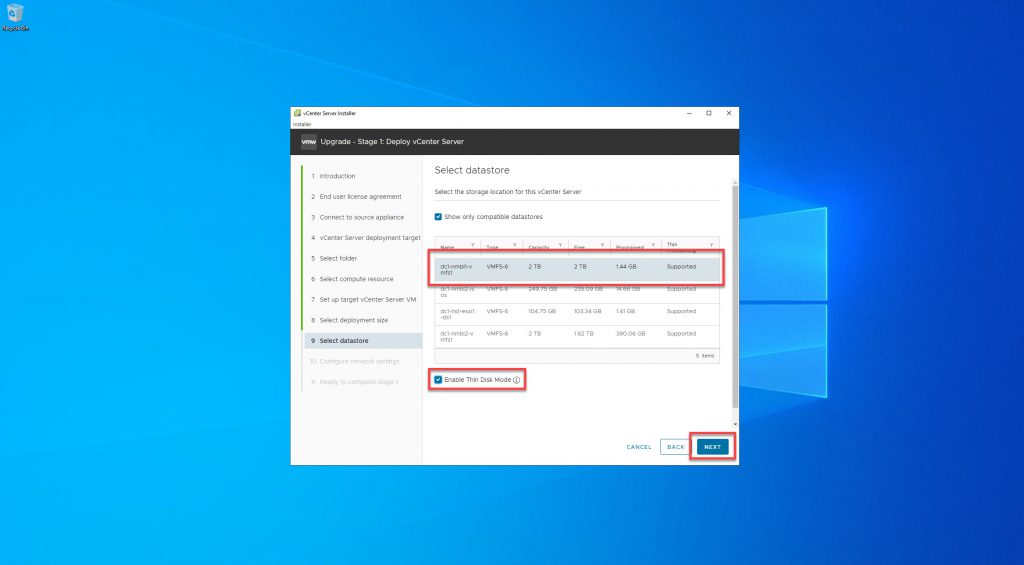
Select a datastore you want the new vCenter 8.0 appliance to be stored.
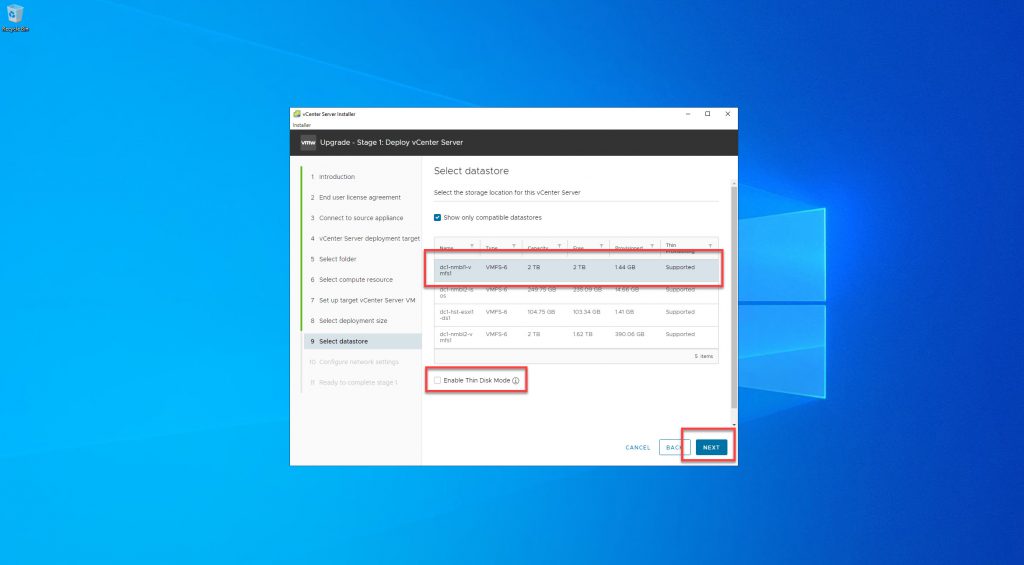
Enable Thin Disk Mode.
Select the appropriate Network Port Group, here is another of the Advanced features. If you had vDS in your environment, you would be able to select that, otherwise you would have to create an ‘ephemeral’ port group with the appropriate VLAN.
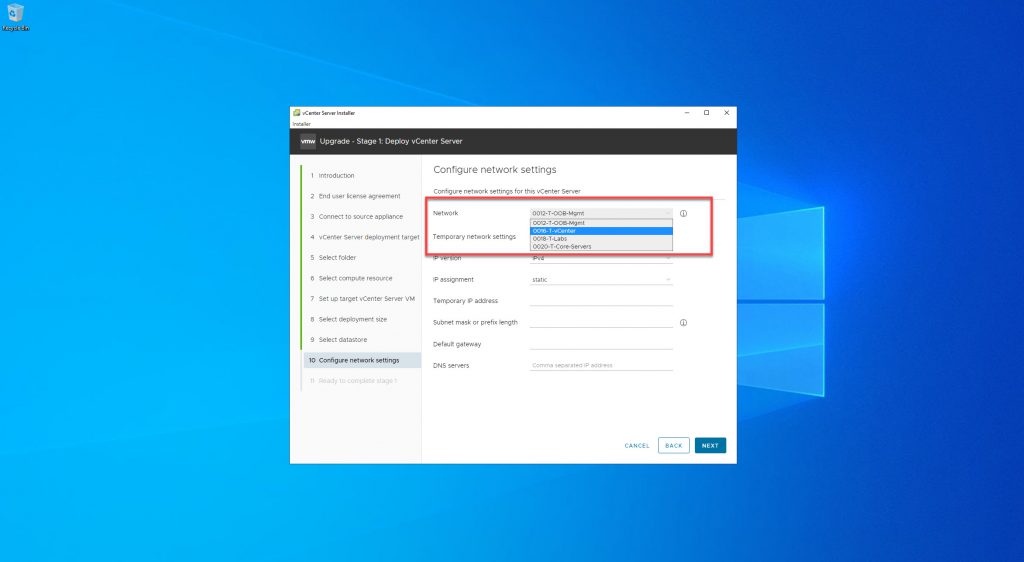
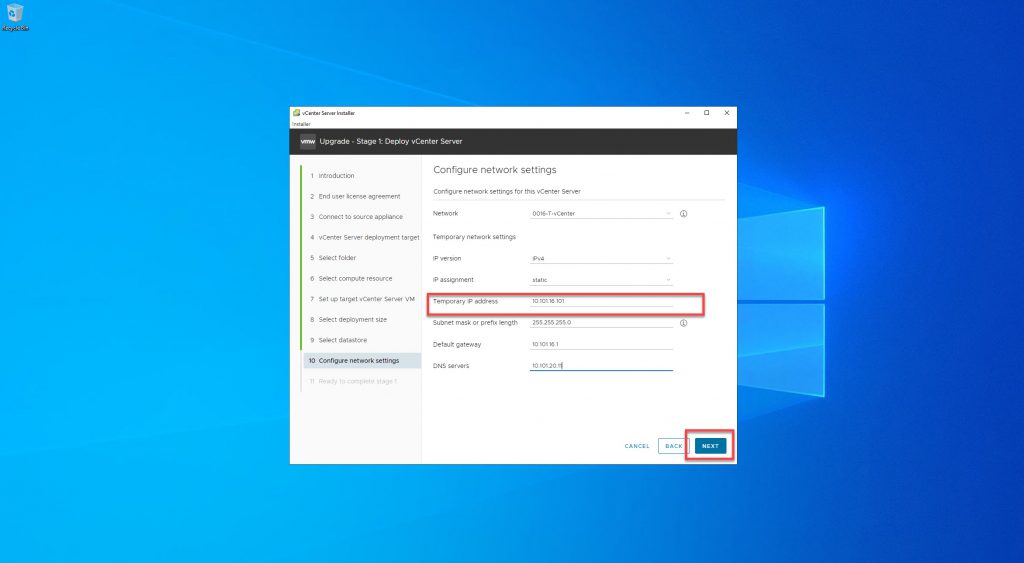
Next configure a temporary IP address. Once Stage 2 of the upgrade has been completed the new 8.0 VCSA will take the IP address of the existing VCSA.
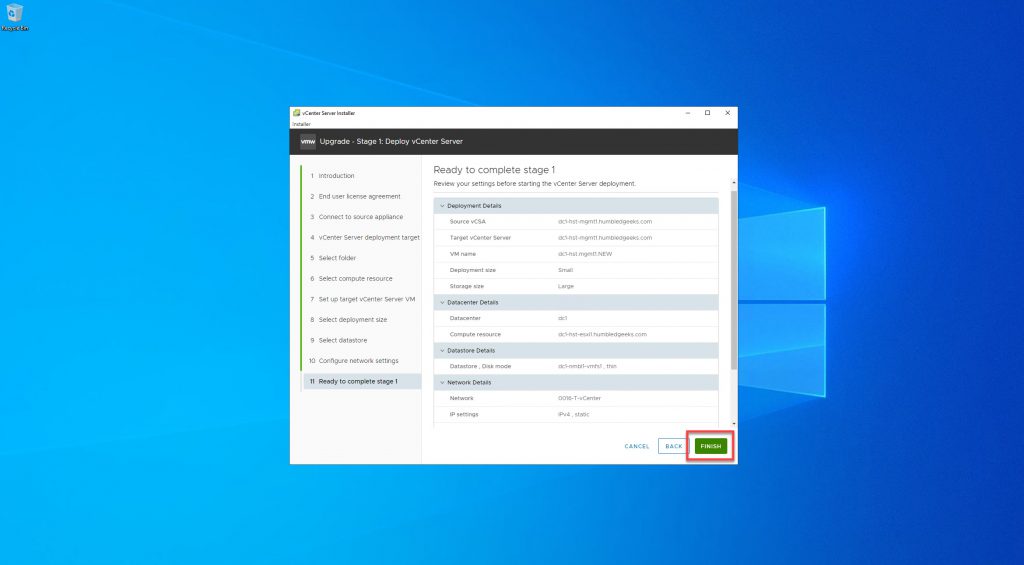
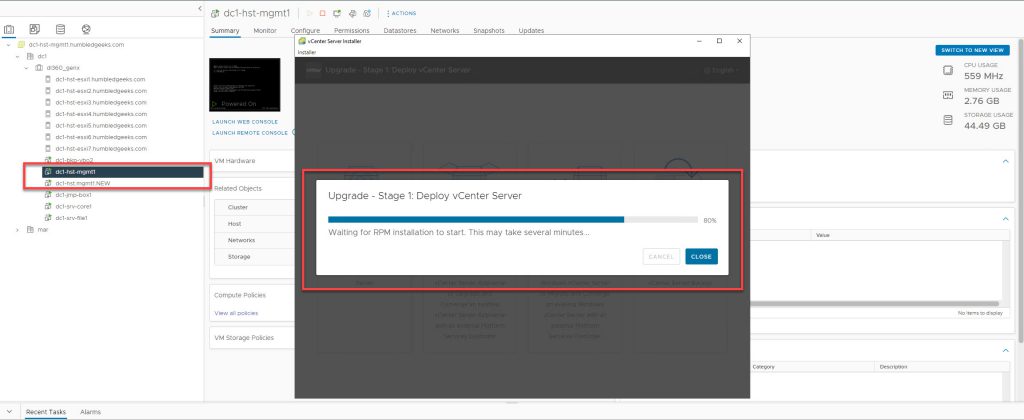
Review the Stage 1 summary and click on Finish.
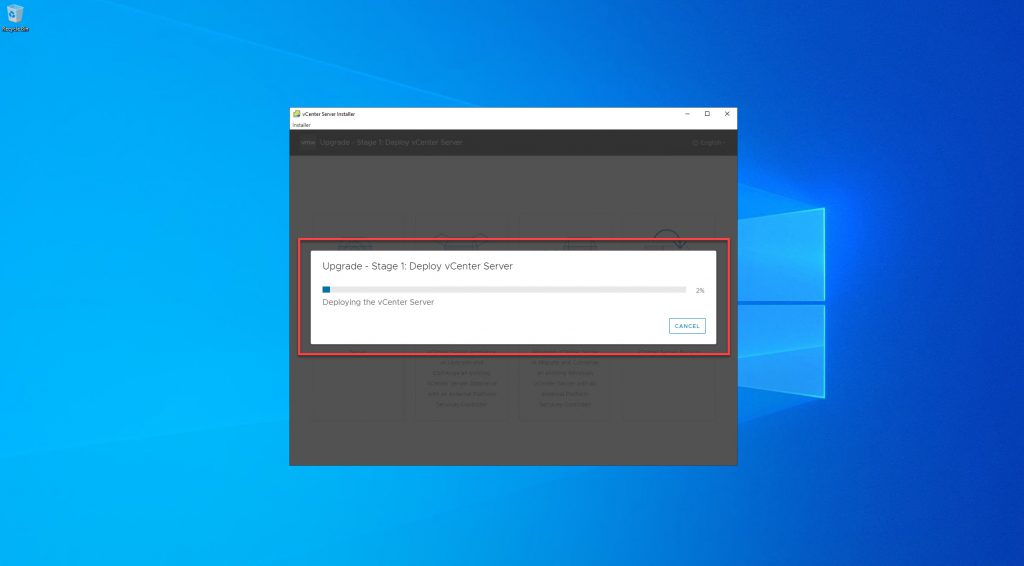
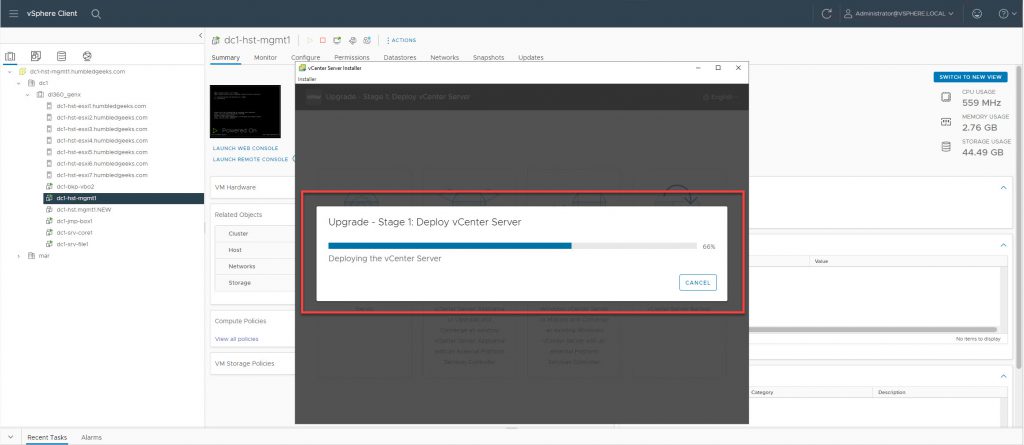
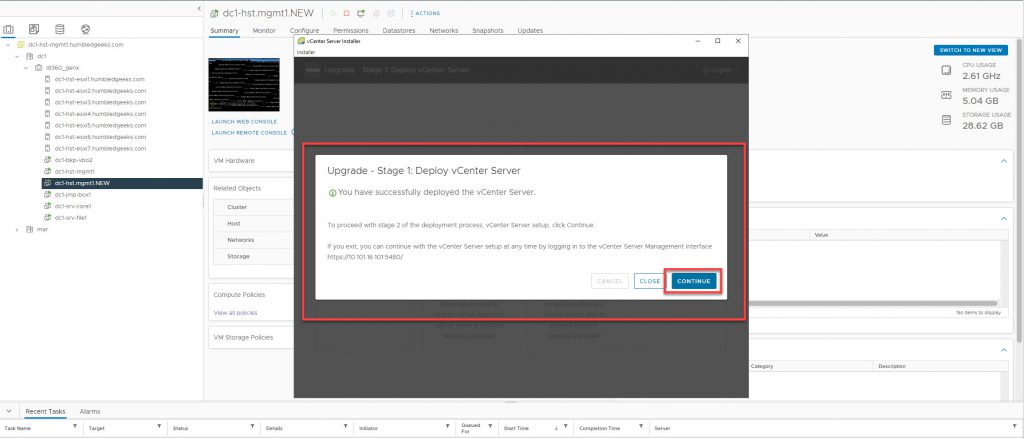
Once Stage 1 of the vCenter 8.0 upgrade completes, click on Continue to move on to Stage 2.
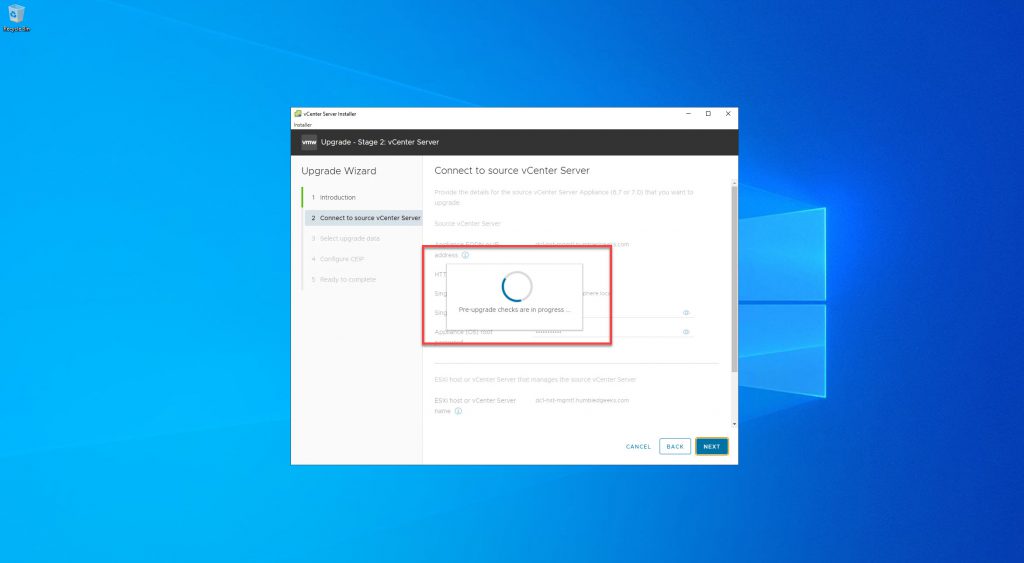
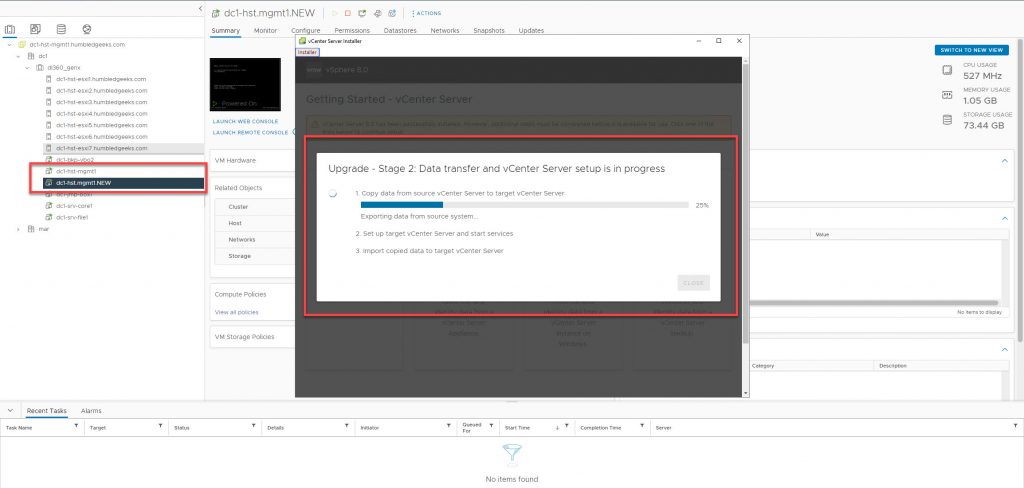
Stage 2 – Upgrade vCenter Server Appliance 7.0 to 8.0, copying VMware vCenter data
Click on Next through the VCSA Stage 2 Introduction.

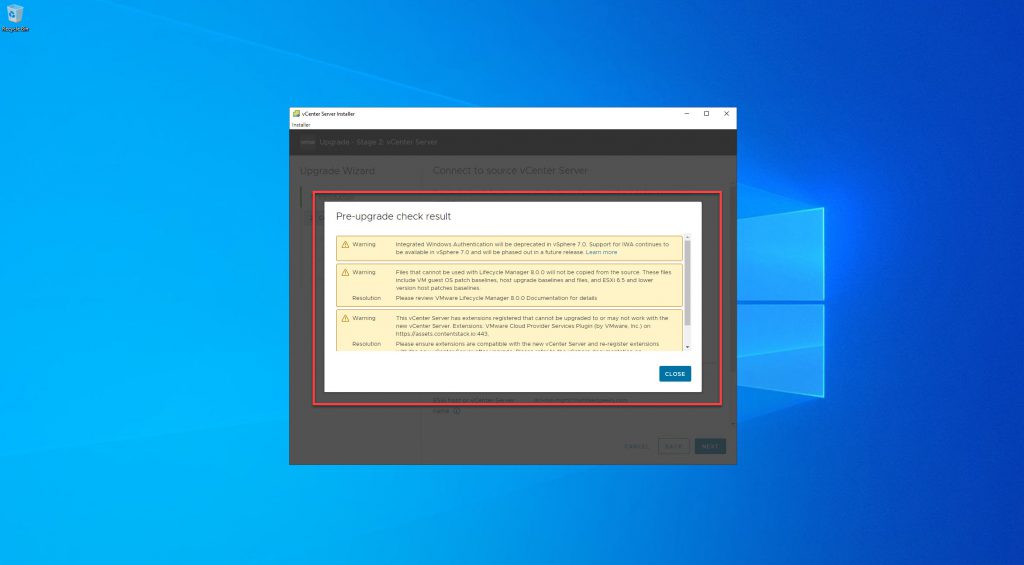
The installer will then automatically run a Pre-Upgrade check on your existing VCSA. Make sure to review those results, then click on Next.
Note:
Be sure that DRS is disabled if you have more than one host.
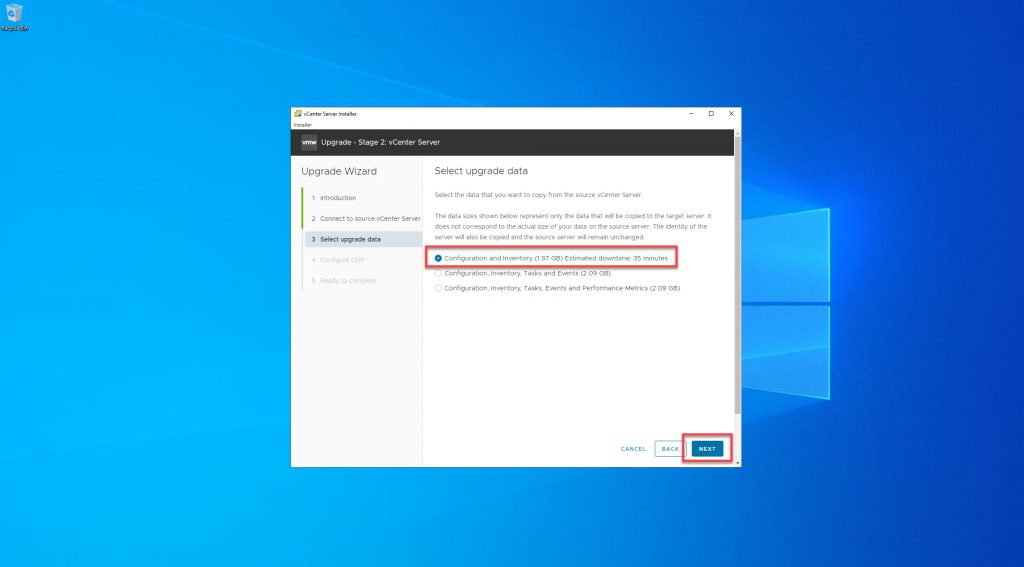
Next select what data you would like to copy from the existing VCSA 7.0 to the new VCSA 8.0 appliance. Since this is my lab, I am choosing the basic configuration.
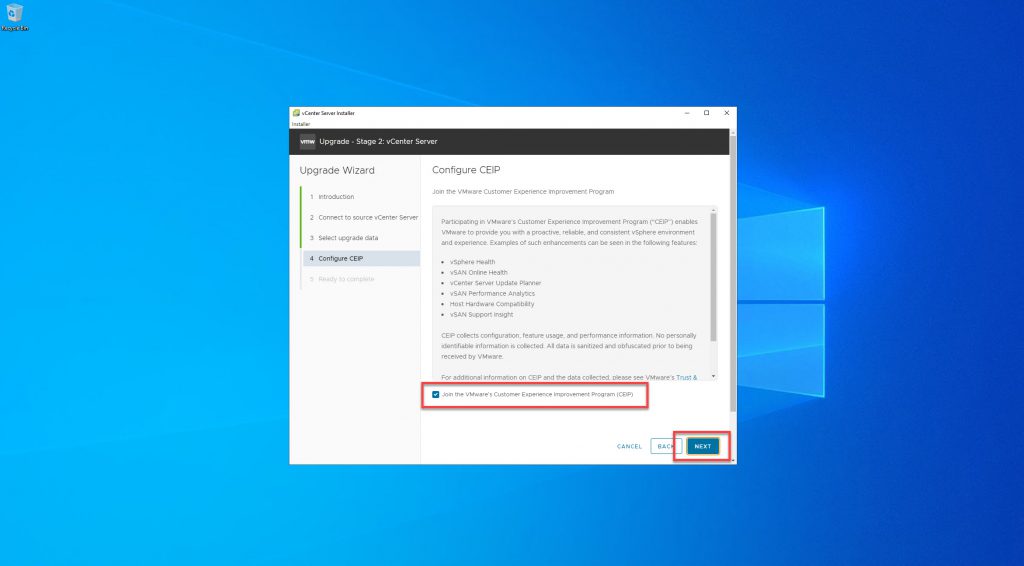
Join the VMware Customer Experience Improvement program, or don’t, and click Next.
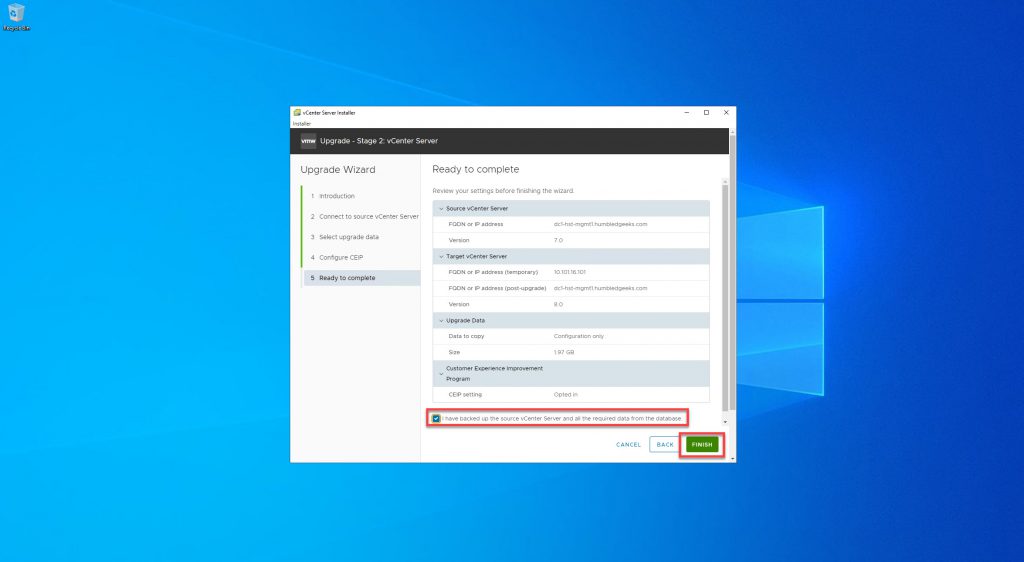
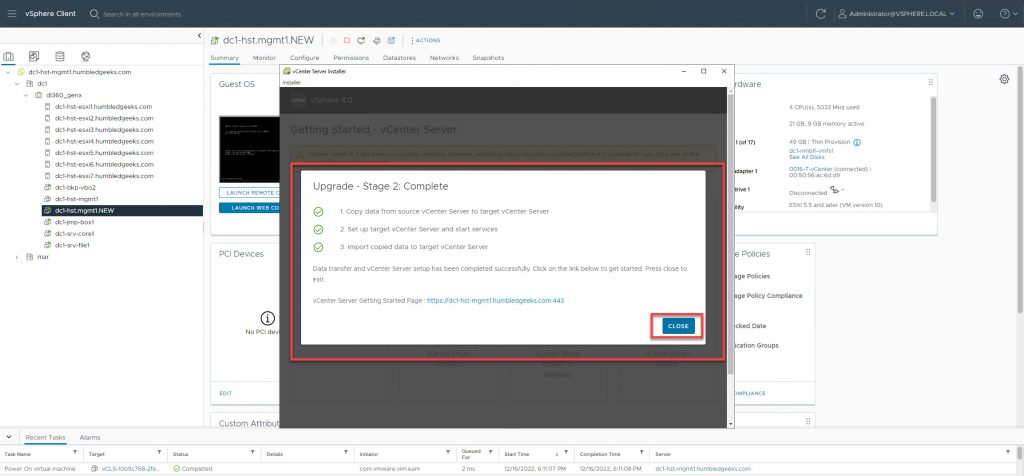
Finally, review the Stage 2 summary and check “I have backed up the source vCenter Server and all the required data from the database” and click Finish.
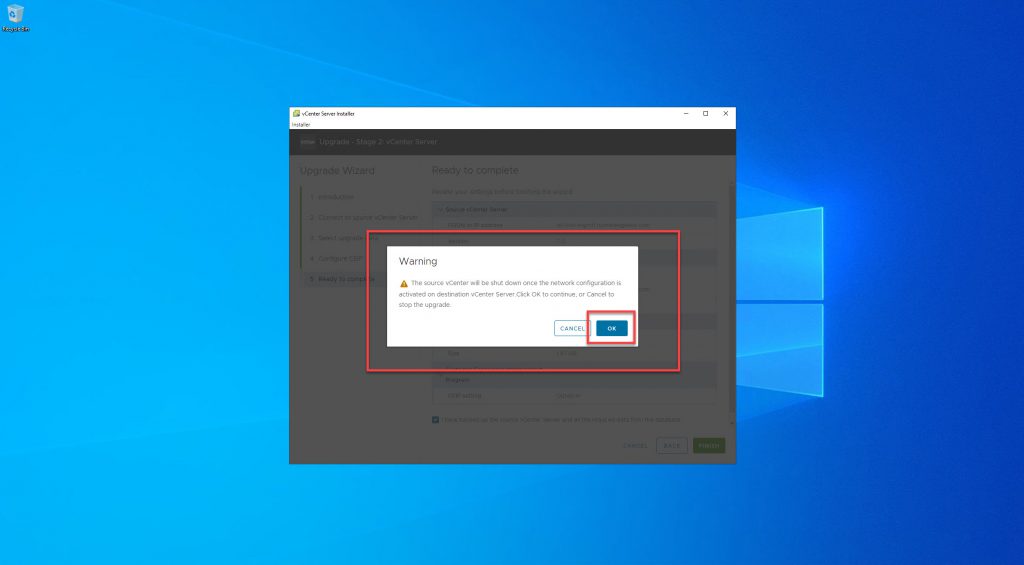
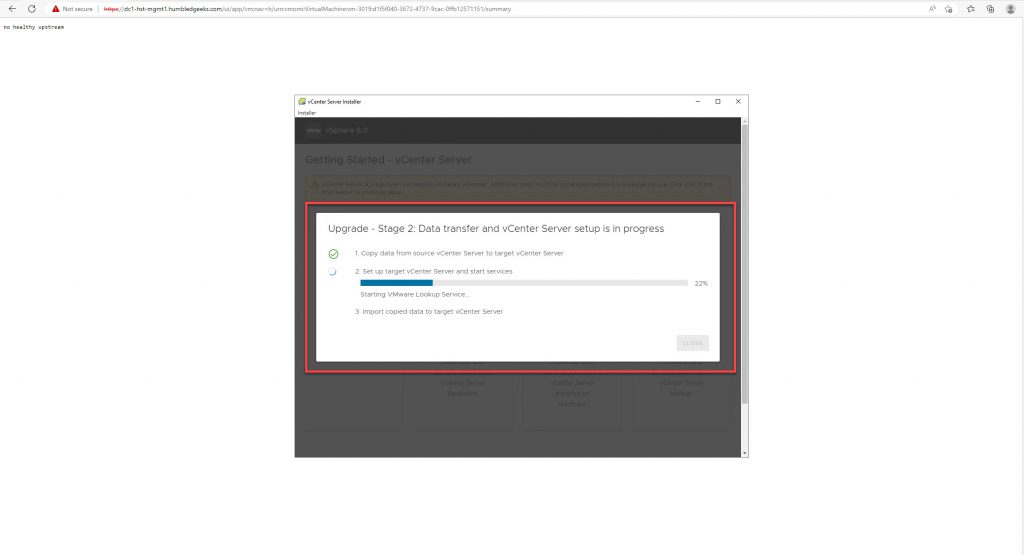
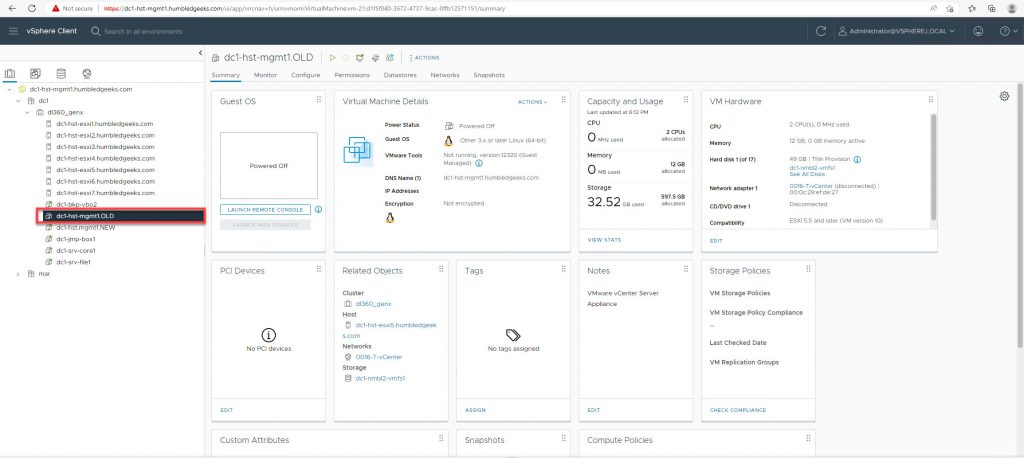
Now at this point, Stage 2 of the upgrade will start copying the data from the old 7.0 vCenter over to the new 8.0 vCenter appliance. After some time, depending on how much data needs to be copied, your OLD VCSA will be powered down and the upgrade will complete.
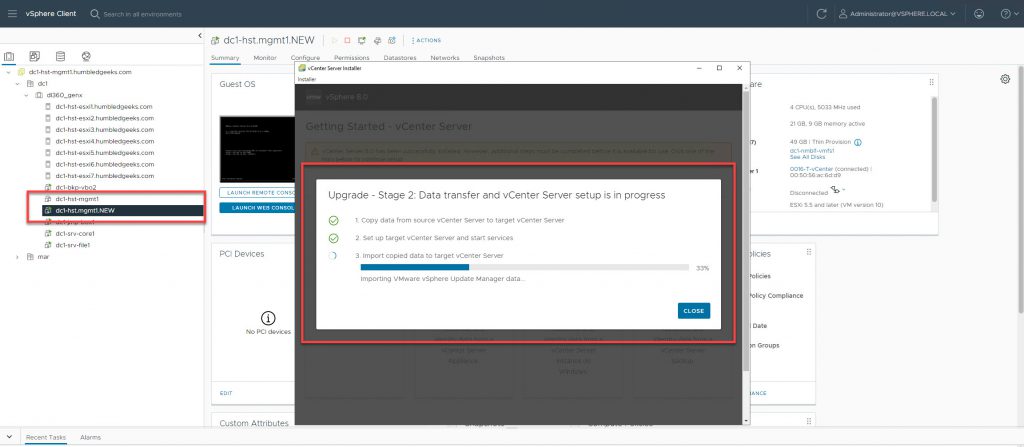
Notice the NEW VCSA has both the temporary IP and the former VCSA IP address.
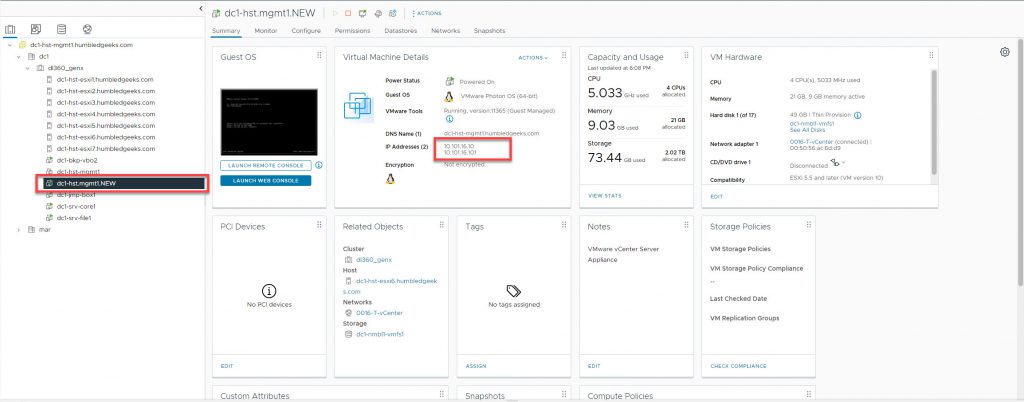
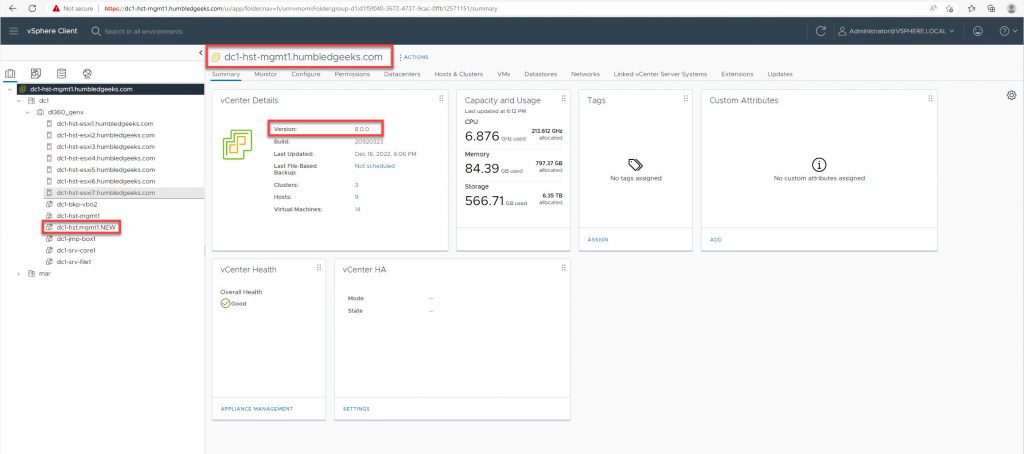
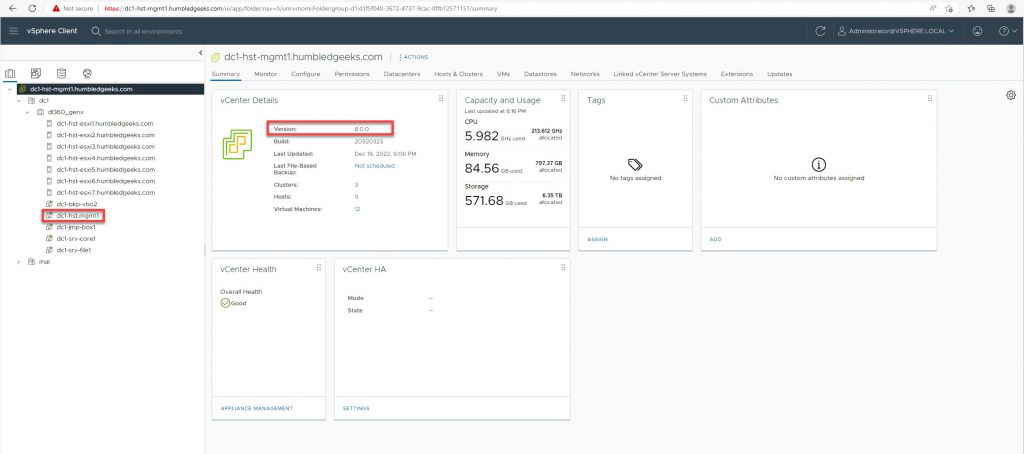
The Upgrade is complete, click Close, restart your browser and log into vCenter.
Since this is a Lab environment and I have the VCSA VM backed up, I can safely delete the legacy 7.0 VCSA. In a production environment, you may want to keep it in case you need to revert back to the previous version.
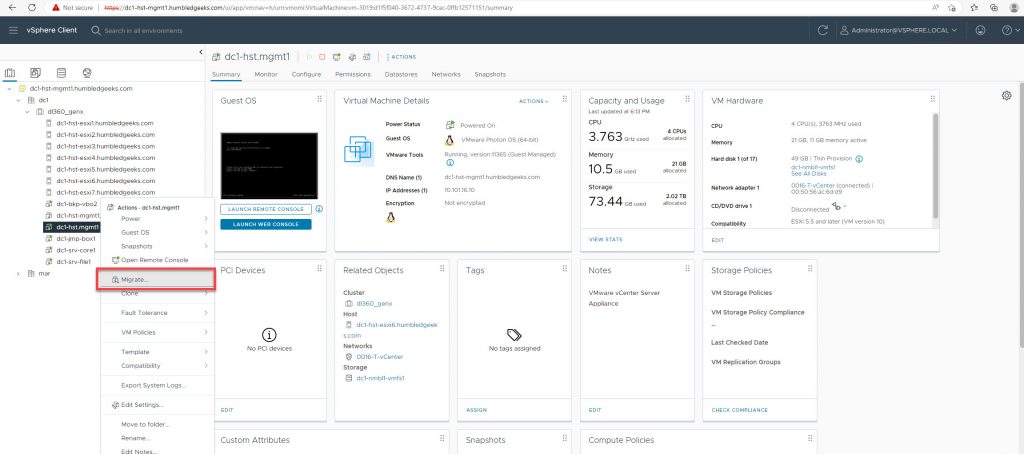
After deleting the VCSA 7.0 VM, I need to perform some clean up tasks. First, let’s rename the VM by removing the appended “.NEW”.
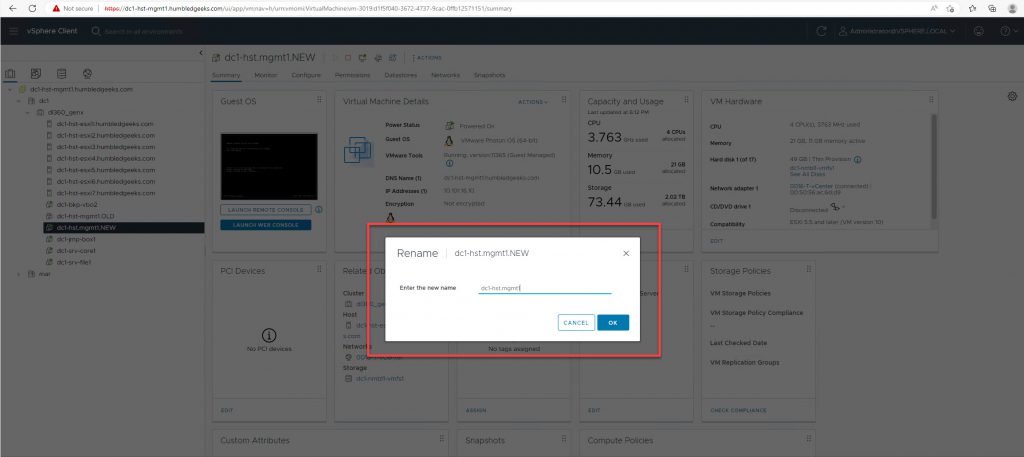
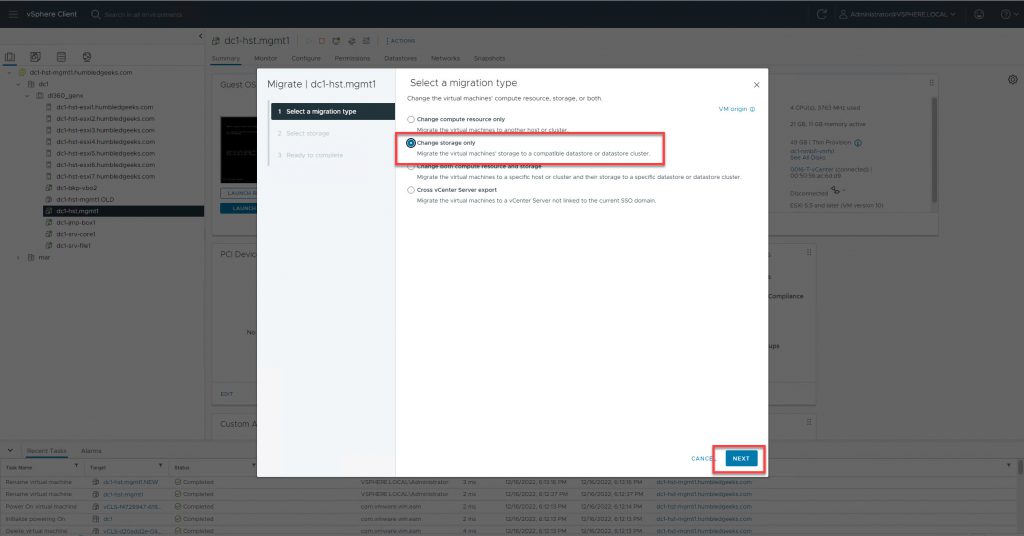
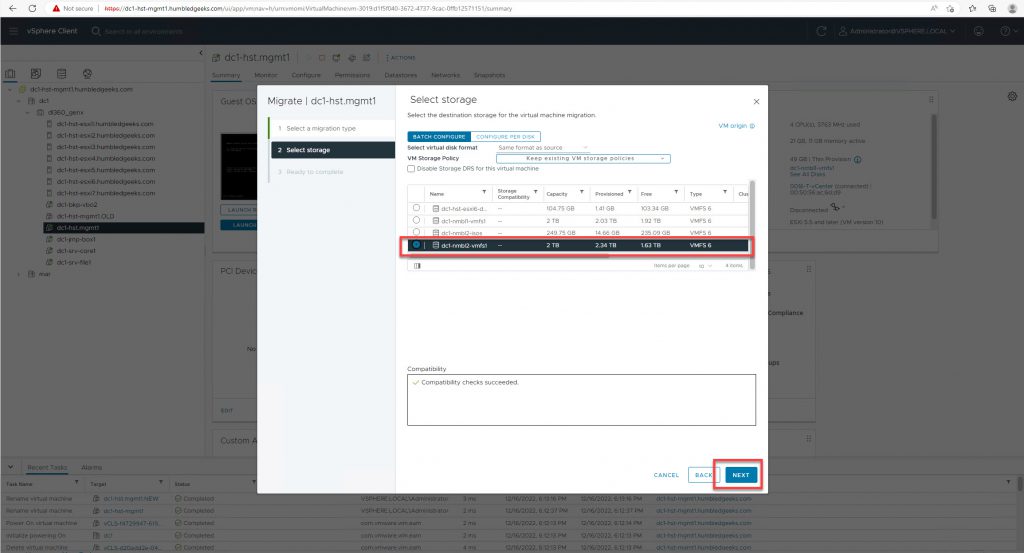
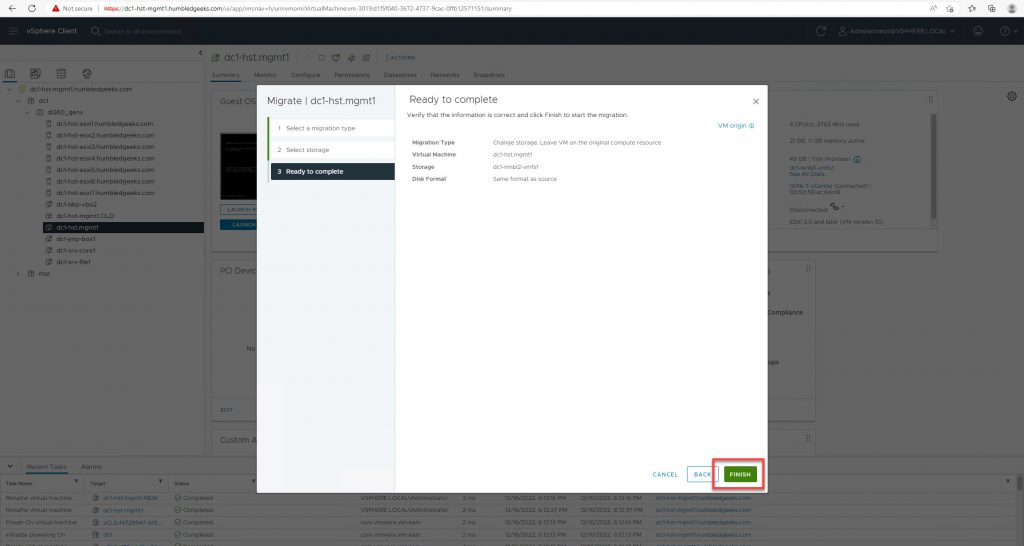
Storage vMotion the VM, so that the underlying folder structure picks up the renamed VM.
At this point you can start upgrading your managed ESXi Host’s. In my next blog post, I will be demonstrating how to use Lifecycle Manager to automate the ESXi upgrade of my hosts.