In my previous NetApp blog post, I demonstrated how to use Active Directory (AD) Authentication on my NetApp ONTAP OTS tightening up Security.
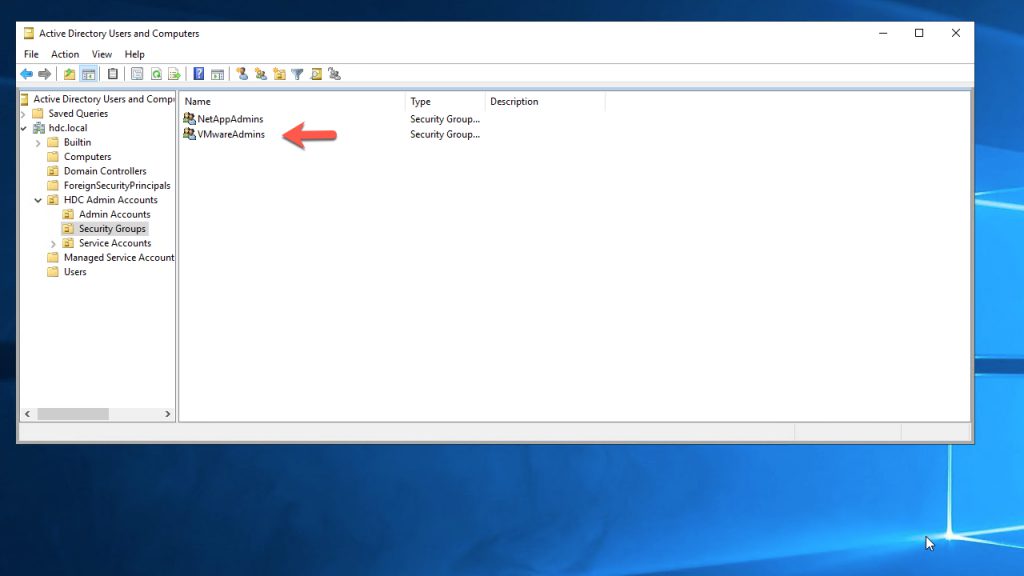
A prerequisite is to have Administrator Privledges to Join vCenter to your Windows Active Directory (AD) and its a good practice to have / create a Security Group ‘VMwareAdmins’
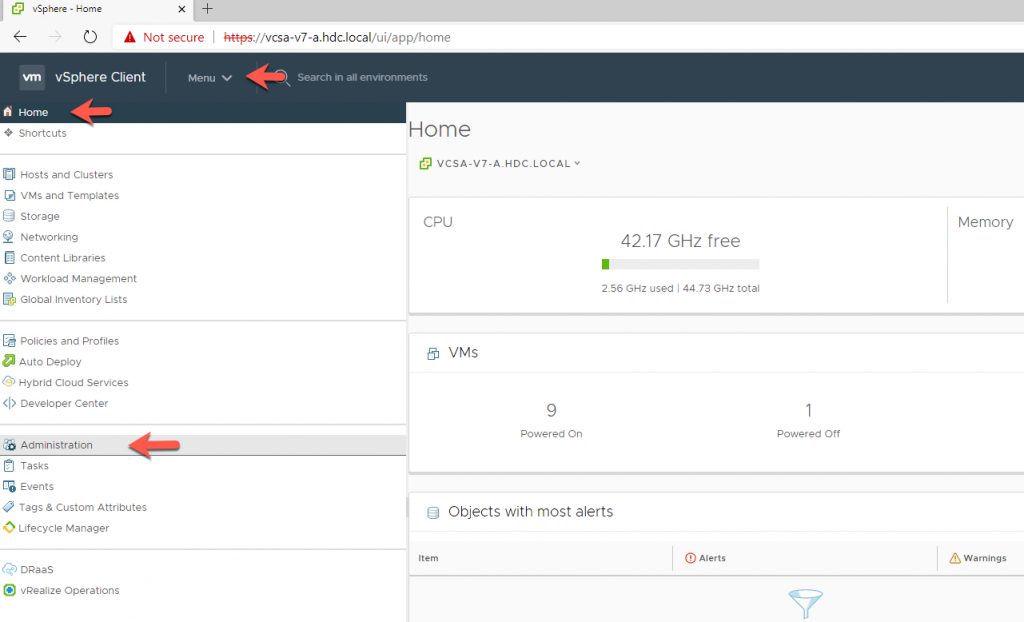
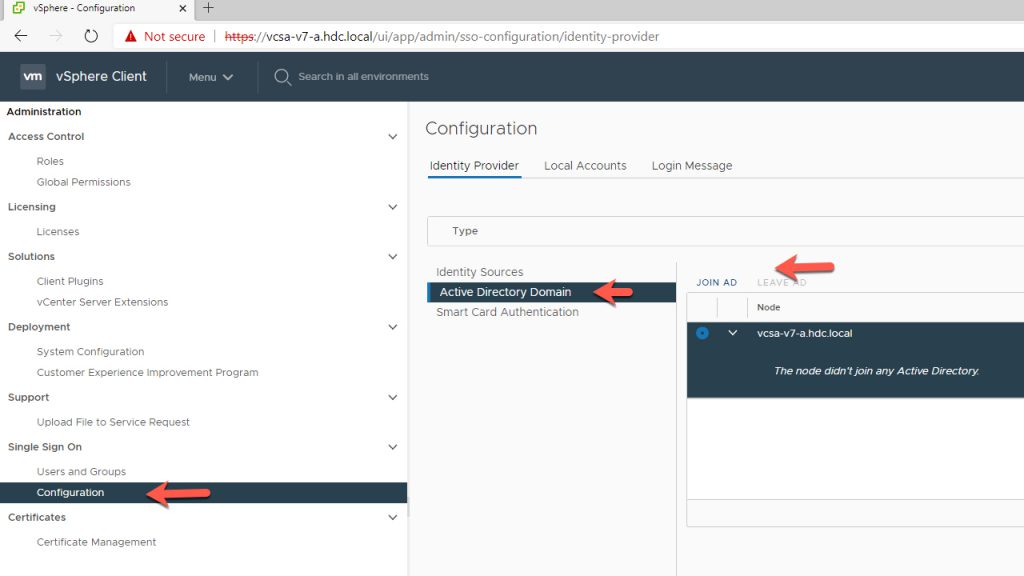
From the Home Screen, Click on Administration.
Under Single Sign On (SSO)
- Click on Configuration
- Click on Active Directory Domain
- Click on Join AD
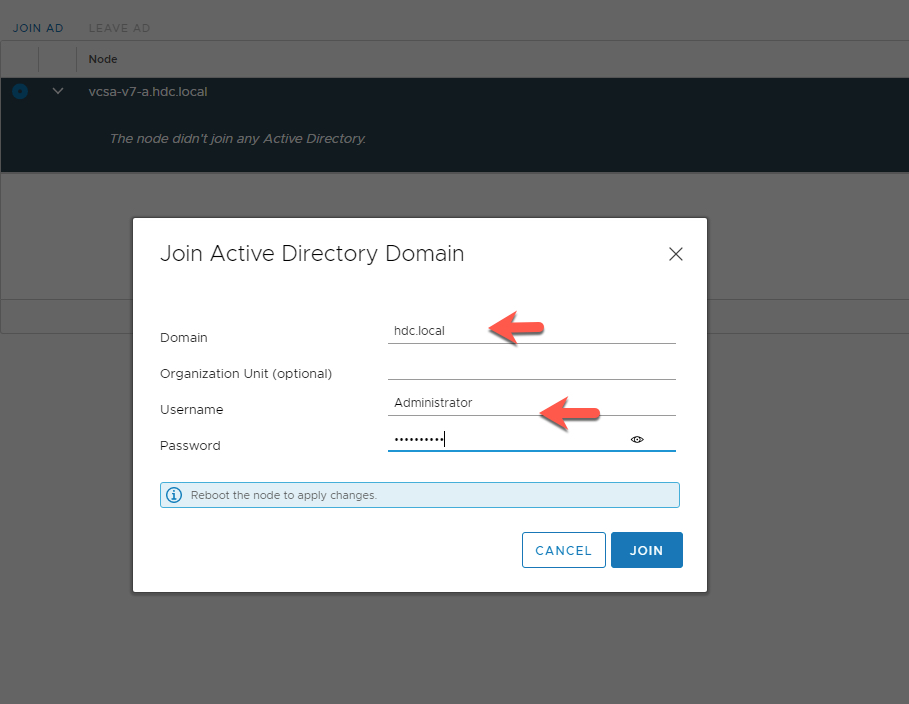
Join Active Directory Domain
- enter Domain details
- enter User and Password
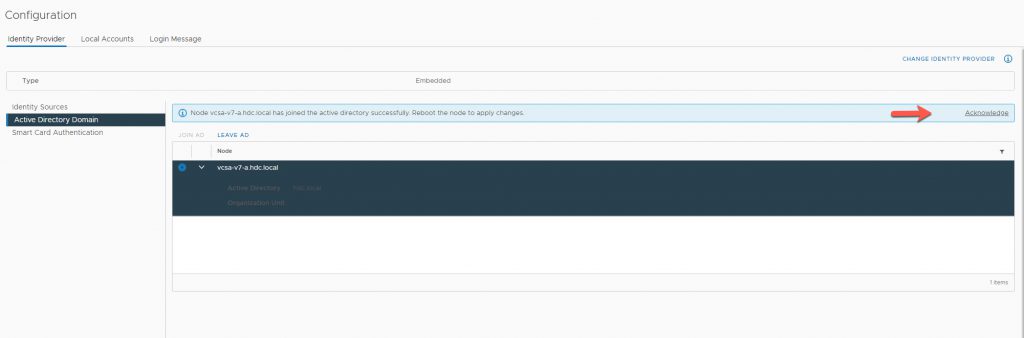
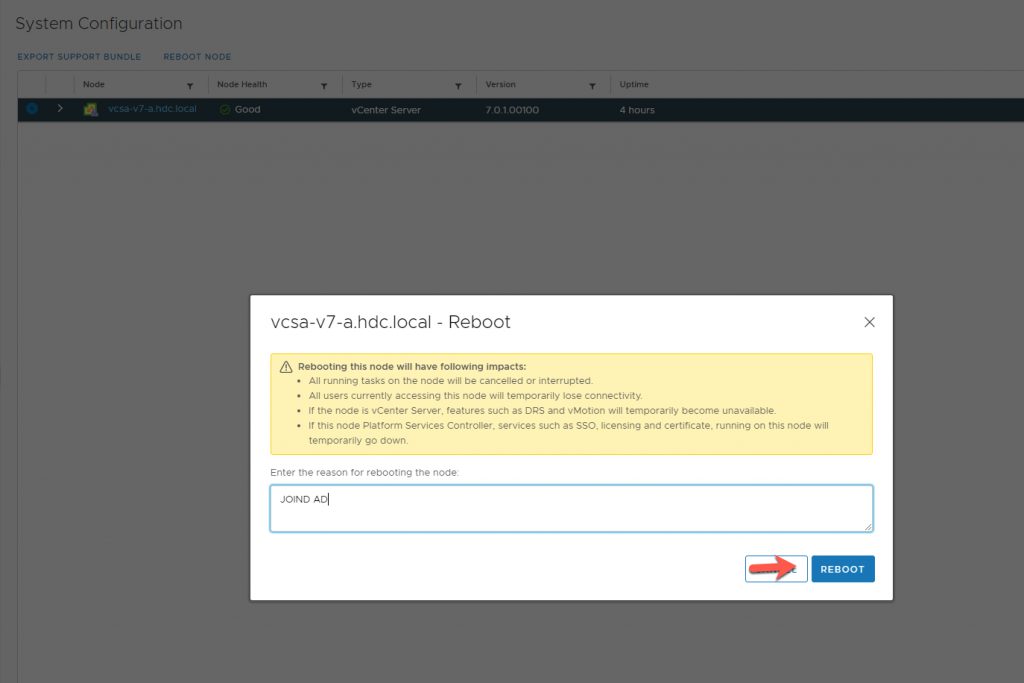
After you successfully Join the AD, you must Aknowledge and Reboot vCenter.
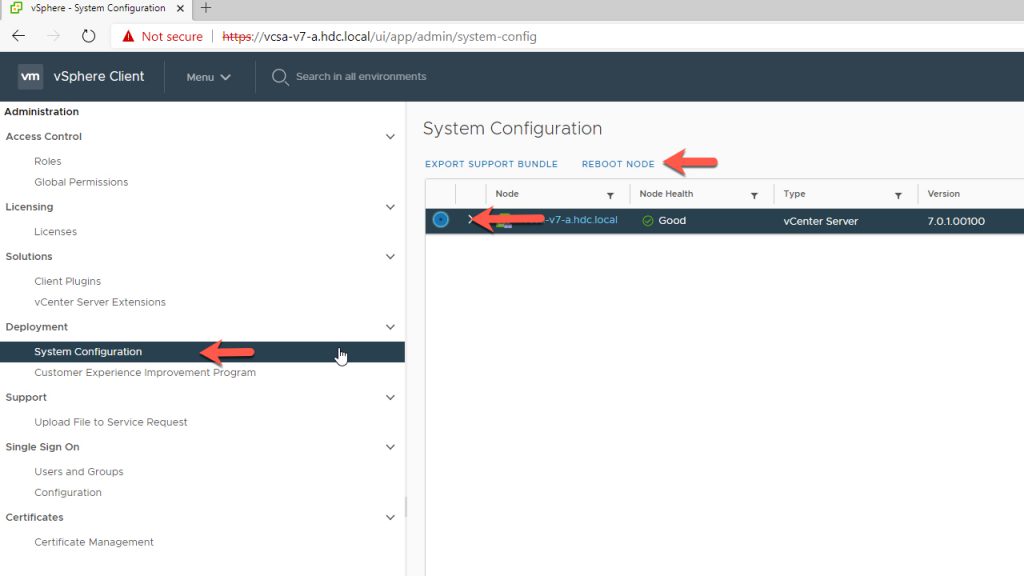
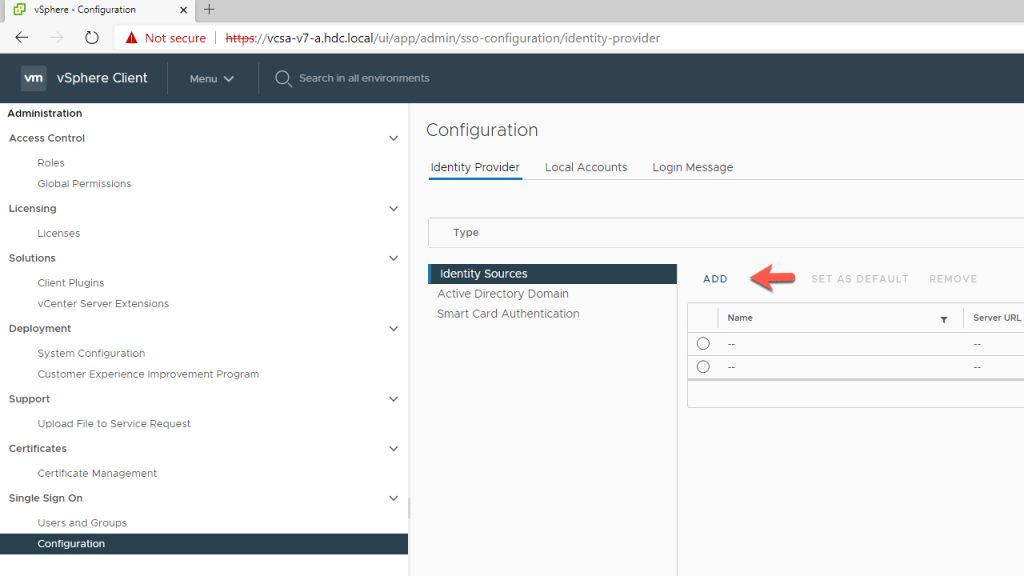
After vCenter has Rebooted, you must now Configure the Identity Source.
- Under Single Sign On (SSO) Click on Configuration
- Click on Indentity Provider
- Click on Identity Sources
- Click ADD
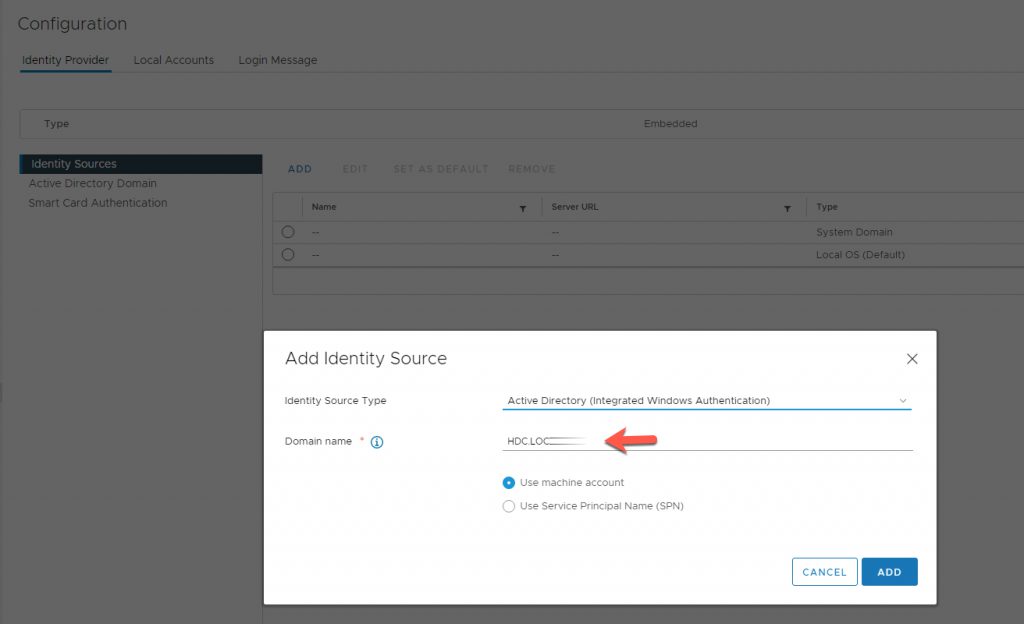
Add Identity Source
- Enter Domain Name (HDC.LOCAL)
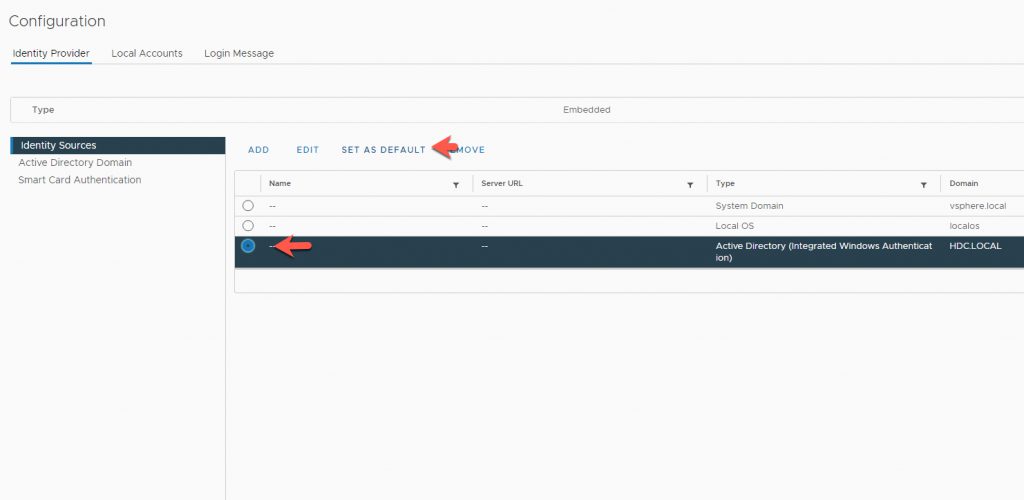
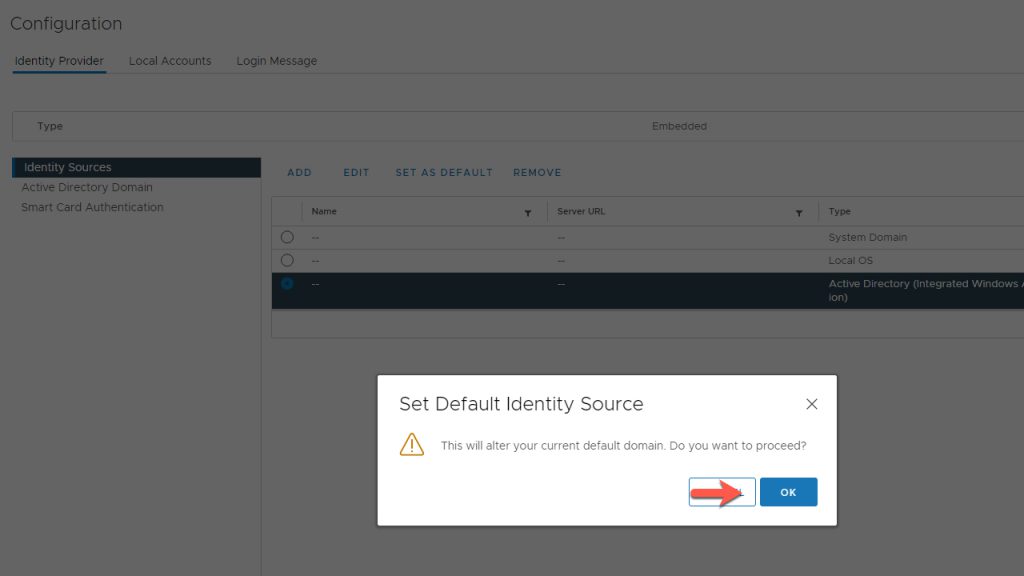
Set Identity Sources
- Select the Radio Button of the Domain
- Click on Set as Default
- Accept and Click OK
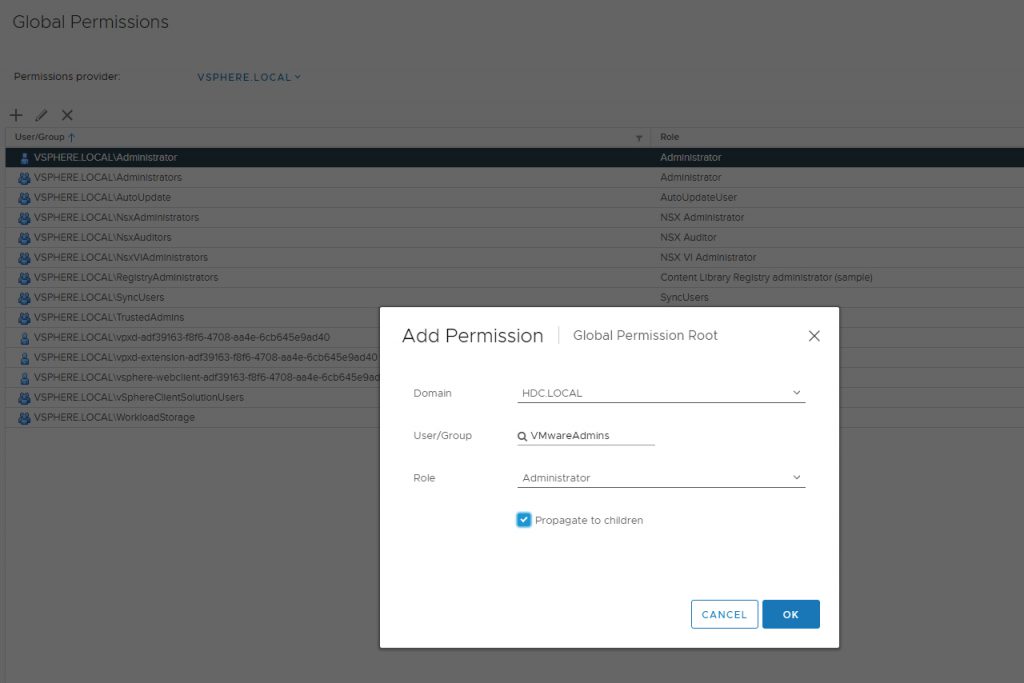
Create / Use the VMwareAdmins Security Group from your AD
- Assign Authorized Users to the Security Group
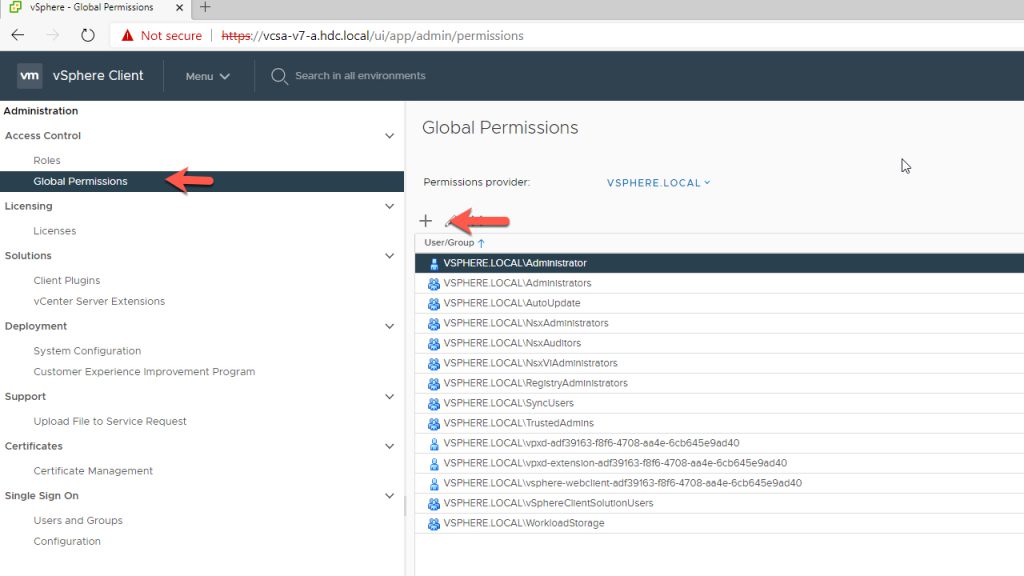
Add Authorized Domain Users / Security Groups
- Under Administration Click on Global Permissions
- Click on the + icon and Add the User / Security Group
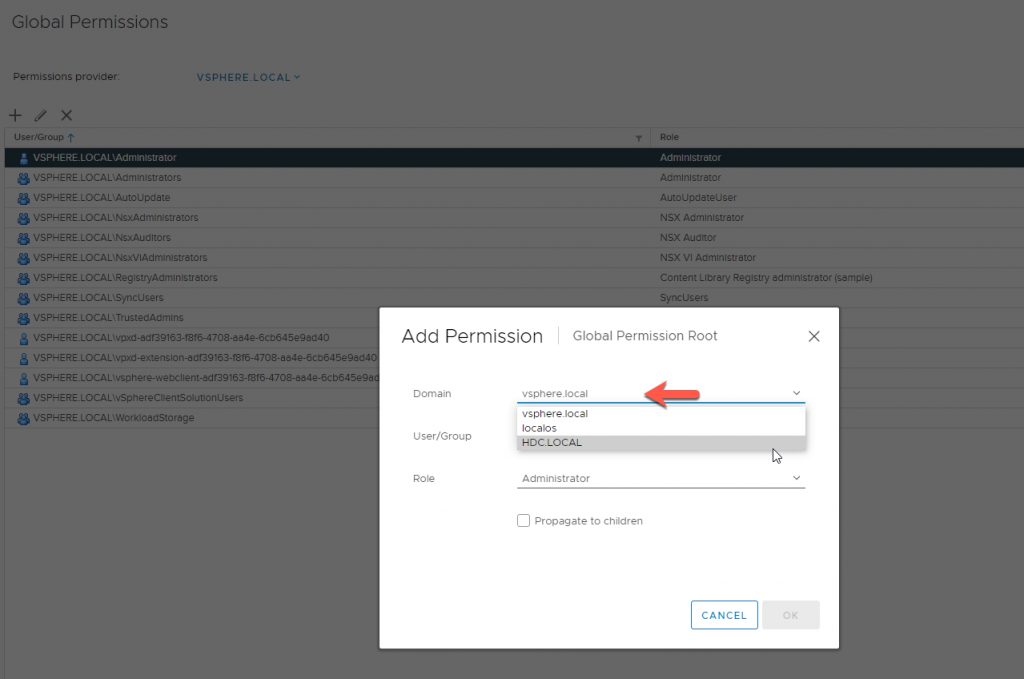
Click the Domain Drop Down Icon
- Select your Domain Name
- Add your Users / Security Group
- Select the Role
- Tick the ‘Propagate to Children
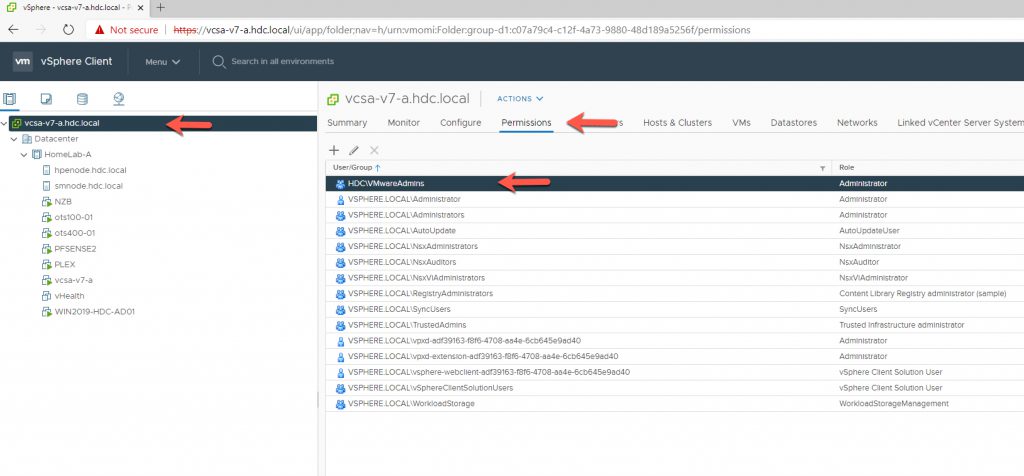
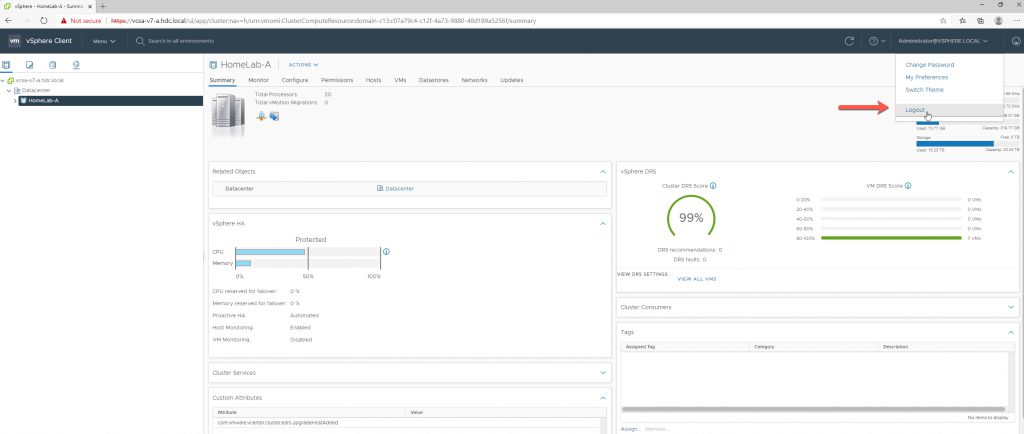
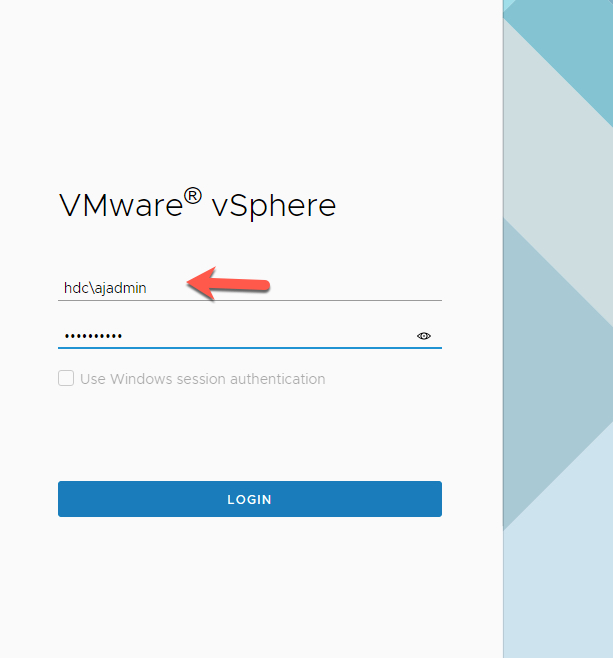
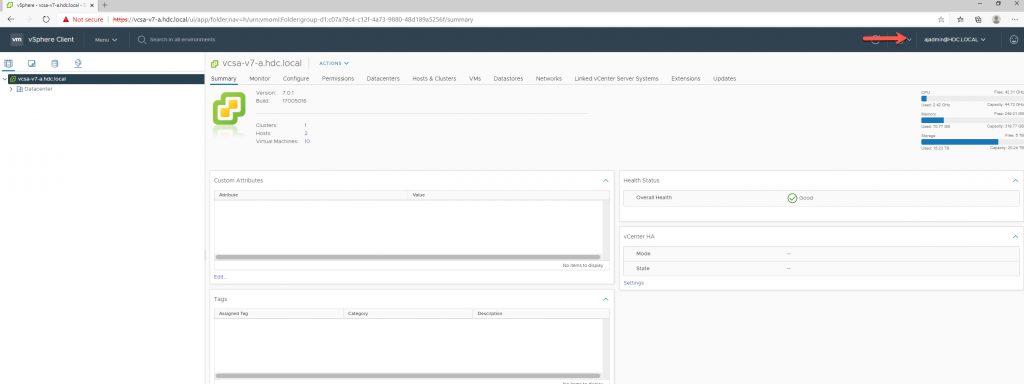
Now that you have added your authorized users / Security Group, lets log out using the ‘Administrator@vsphere.local’ and use an Authorized AD user.