I recently re-deploy my ‘Home Lab’ and decided to document the entire process. I realize there are several deployment guides on the InterWebs, but here I will be sharing some of the post-installation tasks I do after the basic install of vCenter.
My Home Lab consists of some Intel NUCs that are running NetApp Ontap Select for storage and will share the steps on building them in another post.
I also have a couple of compute servers that I will be using to deploy VMware vCenter 7.0.
I recently signed-up for VMUG Advantage, and highly recommend if are not a member, you check them out. The VMUG community is a great way to meet, interact, and learn with like-minded people.
One of the great benefits of becoming a VMUG Advantage member, is you get access to download bits and licenses for your home lab.
In my setup I will be deploying vCenter vc01.hdc.local and vc02.hdc.local for a Production and Disaster Recovery scenario.
Make sure that your vCenter Appliance names are registered and resolve with FQDN.
After obtaining the VMware vCenter 7 appliance OVA, mount the ISO and click on the installer.
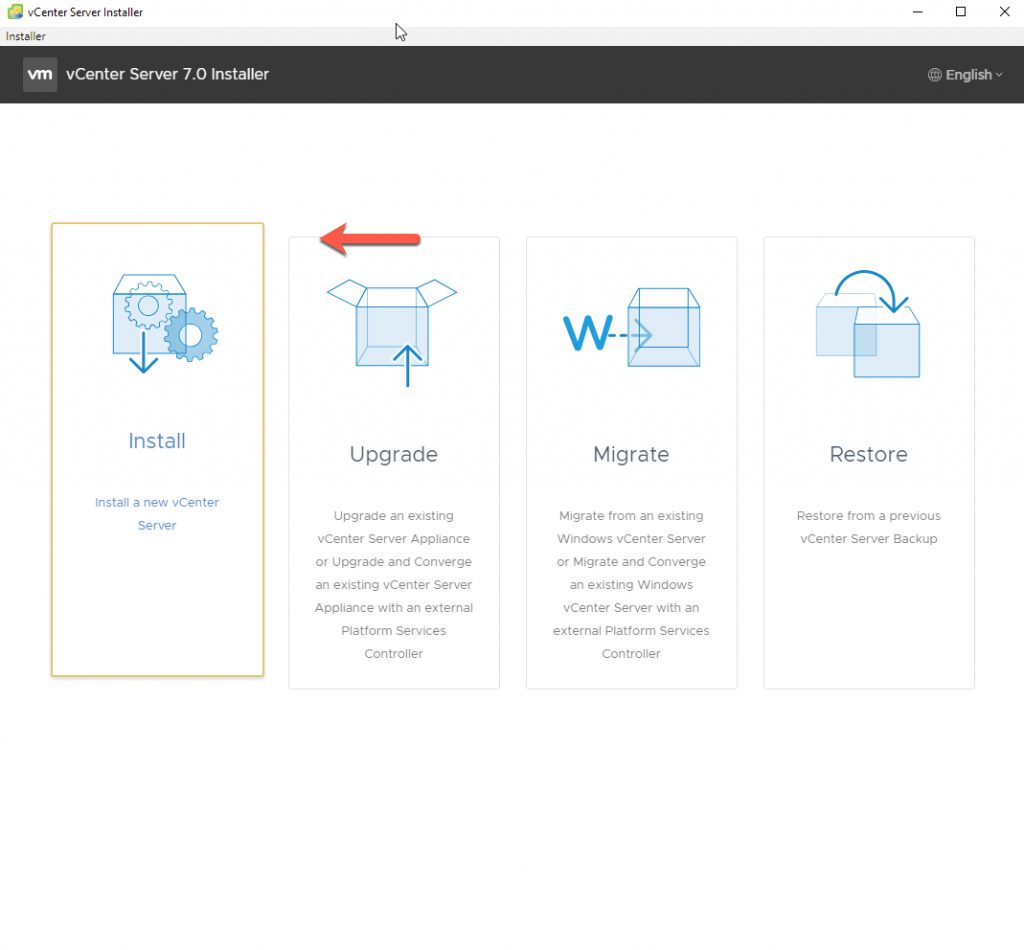
Next
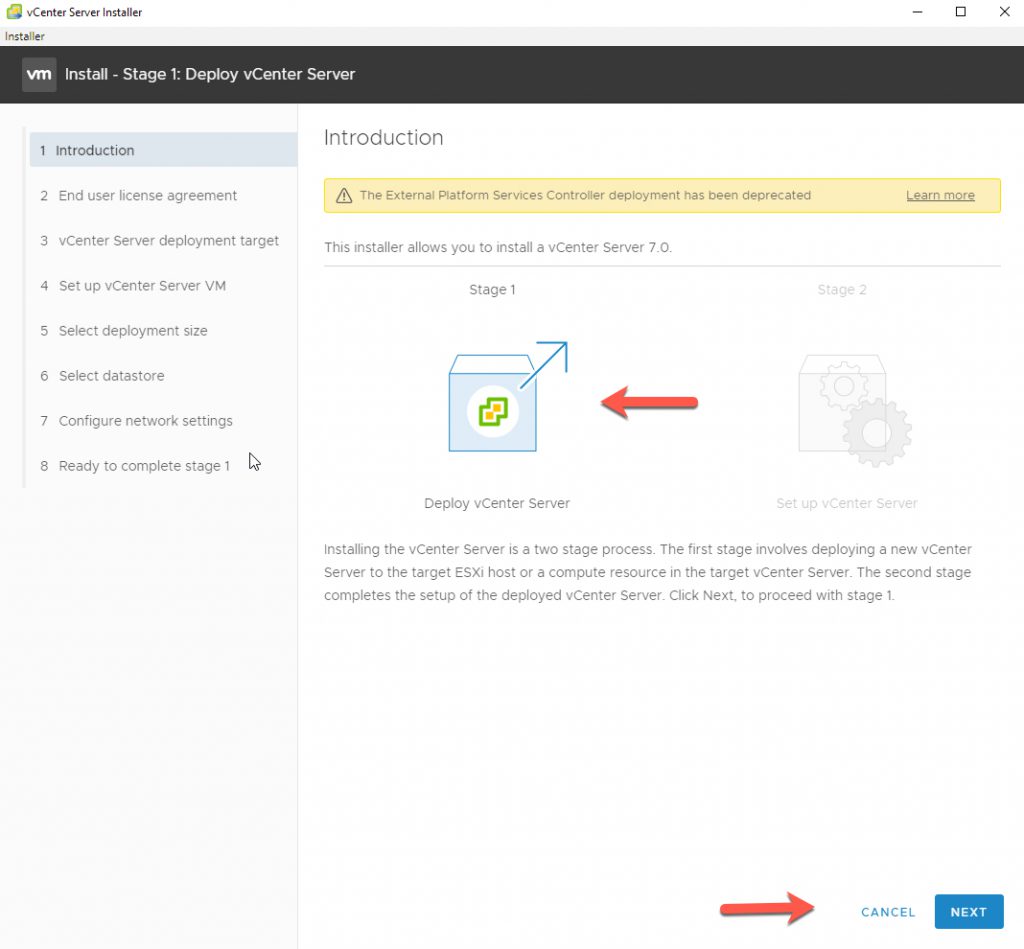
Notice the vCenter 7 only offers an embedded PSC > Click Next.
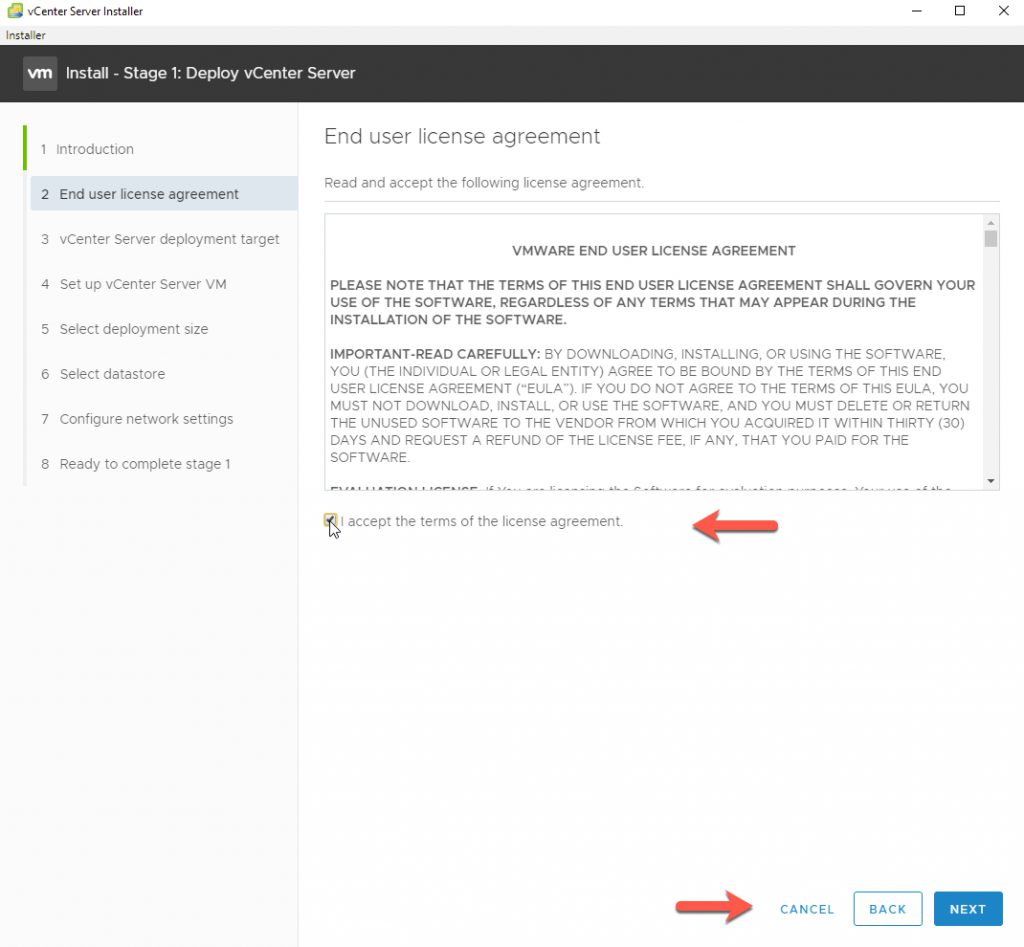
Accept License Agreement, then click Next
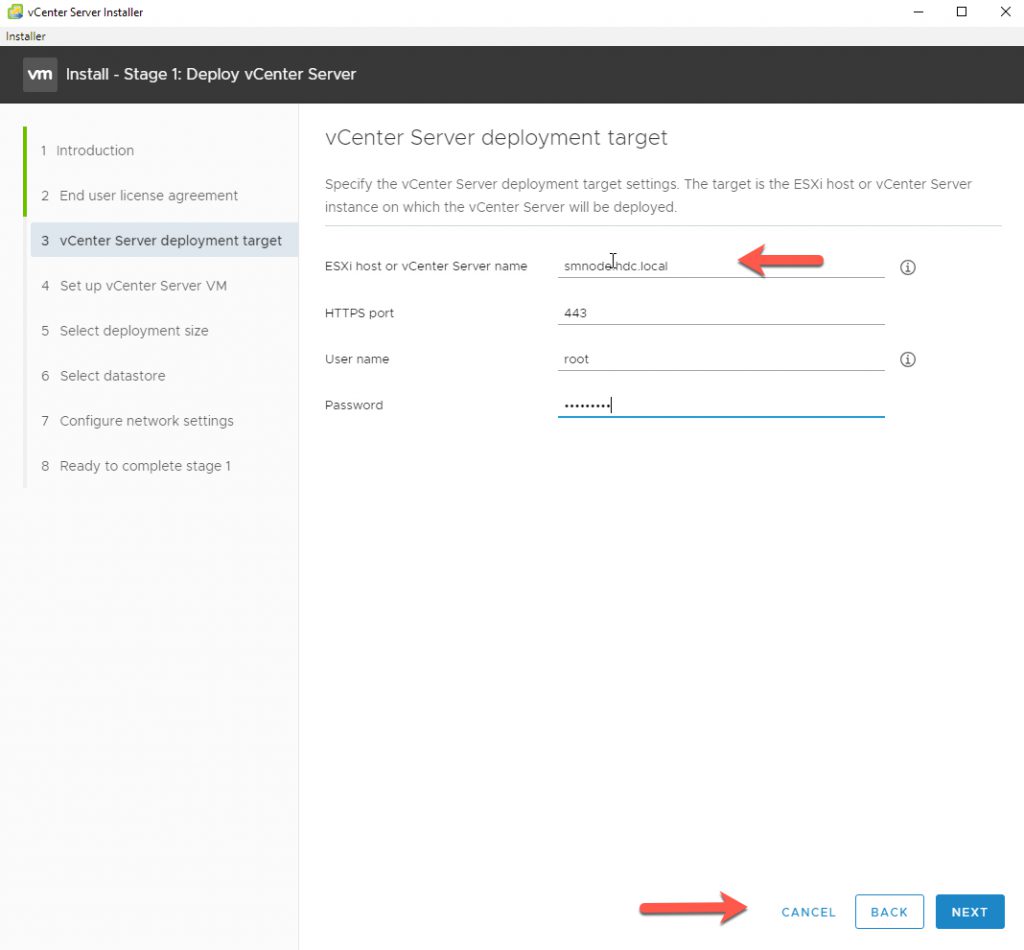
Enter the FQDN name of the ESXi host where you want to deploy vCenter 7
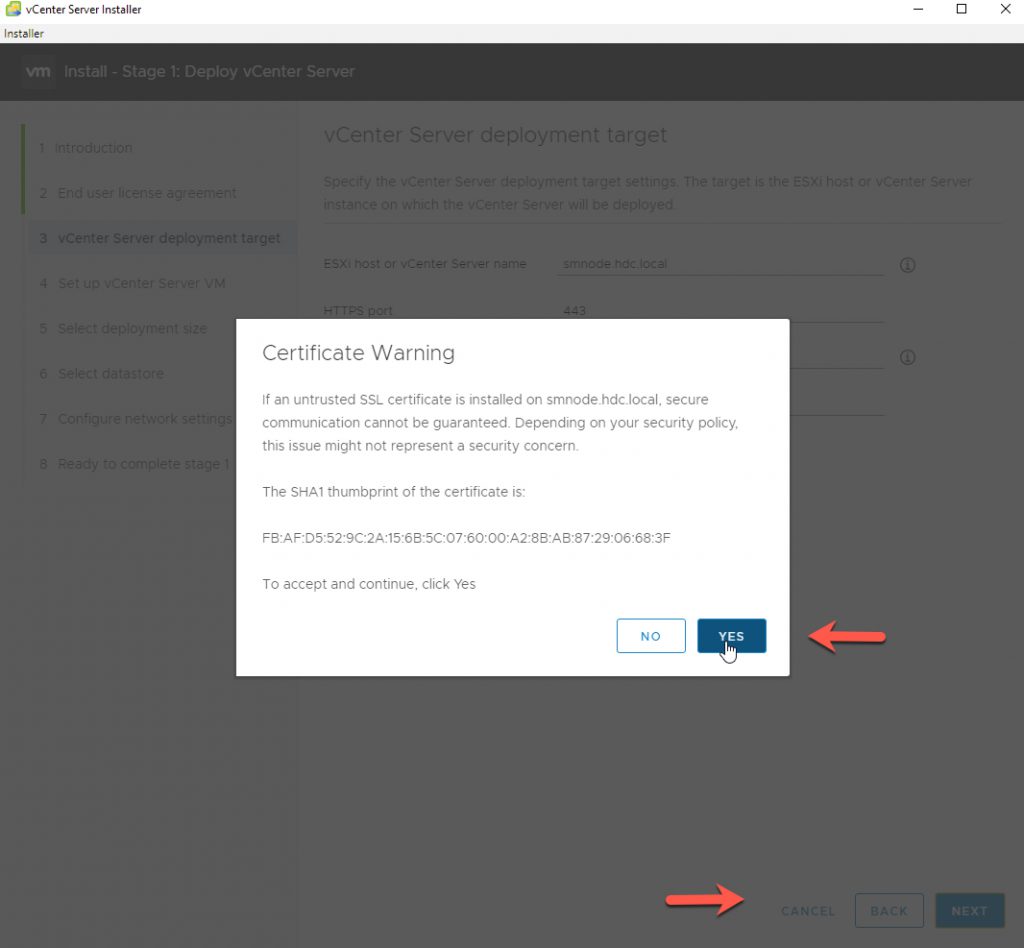
Accept the Certificate Warning, then click Next
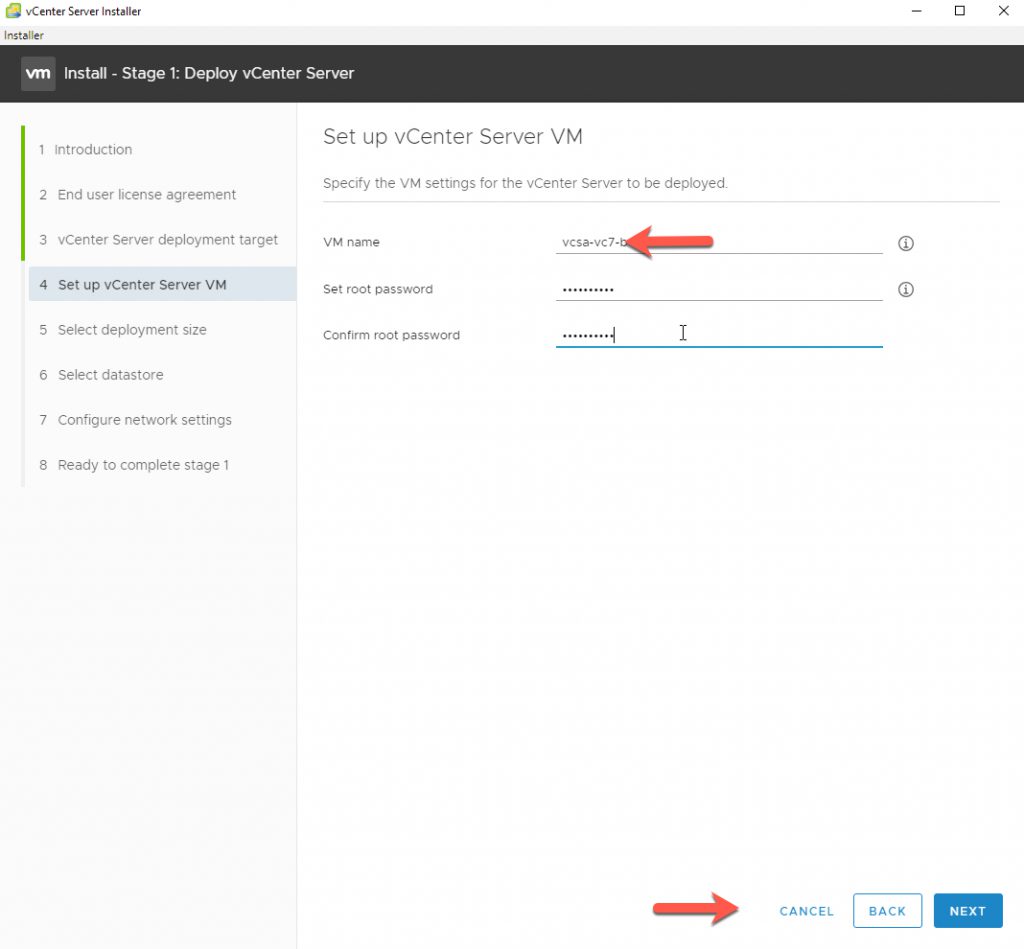
Enter the FQDN name for the Appliance and create a secure password, then click Next
Select the deployment size, for my lab ‘Tiny’ is sufficient. Click Next

Select the target Datastore, I am selecting my NetApp Ontap Select, I will demonstrate how to deploy a NetApp OTS in a future blog post, Click Next

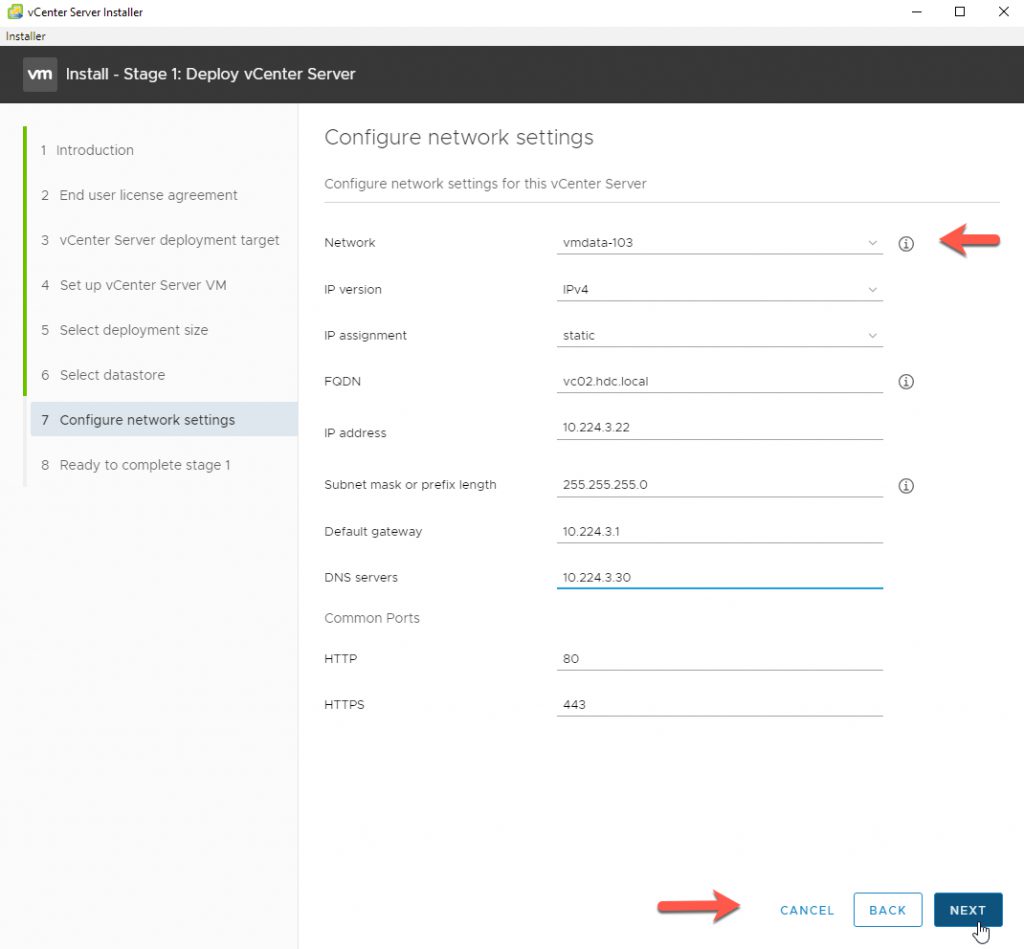
Input your network settings for the appliance, then click Next
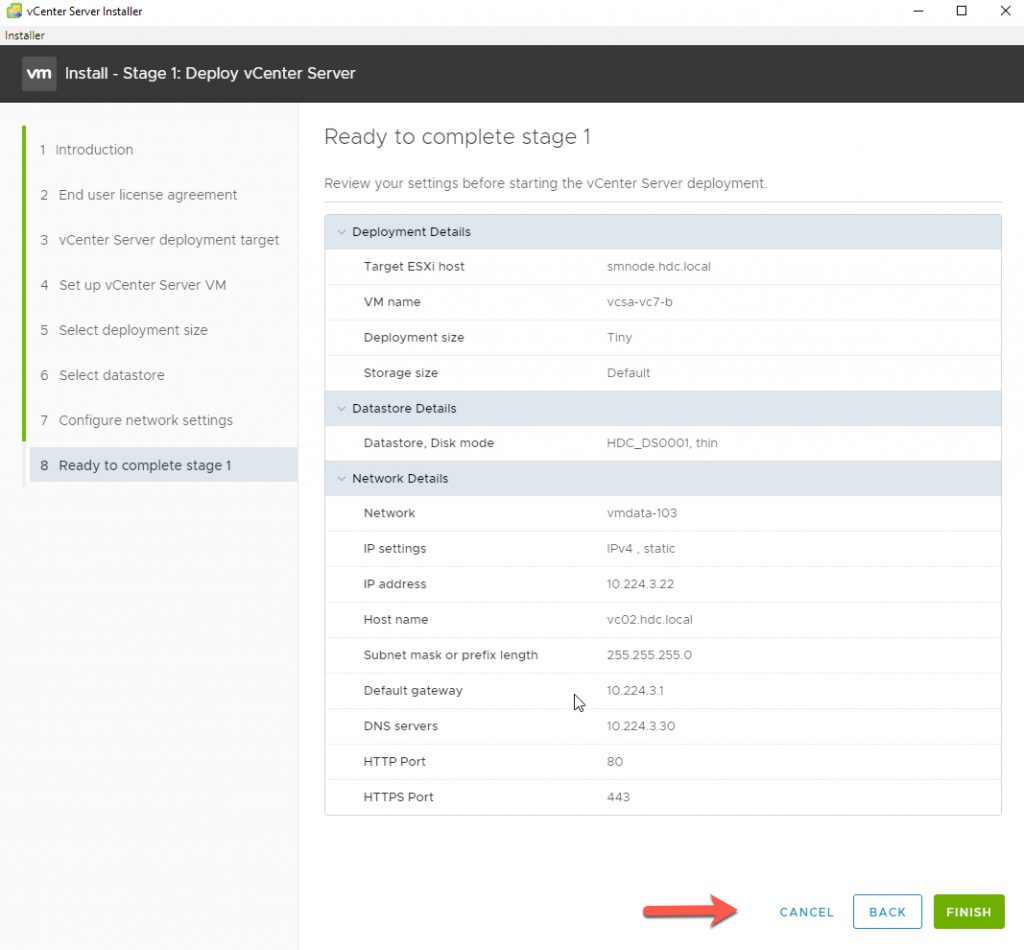
Validate your setting and make any changes if required, otherwise, click Finish.
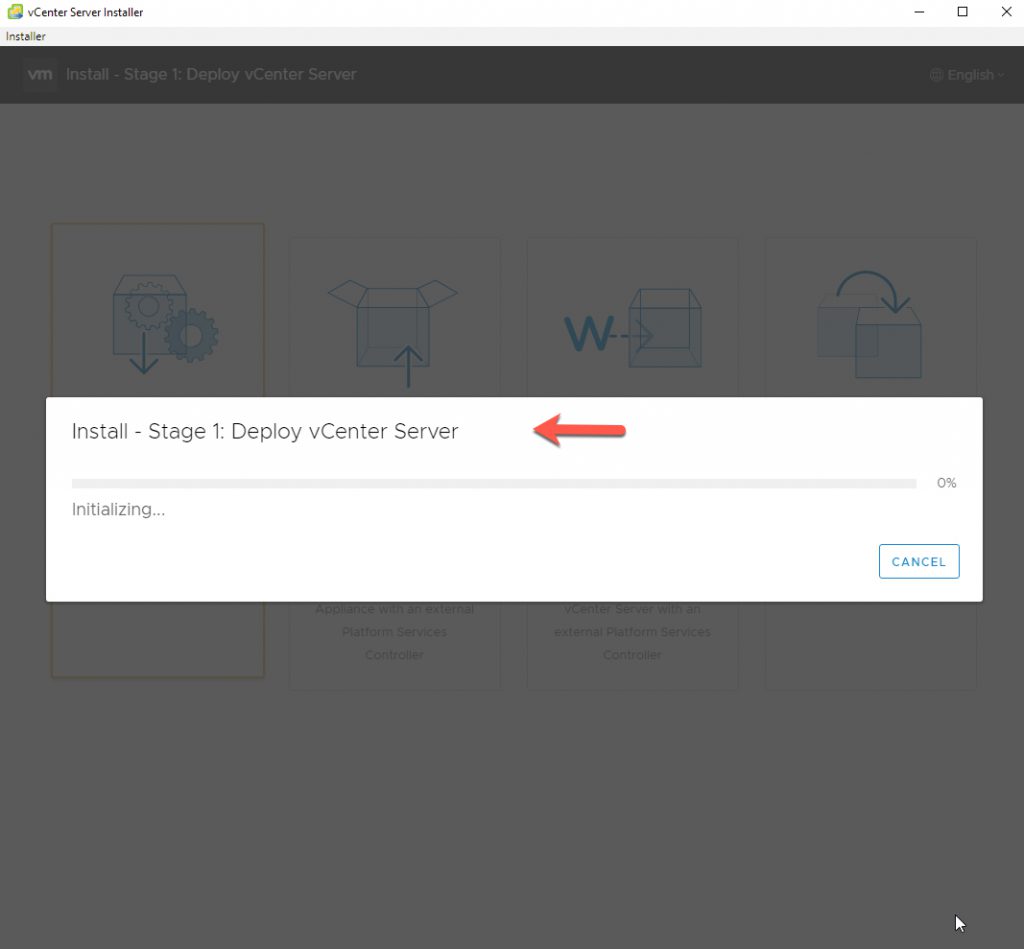
The Stage1 of your VMware vCenter starts, monitor the progress.
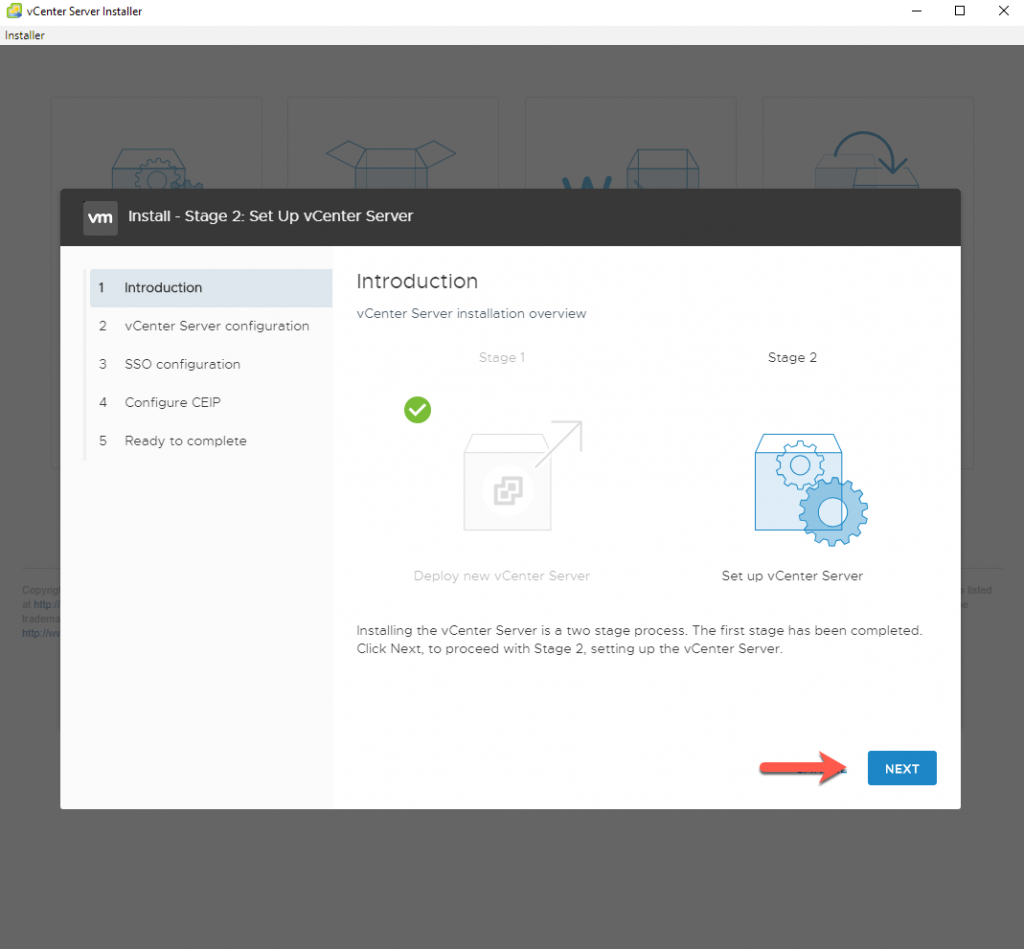
Once Stage1 completes, you can start Stage2.
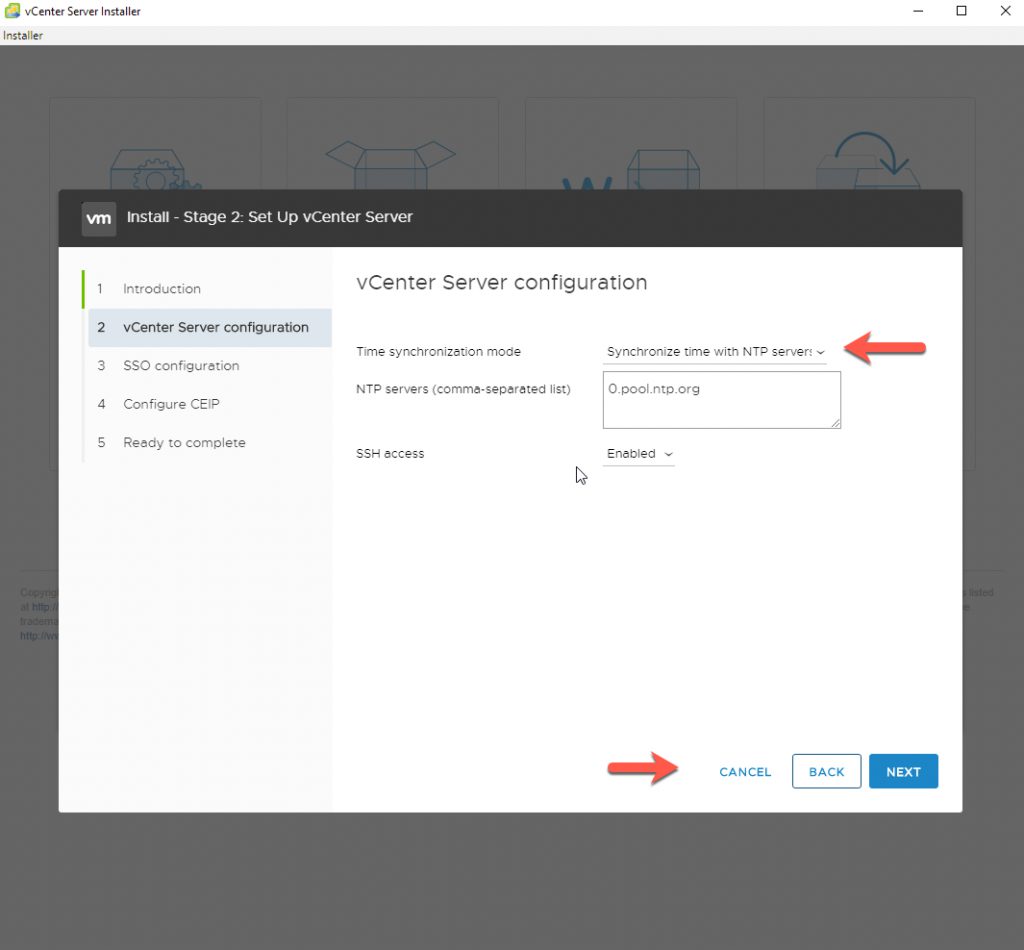
Start the Appliance Configuration, Select NTP, and enter the NTP Server IP, for that, I am using 0.pool.ntp.org > click Next
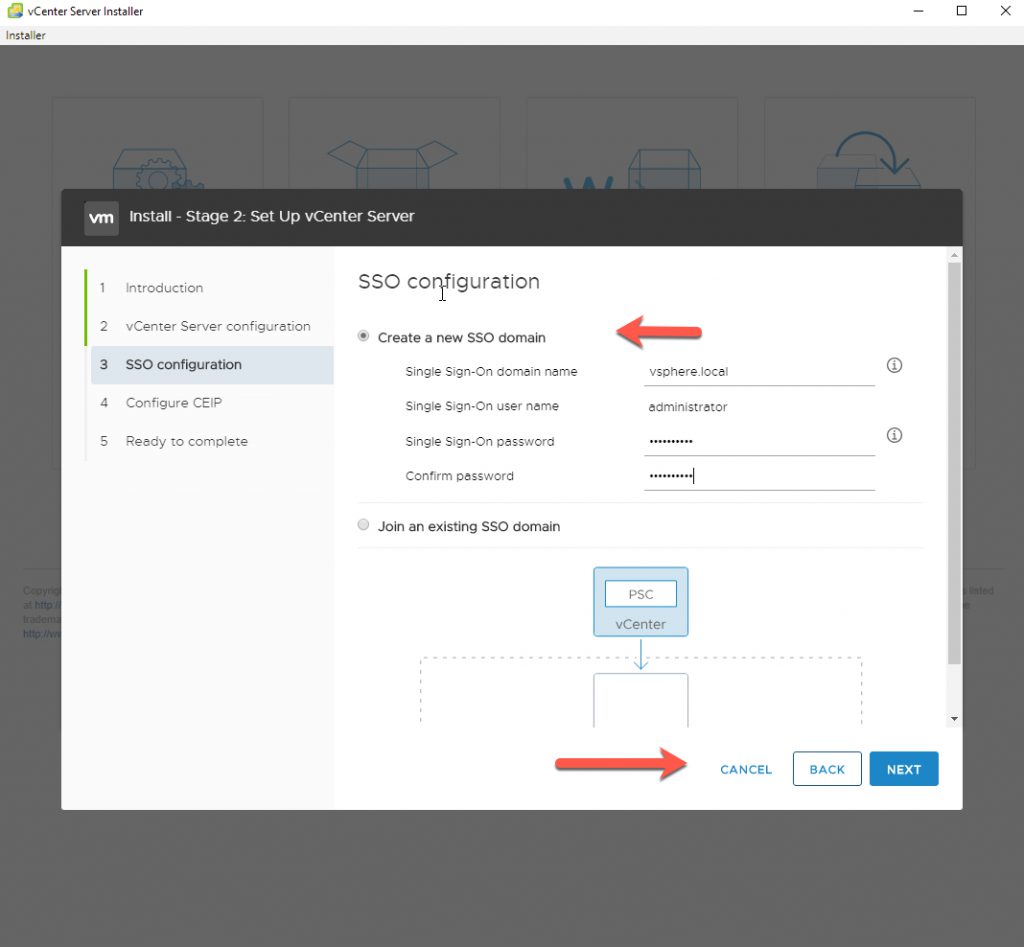
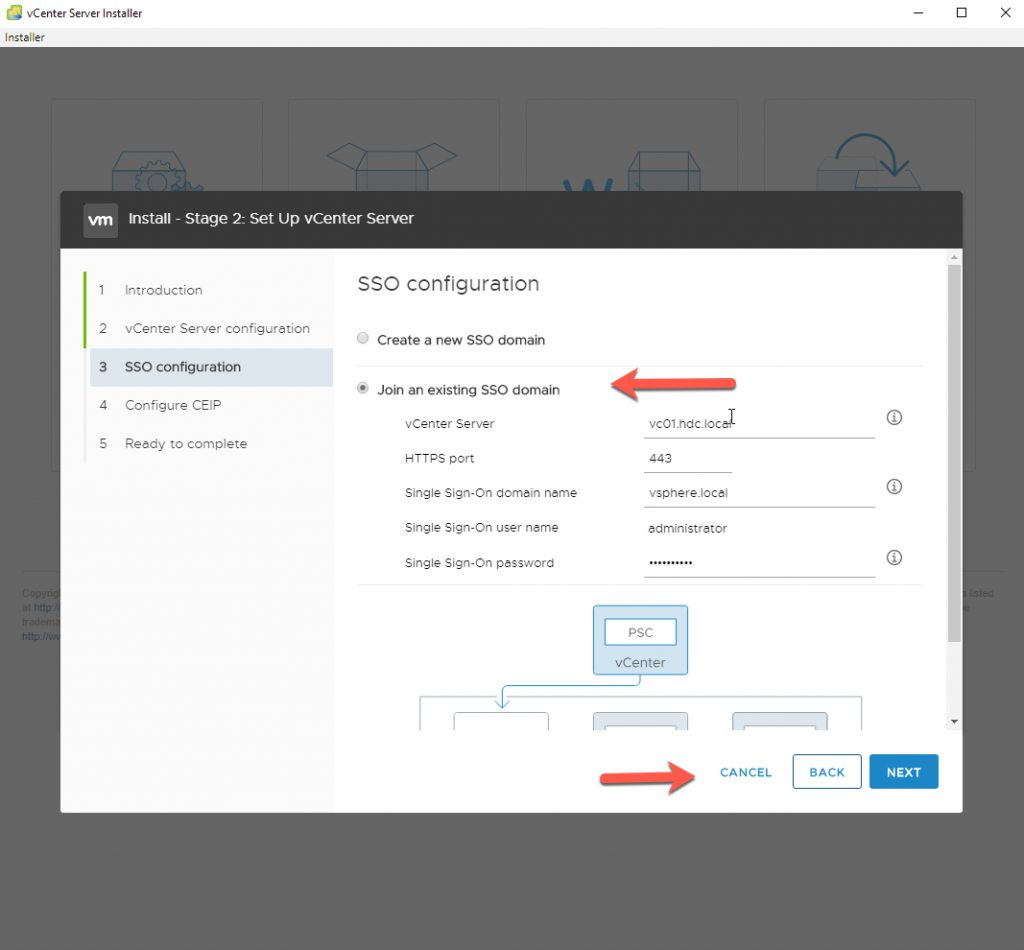
Setup SSO configuration, I am going to create a new SSO domain for vc01.hdc.local, and then when I deploy my second vCenter appliance I will join vc02.hdc.local to the existing SSO domain.
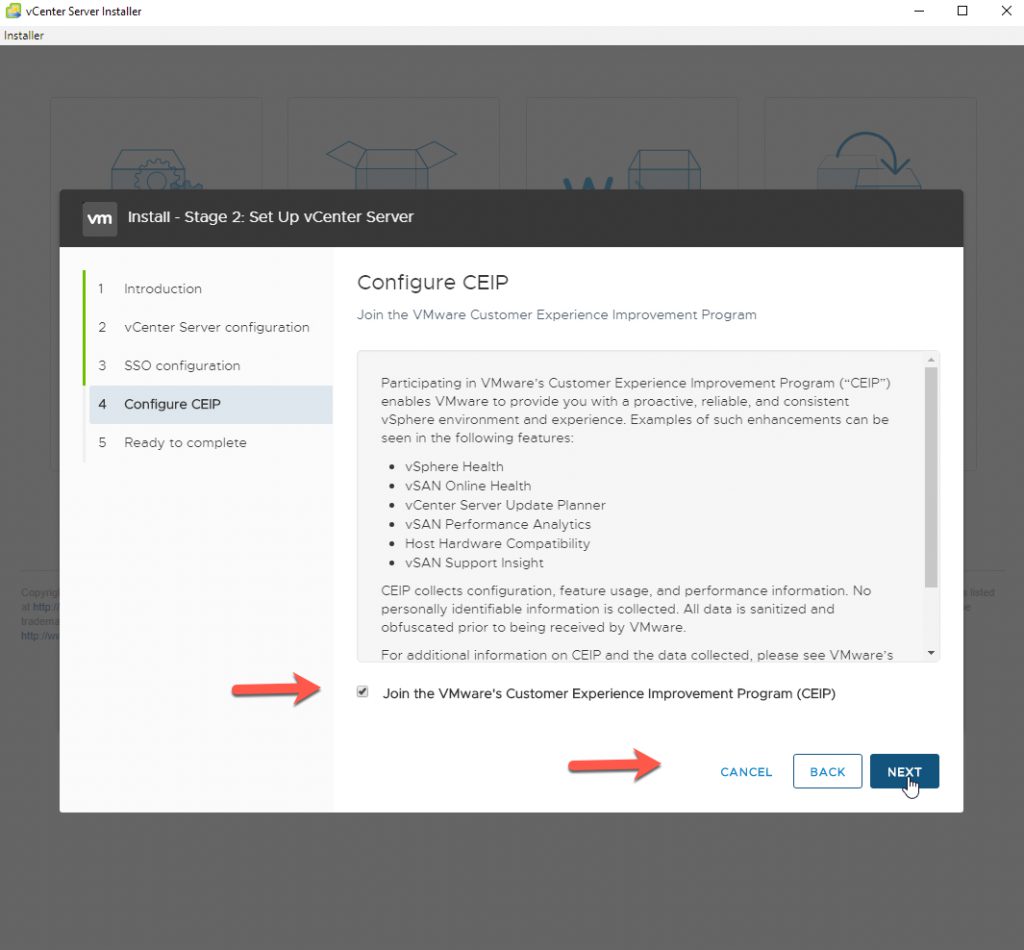
For additional benefits and features accept the CEIP and click next.
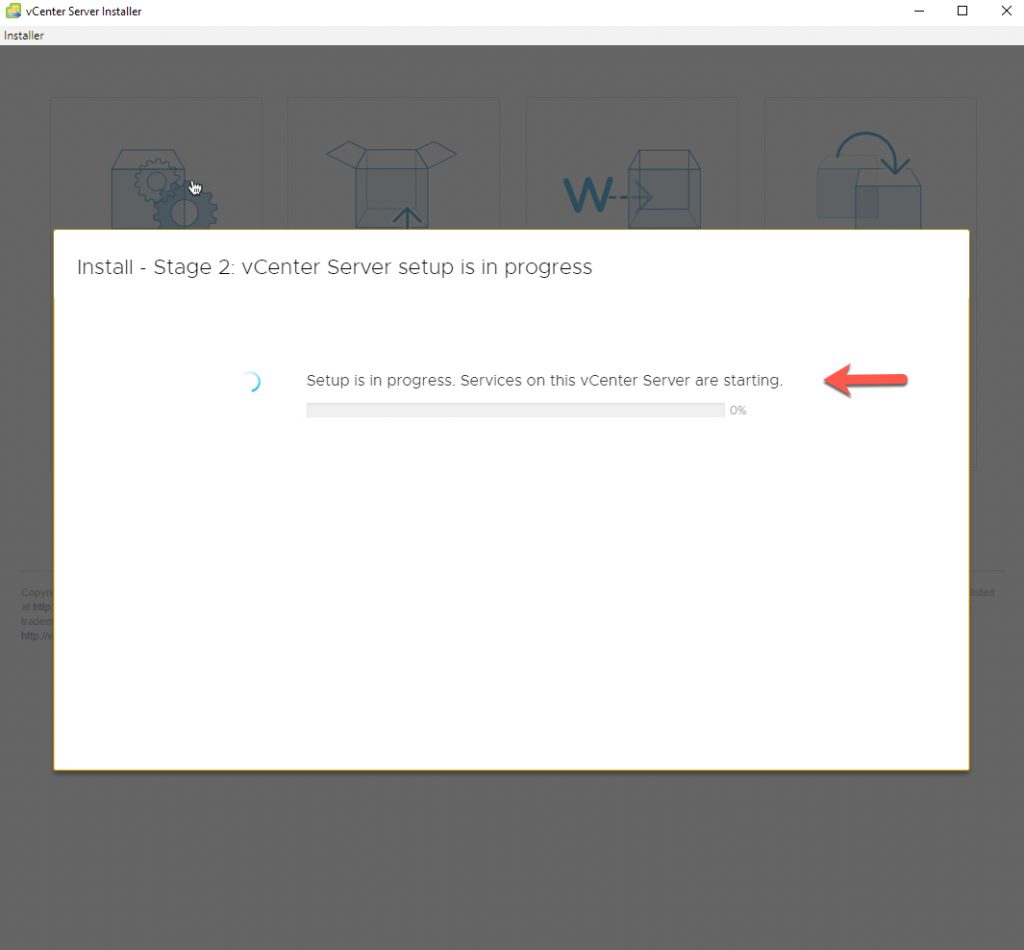
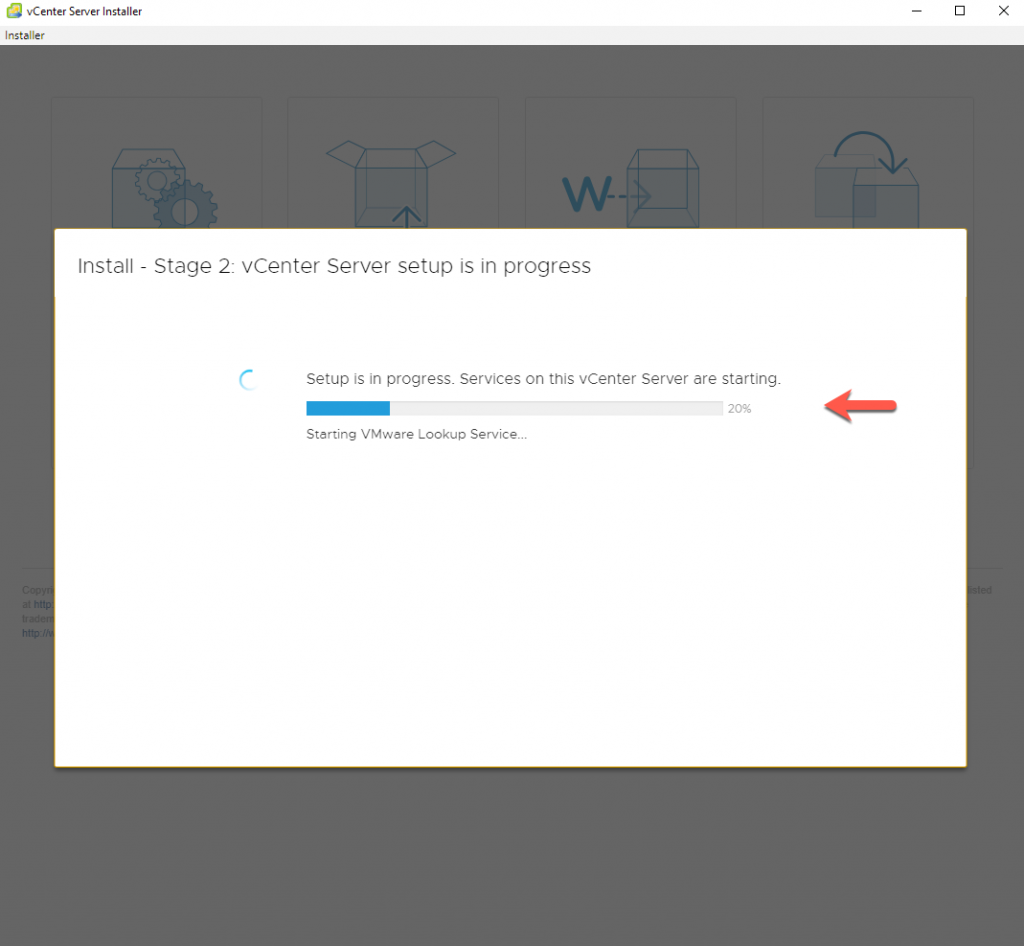
This starts the deployment of your vCenter 7

Monitor the deployment of your installation.
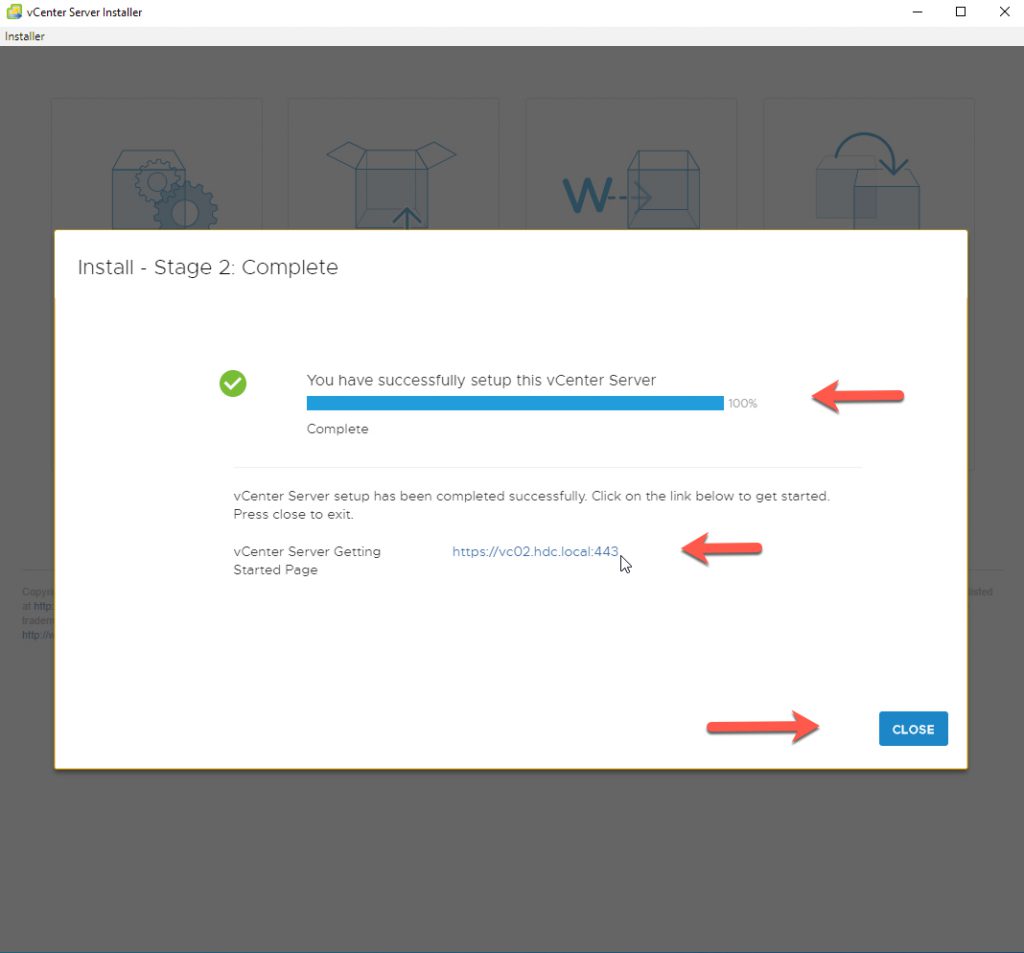
After the deployment is complete, you can access your newly deployed VMware vCenter 7. You can click on the provided hyperlink and click Close.
This is a fairly easy installation process, make sure to check out my blog post on ‘basic vcenter configuration’