
As I mentioned in a previous post, I am re-deploying my entire home lab and wanted to document the entire process.
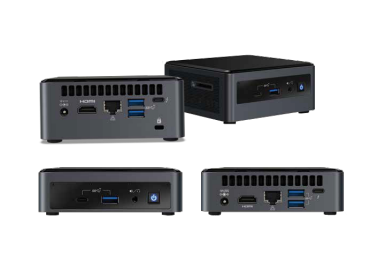
I have been using these Intel NUCs for the past several years to help build out my home lab and highly recommend you do the same.
Not only are they useful for building out your VMware environment, but as the topic of this blog post, they are great for running NetApp vSIM and perfect for ONTAP Select (OTS).
You can have NetApp ONTAP in the palm of your hands, giving you all the features at your fingertips. As you can see its small enough to have several in your home office and easy enough to throw in your suitcase on those long business trips with those long nights in hotel rooms.
If you are studying for NetApp Exams or wanting to practice with some of the features of ONTAP (ONTAP Upgrades, CIFS, NFS, SnapMirror), look no further.
Deploy ONTAP Select (OTS)
I am using one of my Intel NUCs to deploy NetApp Ontap Select as a storage device for my VMware environment.
My VMware home lab environment is licensed with VMUG Advantage which gives me the ability to have annual licenses as long as I keep my subscription valid.
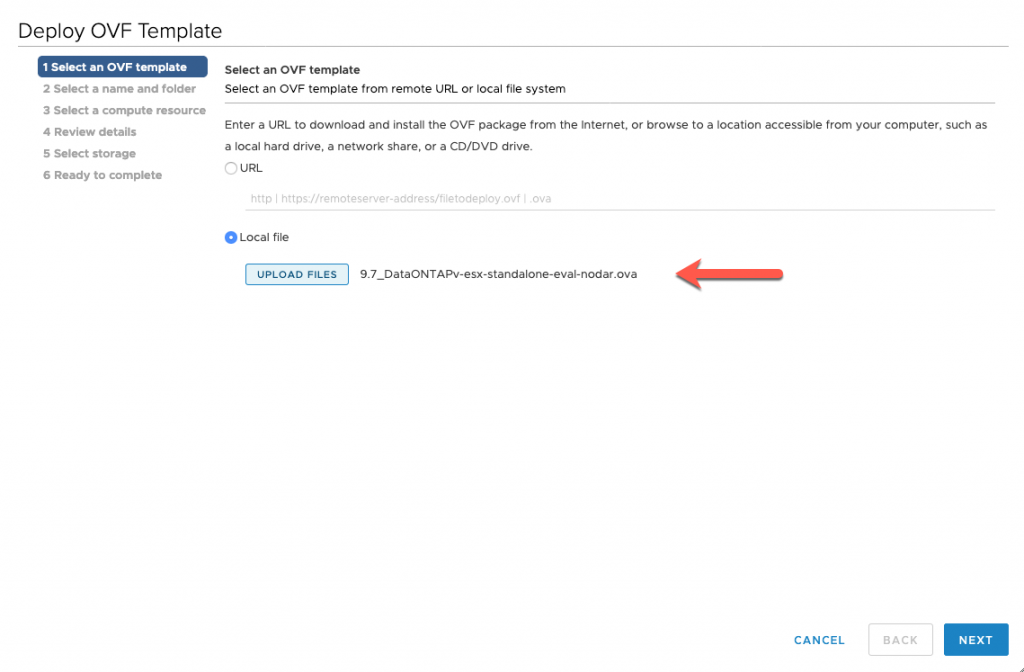
Obtain ONTAP Select
NetApp offers a FREE 90-DAY trial of ONTAP Select
If you have an existing account on the NetApp support site, you can download it from the evaluation section of the support site. If you need to create a guest account, follow the instructions on the 90-day trial link to get access.
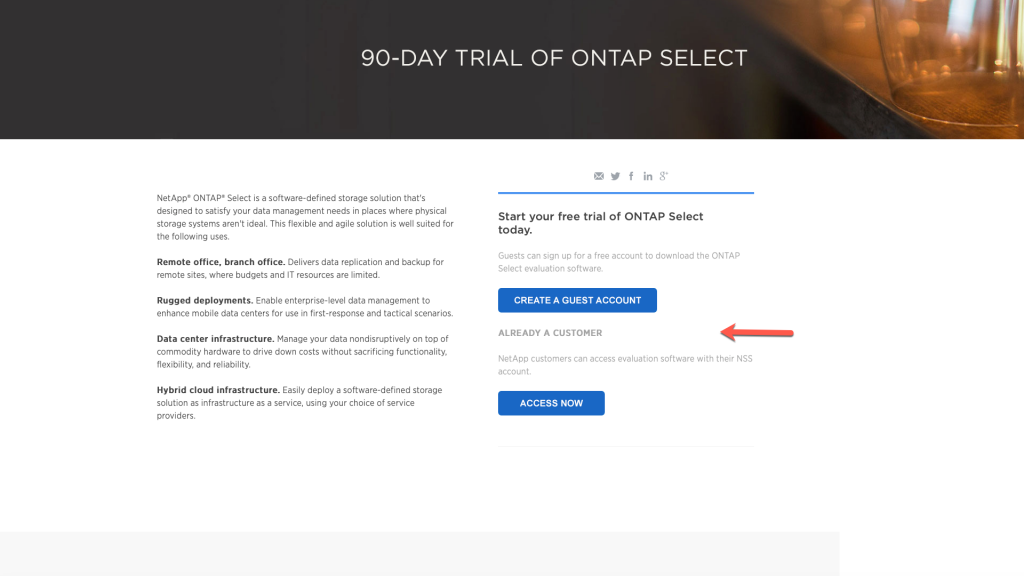
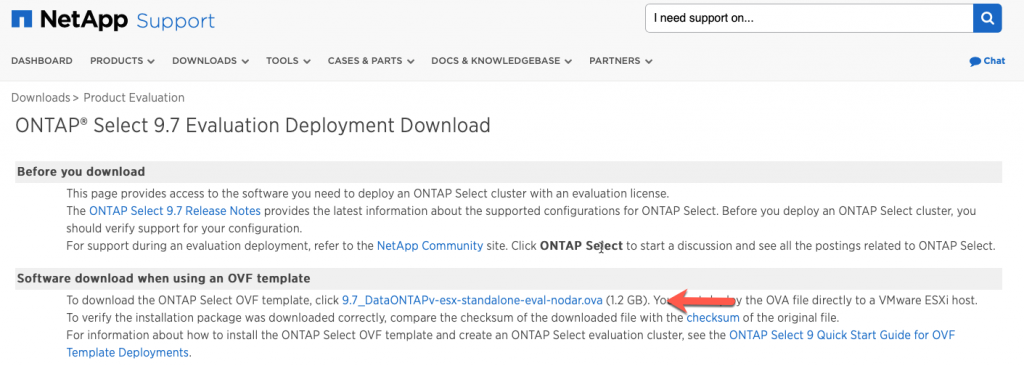
Select the LINK to download the NetApp ONTAP Evalution
After you have downloaded the OVA, you just deploy it like any standard OVA.
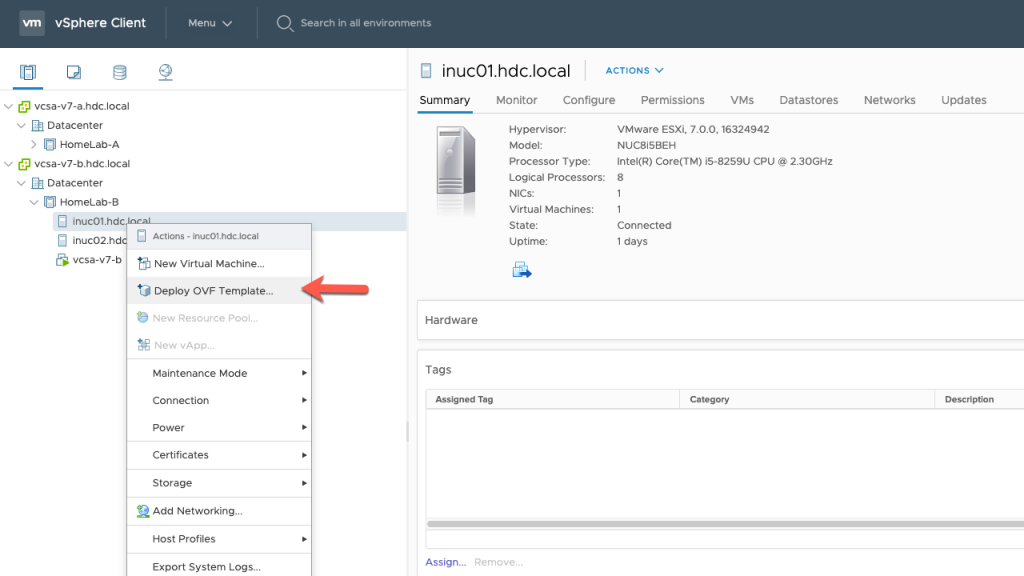
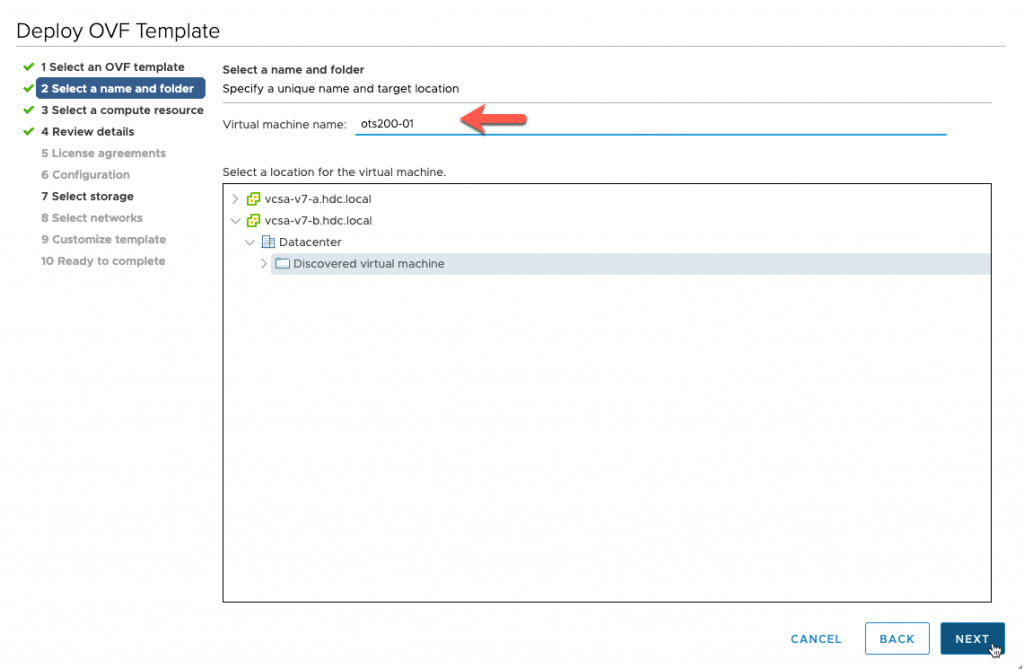
Select the VM name and folder
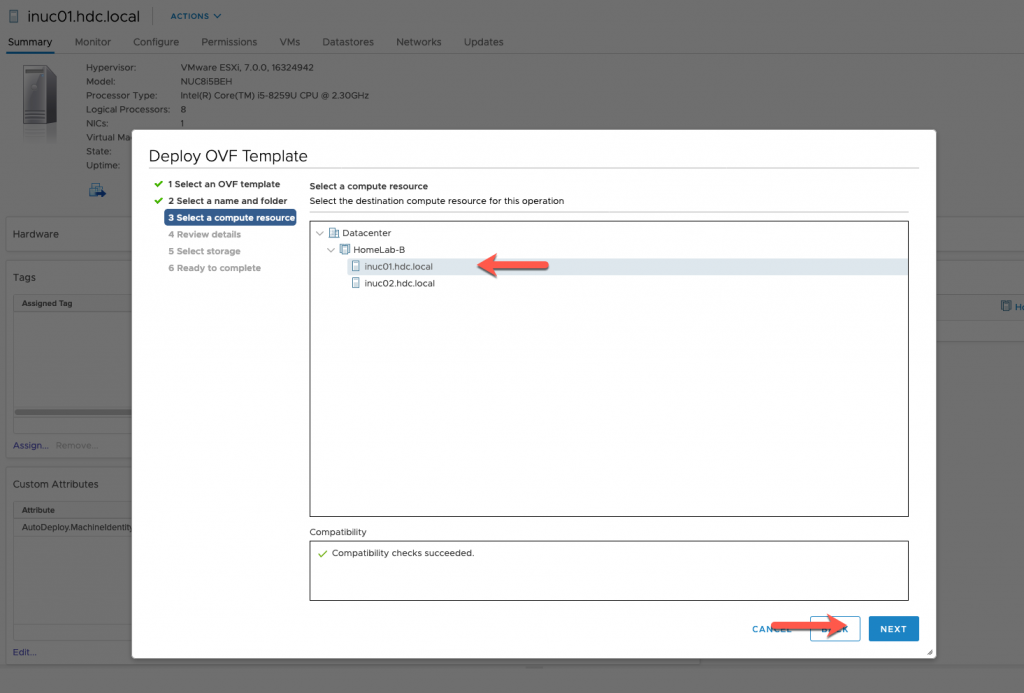
Select the Compute Resource
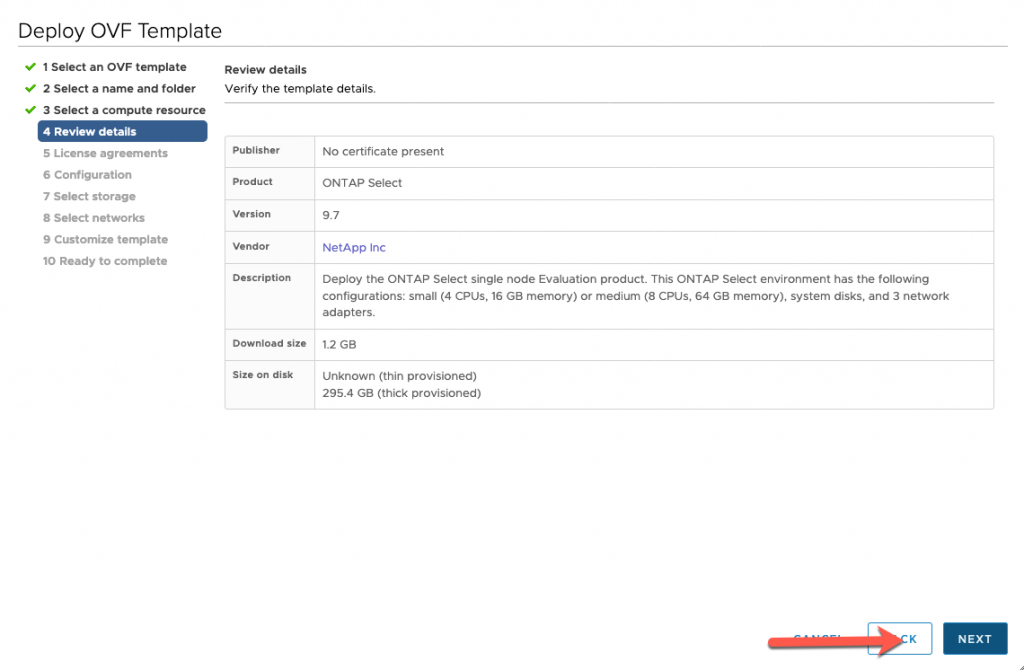
Review the Details
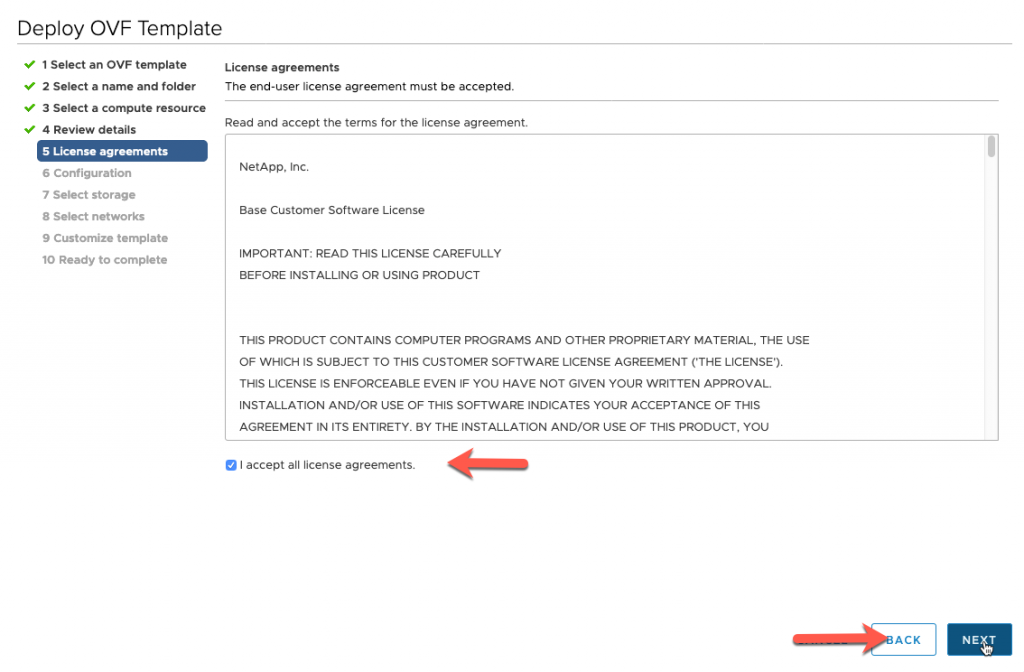
Accept License Agreement
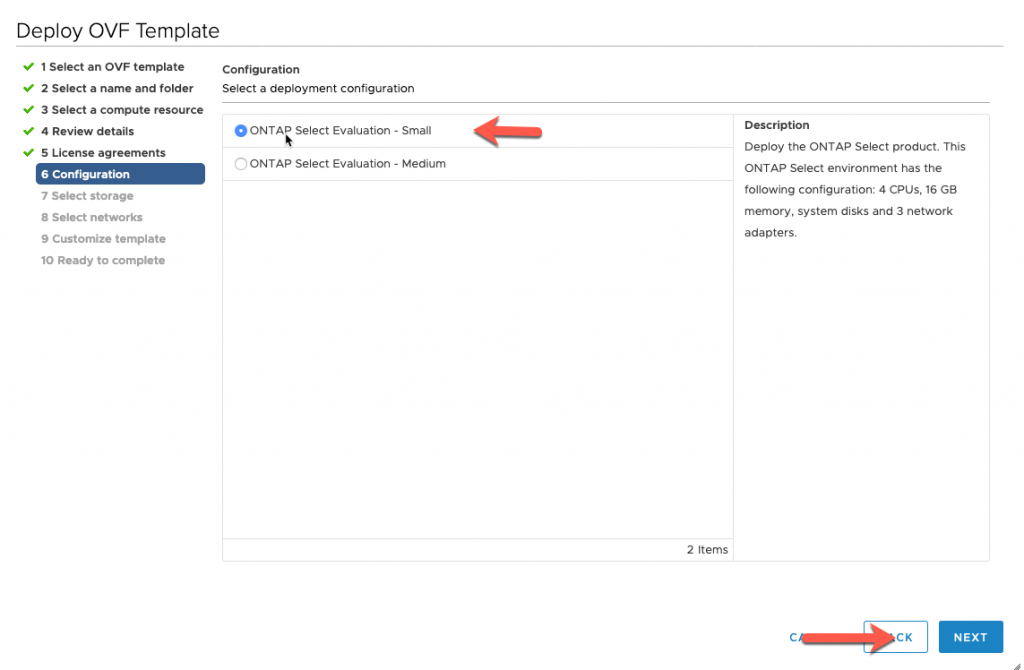
Select a Deployment Configuration, I am choosing small
Create VM Name, since this is a Single Node deployment, I am choosing to place “-01” at the end of my VM name.
Select Storage, I have an NVME drive where I will be placing OTS and this should boot pretty fast.

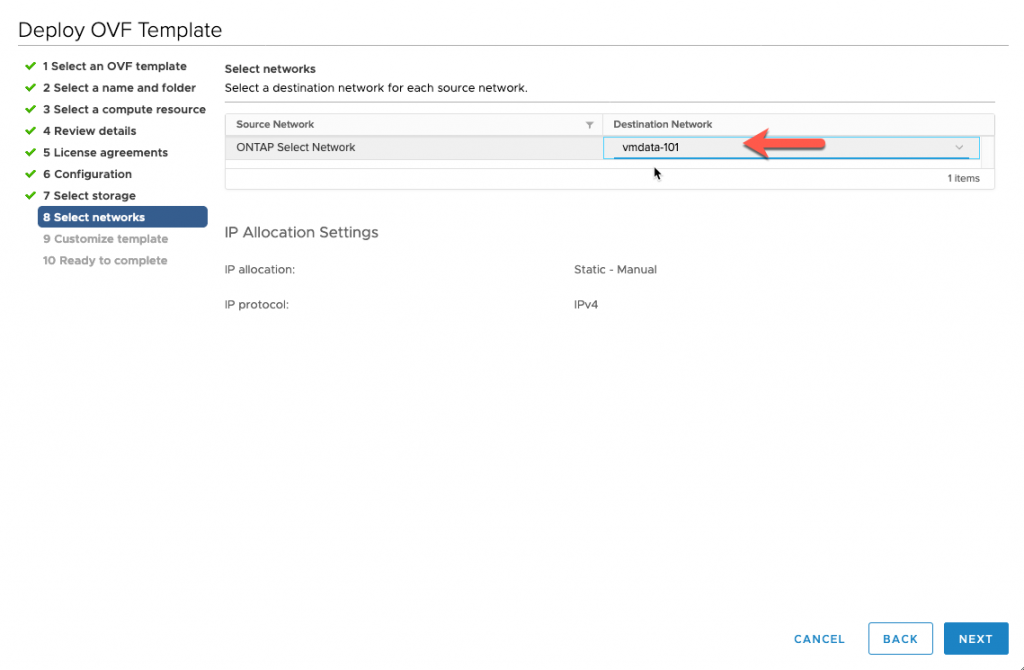
Select you Network, during the deployment, I am choosing a VLAN 101. I will demonstrate in another video how we can modify the interface to allow multiple vlans.
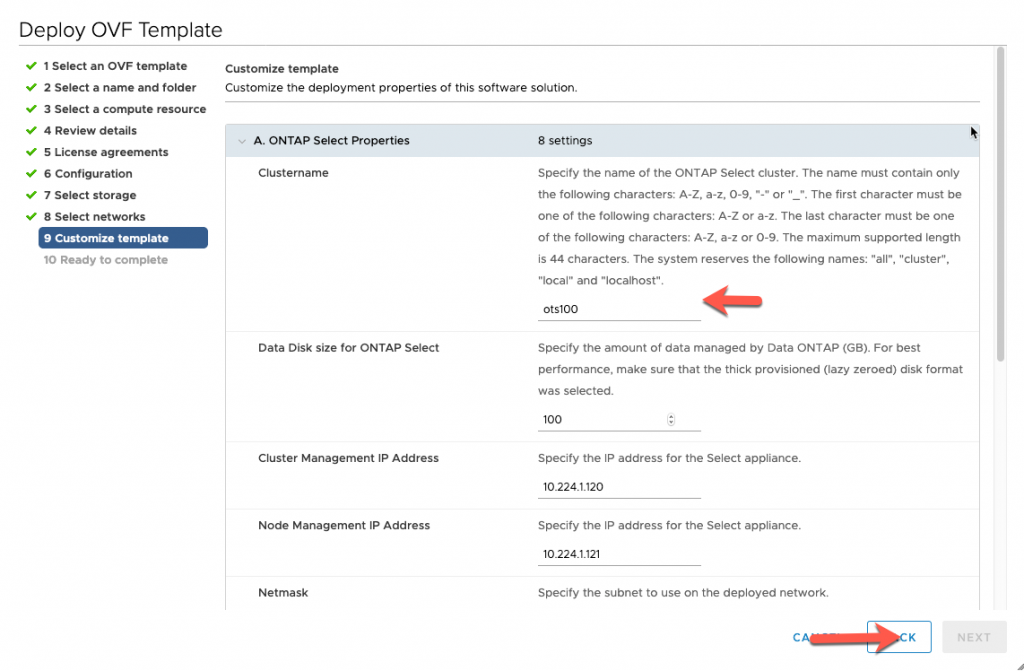
Customize the Template Properties
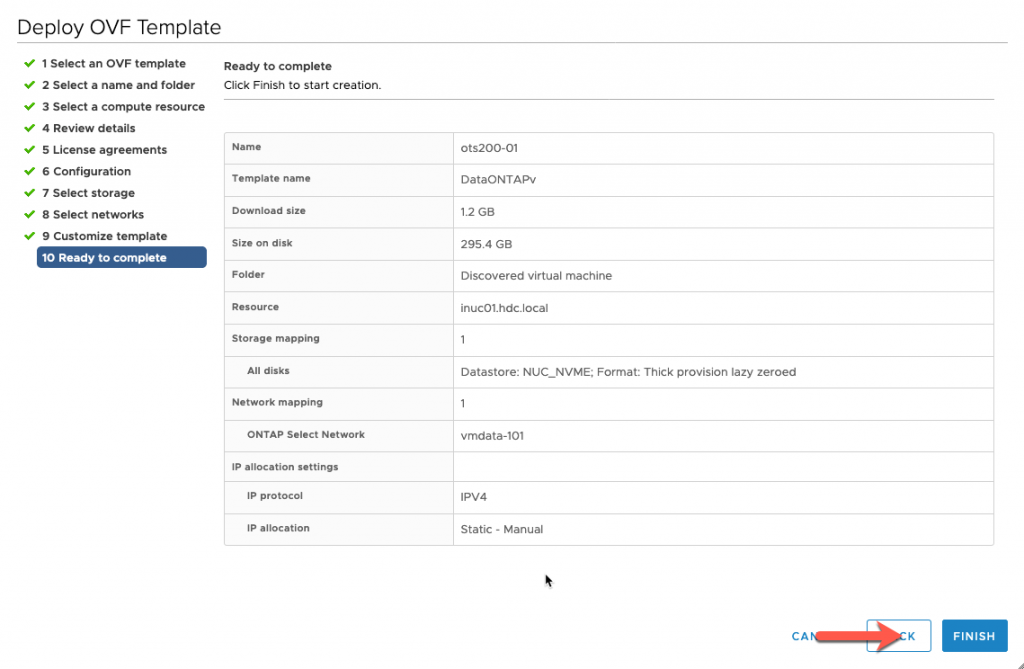
Validate Setting then Click Finish
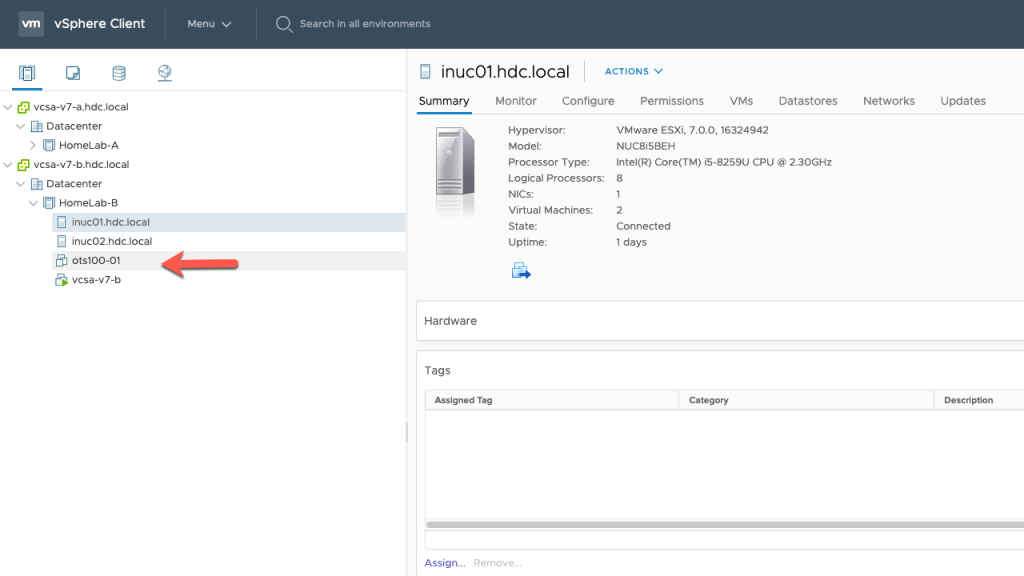
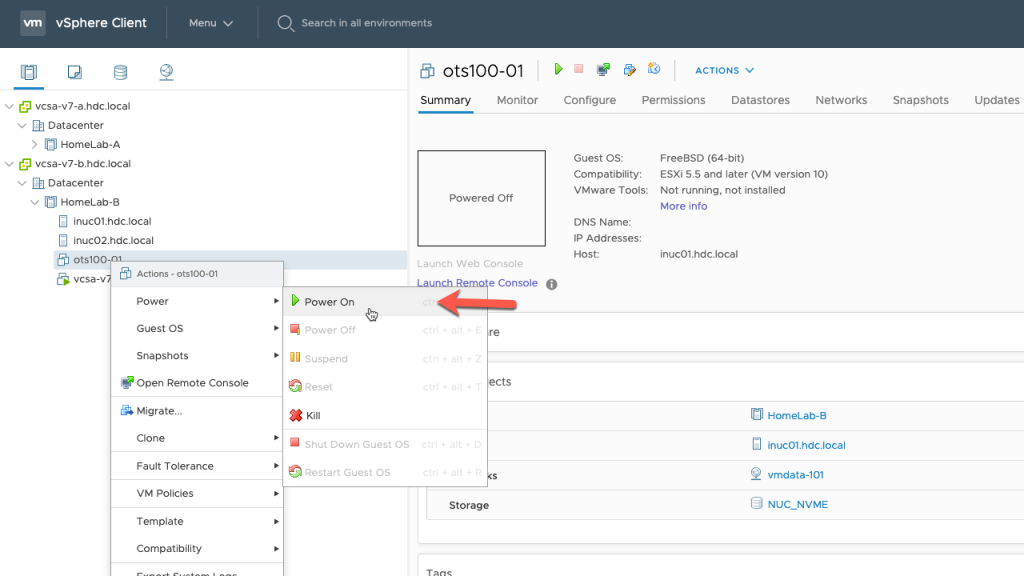
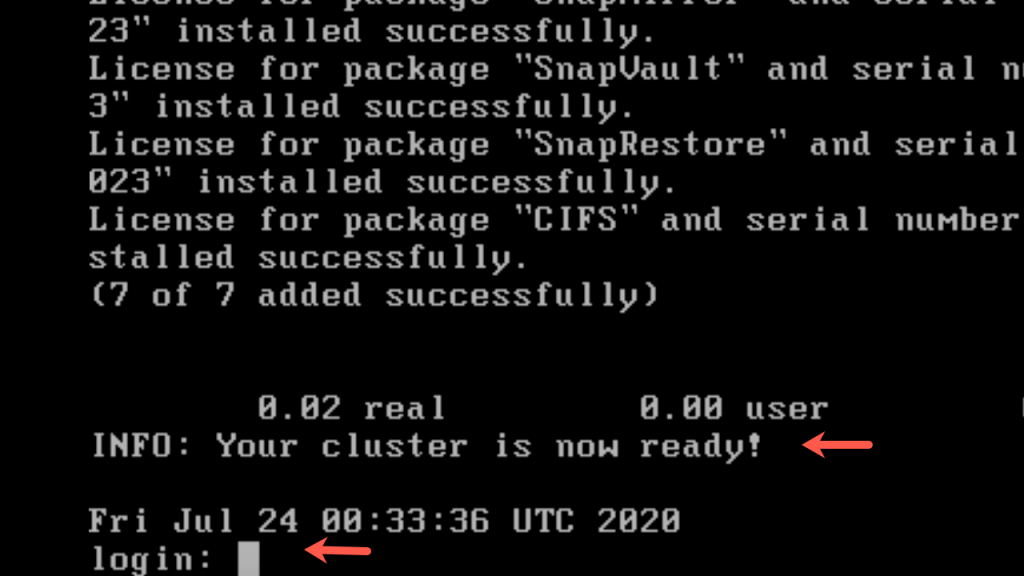
After the OVA deploys, Power on the VM
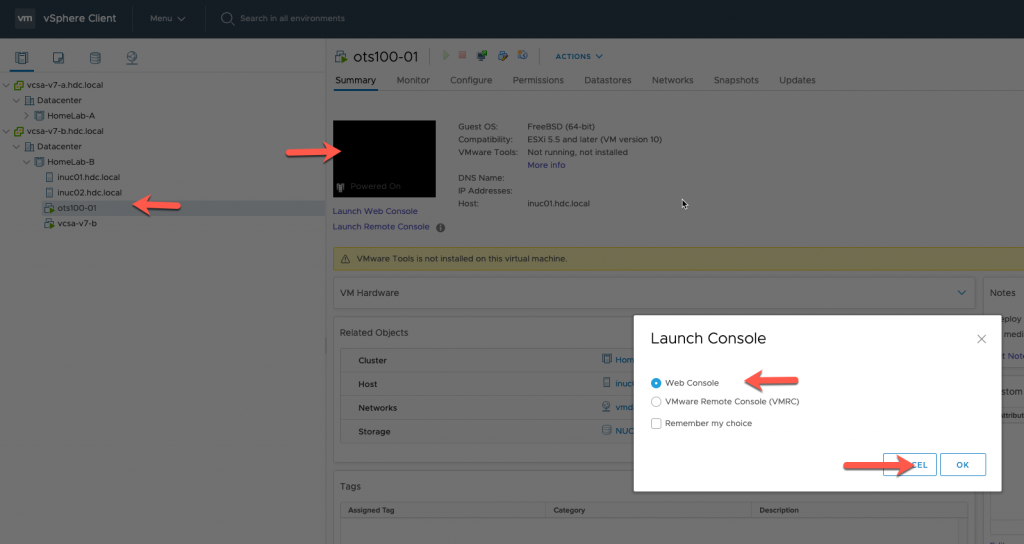
You can monitor the boot process by launching the webconsole
You have successfully deploy NetApp ONTAP Select
Login with your credentials
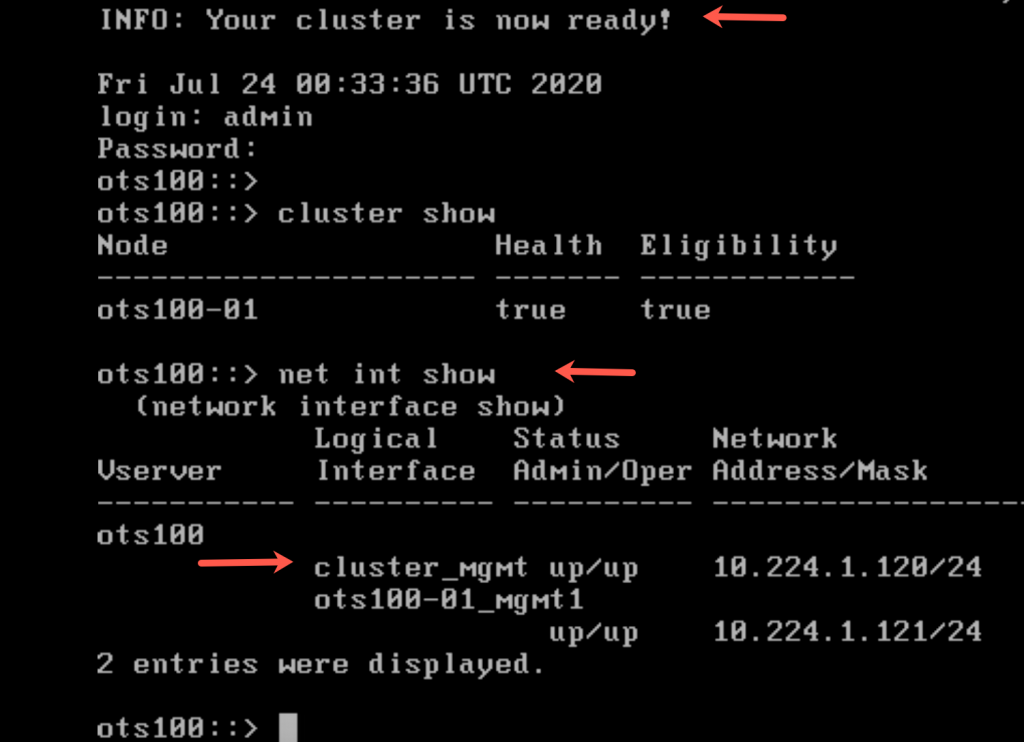
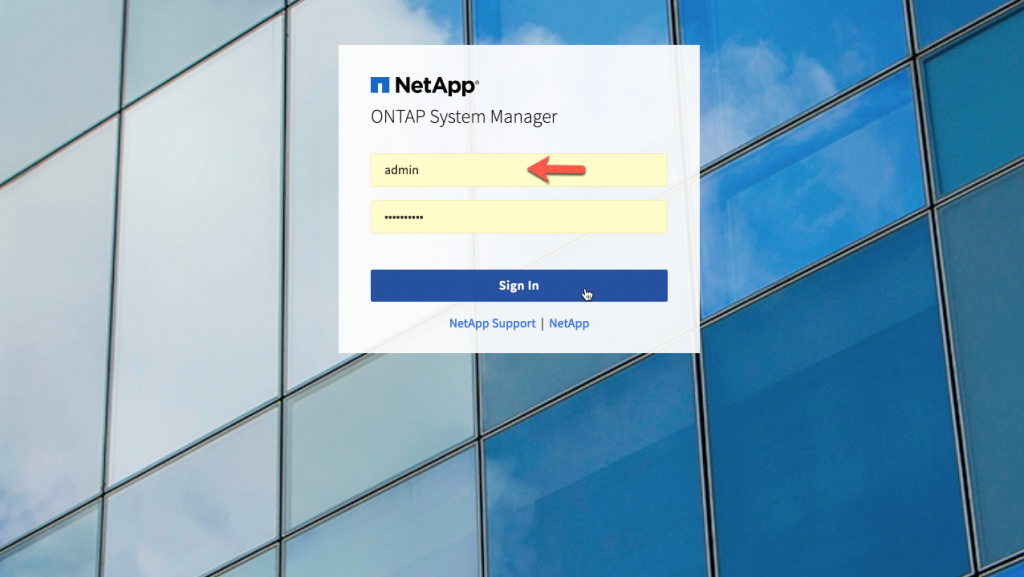
Open a web browser and enter the Cluster Management IP address to launch System Manager
In an upcoming blog post, I will show you how to expand storage, go through the basic setup, and serve data volumes.