What is NetApp HCI?
NetApp HCI is an enterprise-scale hyper converged infrastructure that delivers predictable performance on a highly flexible, efficient architecture that is simple to deploy and manage.
Make sure to visit NetApp University and check out the NetApp HCI Fundamentals course. Its very informative and will give you a deeper understanding of the underlying technology.
NetApp University
https://www.netapp.com/us/services-support/university/index.aspx
(depending on your customer / partner level, you may not have access to this training course).
Current Deployment Configuration
In my previous blog post, I performed a Return to Factory Image (RTFI), so that I could demonstrate a NetApp HCI deployment.
If you are interested on how to perform and (RTFI) please check out my last post.
One of the last steps of the (RTFI), was setting a temporary statice IP address to one of the storage nodes. This address allows me to start the deployment and will be overwritten during NetApp Deployment Engine (NDE) process.
Lab Configuration
I have a 4X4 (Compute and Storage) Cluster, and during this NDE, I will be performing a 2X4 (Compute and Storage) Cluster, leaving 2 Compute Nodes for a future blog post.
As with the RTFI process, its best to have a offline copy of a NetApp HCI Installation / configuration workbook for reference.
NetApp HCI Installation Workbook
This is workbook that a customer would be sent prior to a NetApp/Partner Professional Services installation engagement. It is to make sure the environment and required information (network switches, DNS, NTP, IP Address, VLANs, ect…)
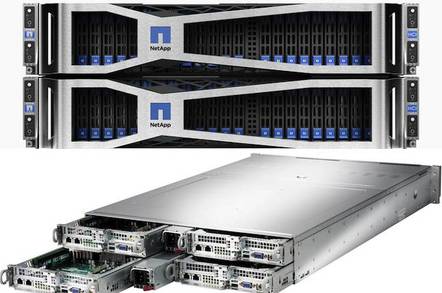
Components of NetApp HCI
Compute Node
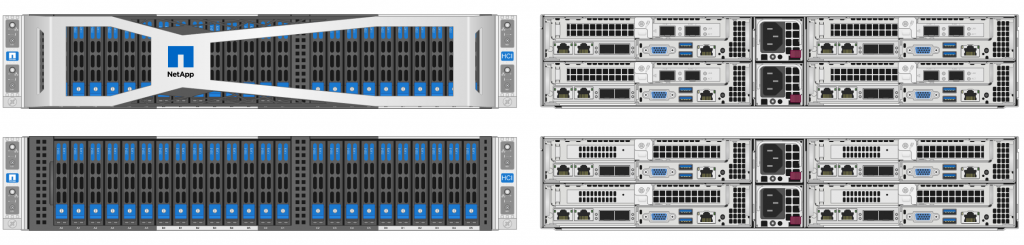
Storage Node
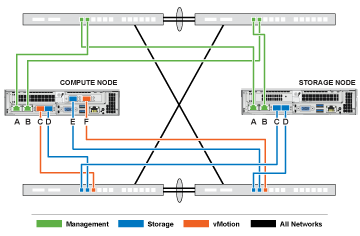
Network Topology
Using the NetApp Deployment Engine (NDE)
Open a browser (preferably Chrome) using the temporary static IP address assign the the storage node.
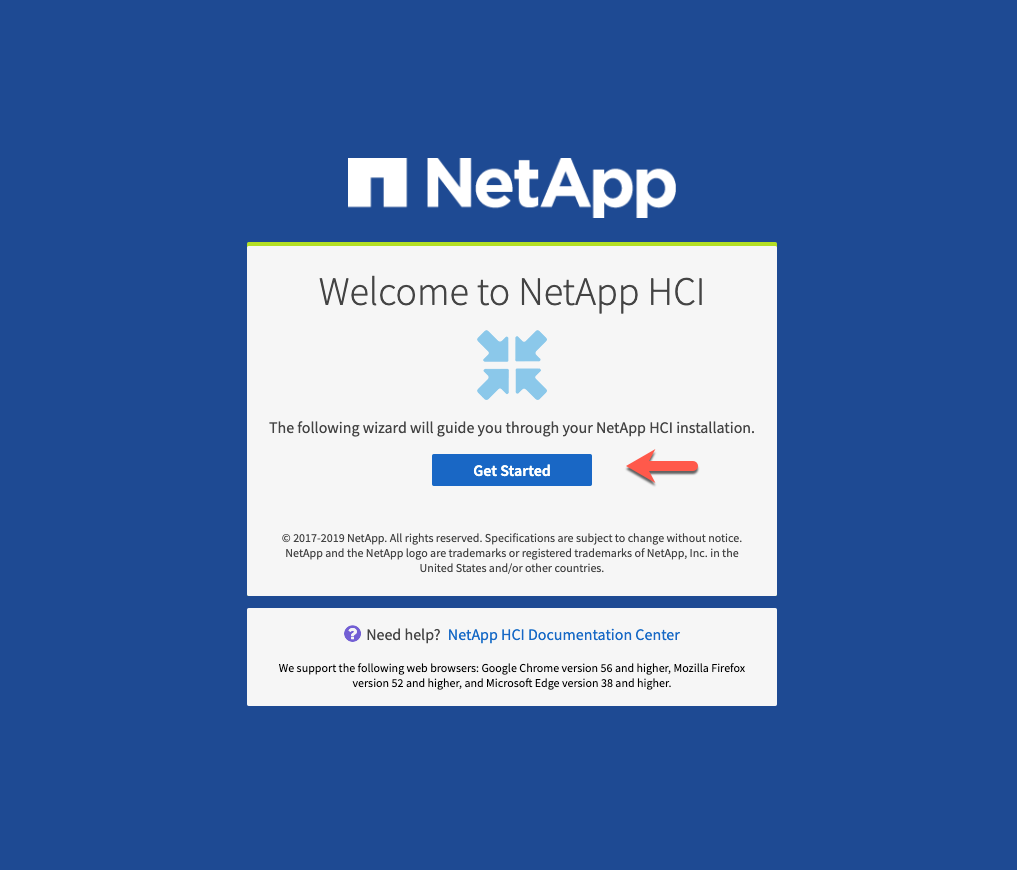
Lets Get Started, this entire process takes roughly 30-45 minutes.
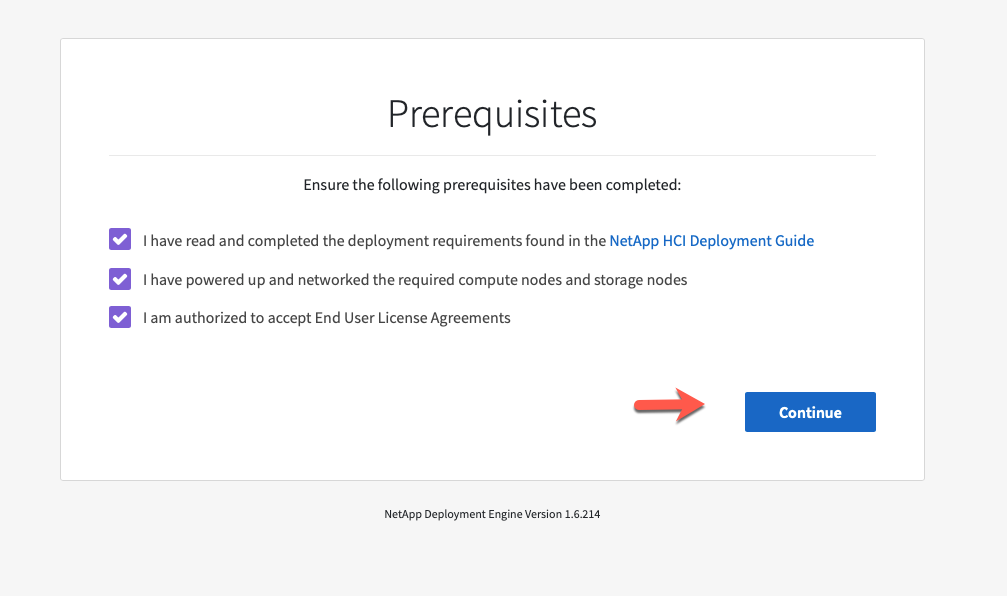
Check the Prerequisite boxes and continue
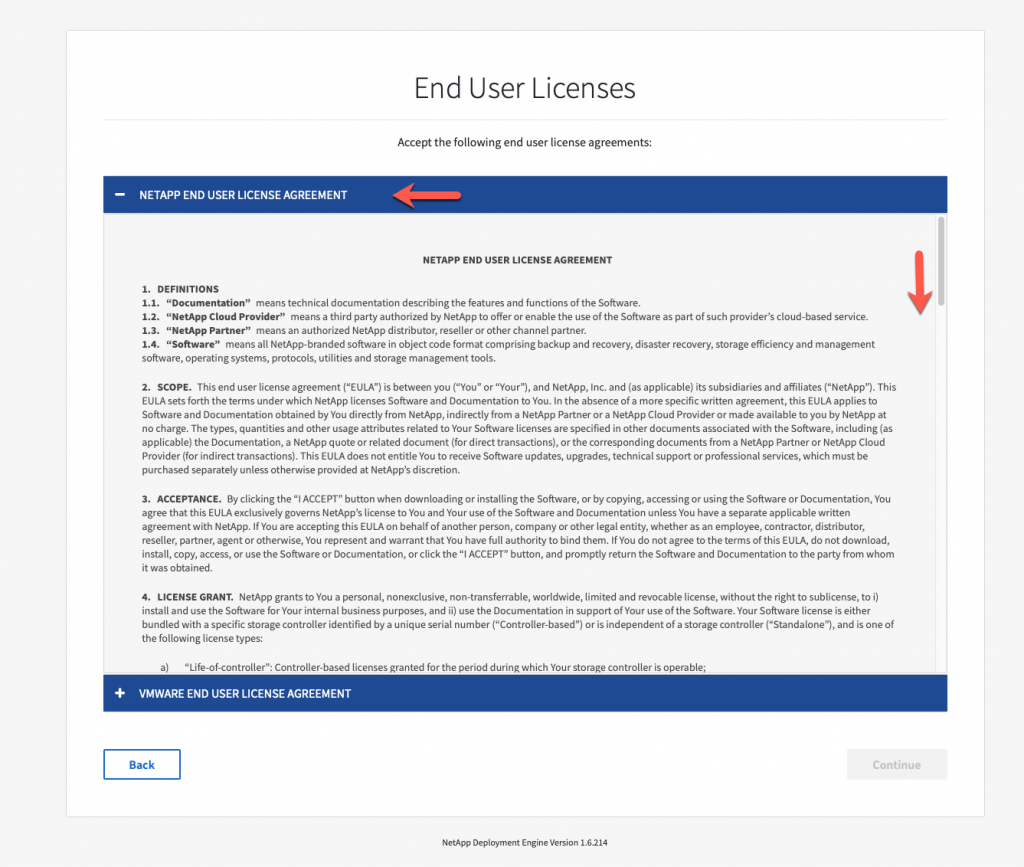
Accept the NetAPP EULA
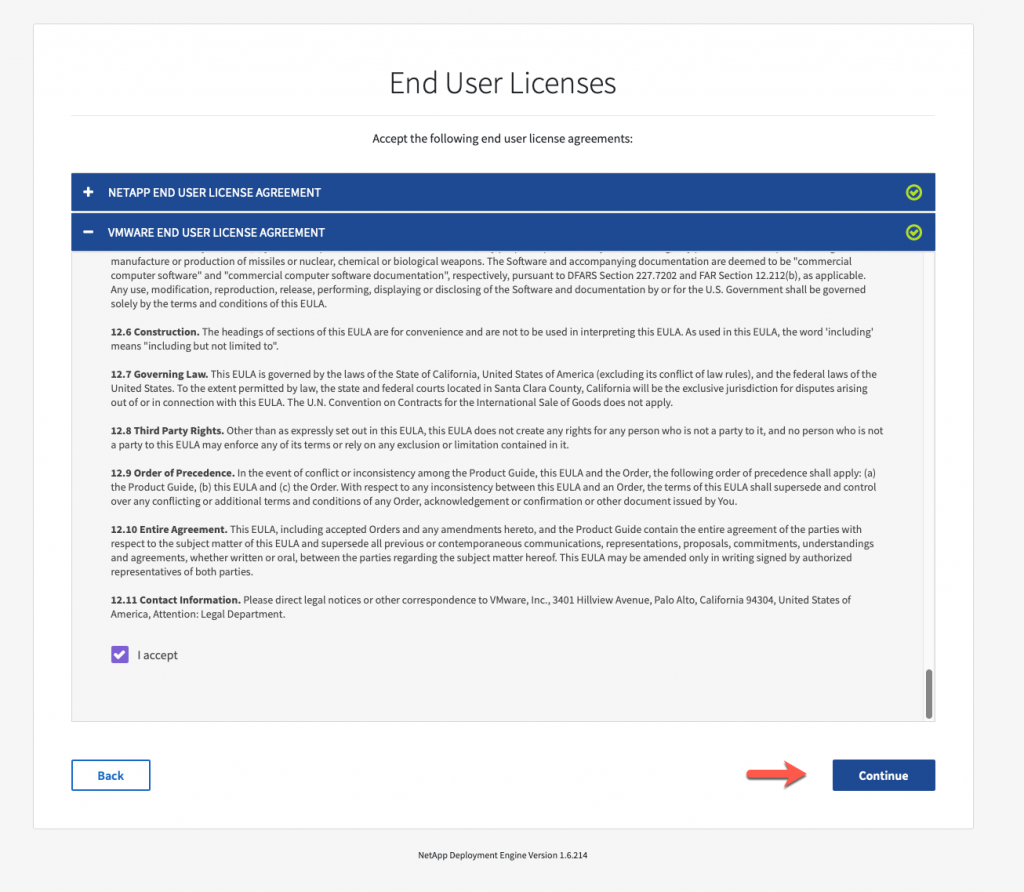

Accept the VMware EULA
Click Continue
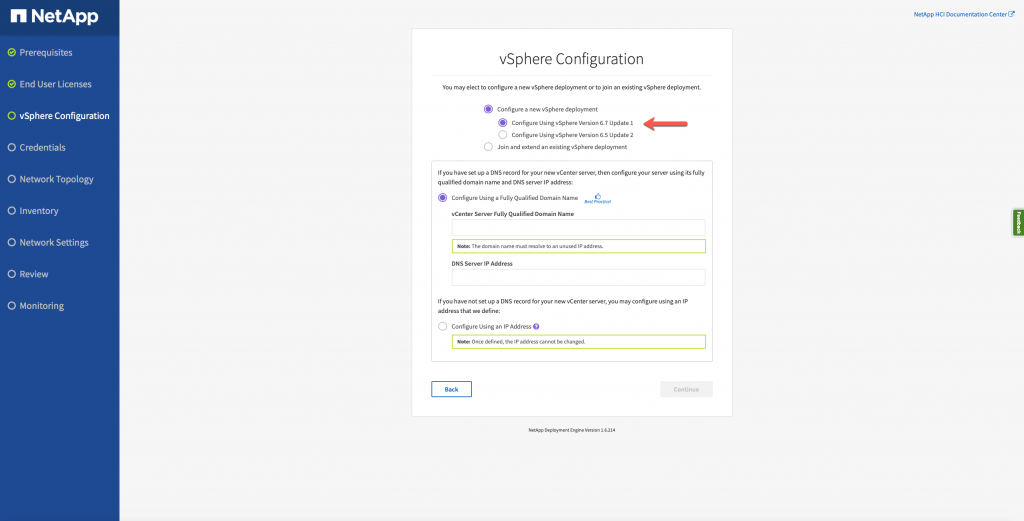
One of the beauties of the NDE, is you can either Create or Join an existing vCenter. For this Demo, choose Configure a NEW vCenter.
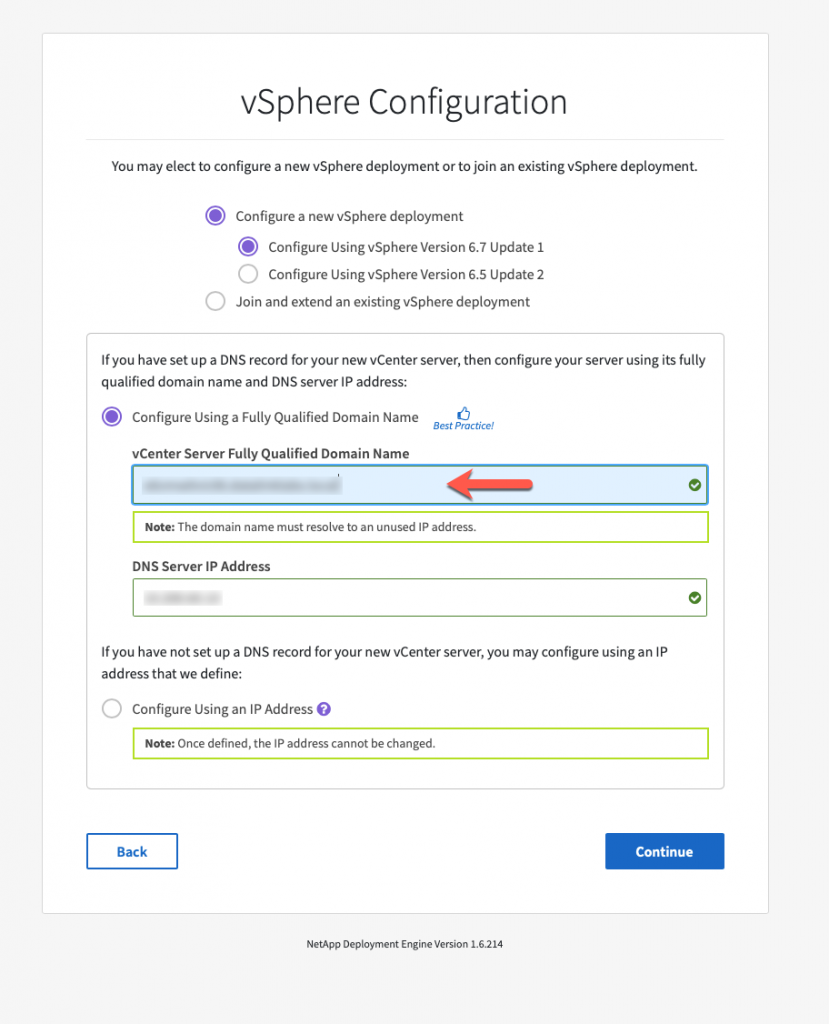
Using the spreadsheet, enter the appropriate values and click Continue.
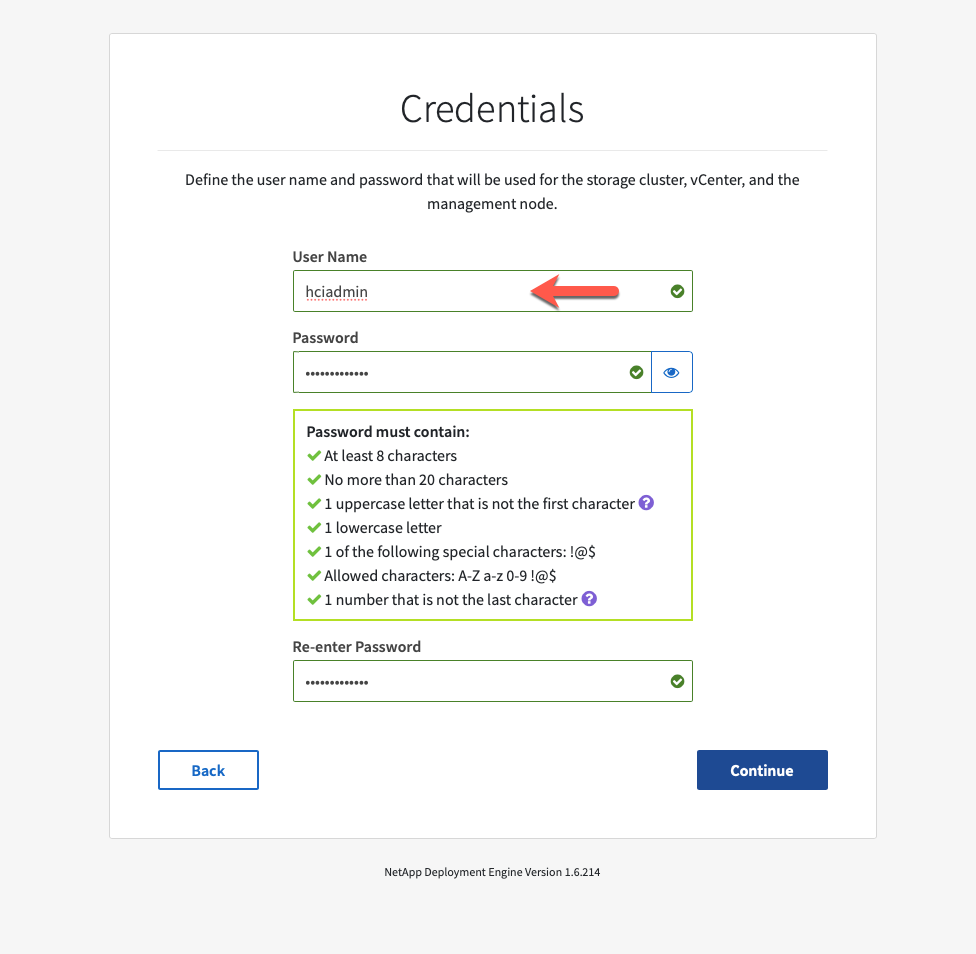
choose a password and click Continue.

For this deployment, Choose the Compute 6-Cable option and check Use Distributed Switch. The Storage 4-Cable option is selected by default. Click Continue.
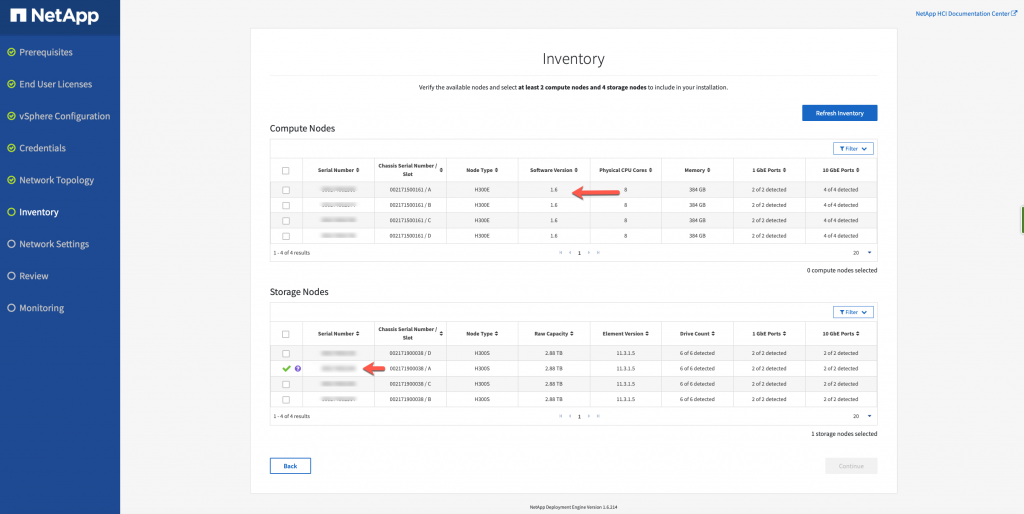
The discovery process detects our Compute and Storage nodes that we (RTFI) in the previous step.
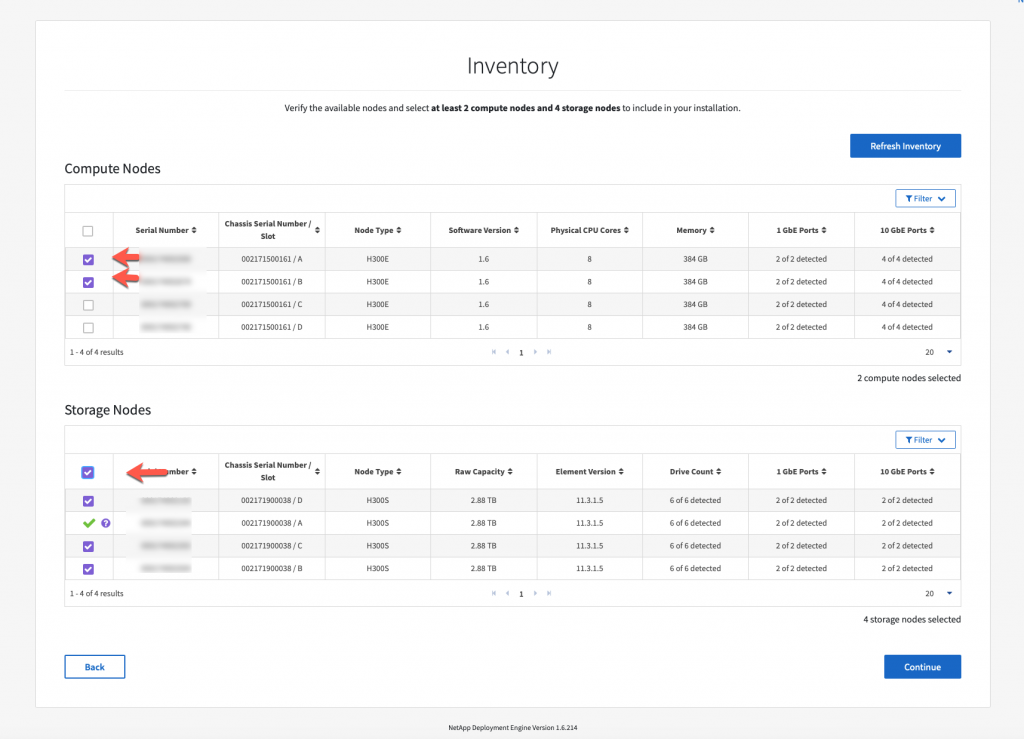
As I mentioned earlier, this will be a two part blog post. I am selecting two computed nodes and all storage nodes. I will be performing another post on how to add compute nodes. Click Continue.
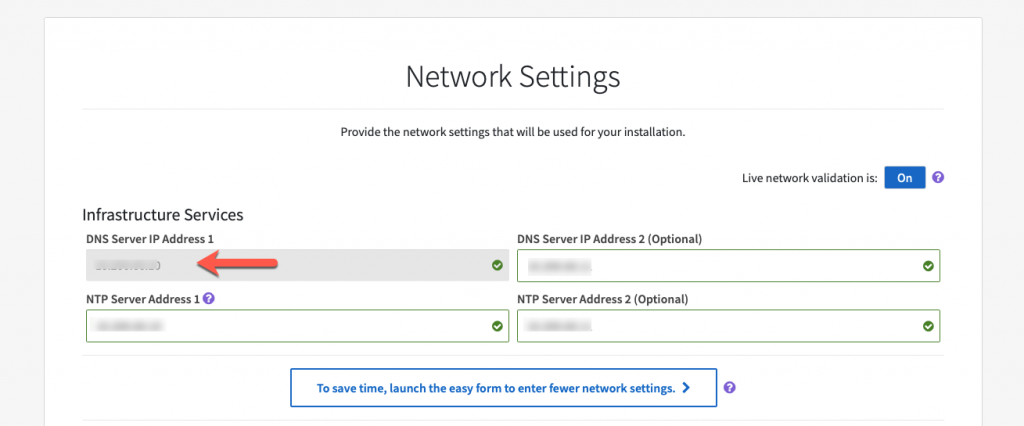
Using the spreadsheet, enter the required DNS and NTP settings. As you notice, the NDE performs validations along the way. It gives little green check boxes as an indication its ok to proceed.

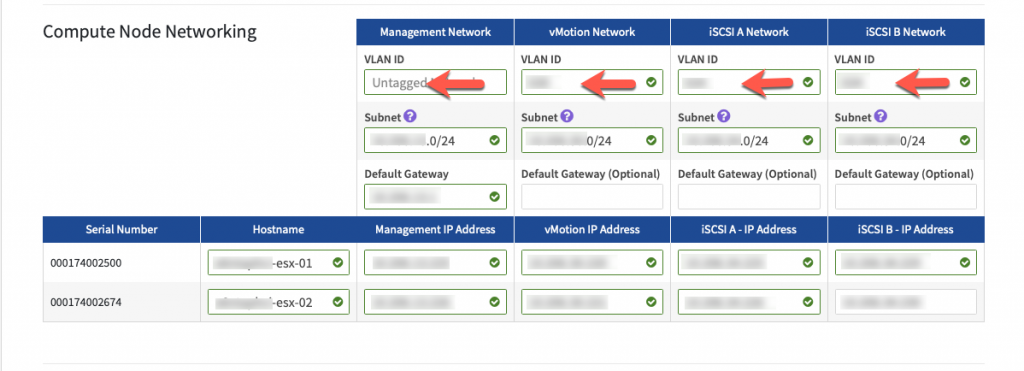
Using the spreadsheet, enter the required values.
Since my upstream network is tagged, I do not need to enter VLAN ID for the management ports.

Using the spreadsheet, validate the information entered. If you make a mistake, you will have to start all over again. Click Continue.

You are able to save the configuration by clicking on the icon on the top right corner. If you every have to redeploy, this will allow you to easily import your settings.
Start Deployment.
This part of the deployment takes roughly 30-45 minutes.

From here you can monitor the progress.
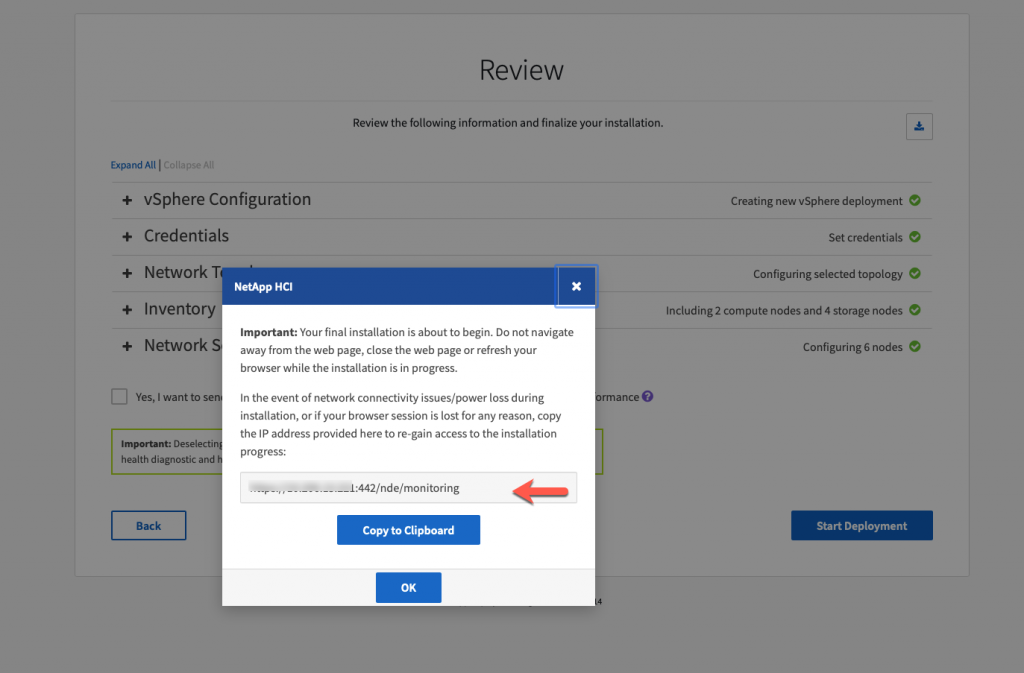
Click the Copy to Clipboard, then OK.

If there are no errors during the deployment, you should receive a similar screen.
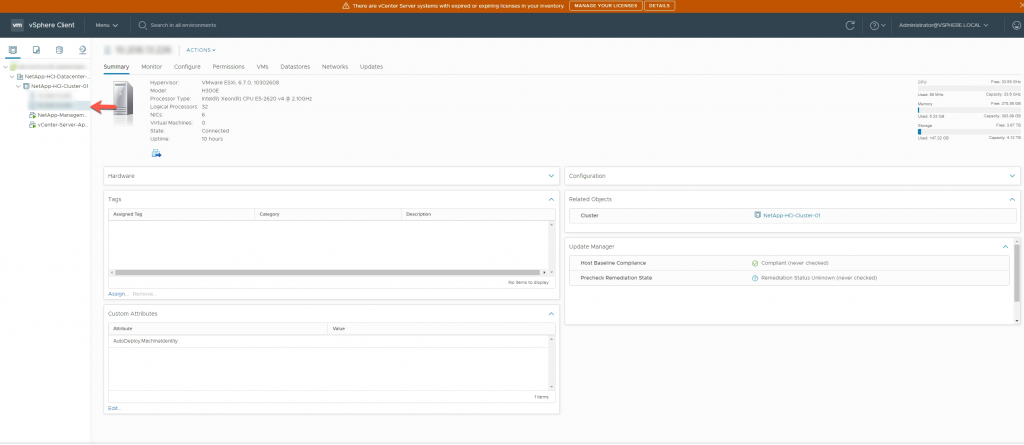
After roughly 30-45 minutes the NDE process is complete and you have successfully deployed a 2 Node HCI Cluster along with vCenter.
The next blog post will be how to add 2 Compute nodes the existing HCI Cluster.